Sometimes, small details—like the correct time on a device—can make a big difference in a company’s daily operations. Keeping all devices synchronized helps prevent confusion and ensures that applications run smoothly.
In this guide, we’ll explain how to change the time zone and configure the NTP server on Zebra devices. To do so, we’ll use the Zebra OEMConfig and Legacy Zebra OEMConfig apps, which allow you to apply advanced settings centrally across your devices. This process ensures that all devices maintain the correct time based on their location or your company’s synchronization policy, preventing mismatches in logs, communications, or critical applications.
It’s important to know when and on which devices to use each app. Depending on the Android operating system version, you’ll need to use either the Legacy or the current version of Zebra OEMConfig. The steps for configuring the time zone will vary slightly depending on which app you use.
Legacy Zebra OEMConfig (Android 11-) #
For devices running Android 11 or earlier, use the Legacy Zebra OEMConfig app to configure the time zone.
Add the app to your policy through the Managed Google Play iFrame. If you need help with this step, you can find more information here.
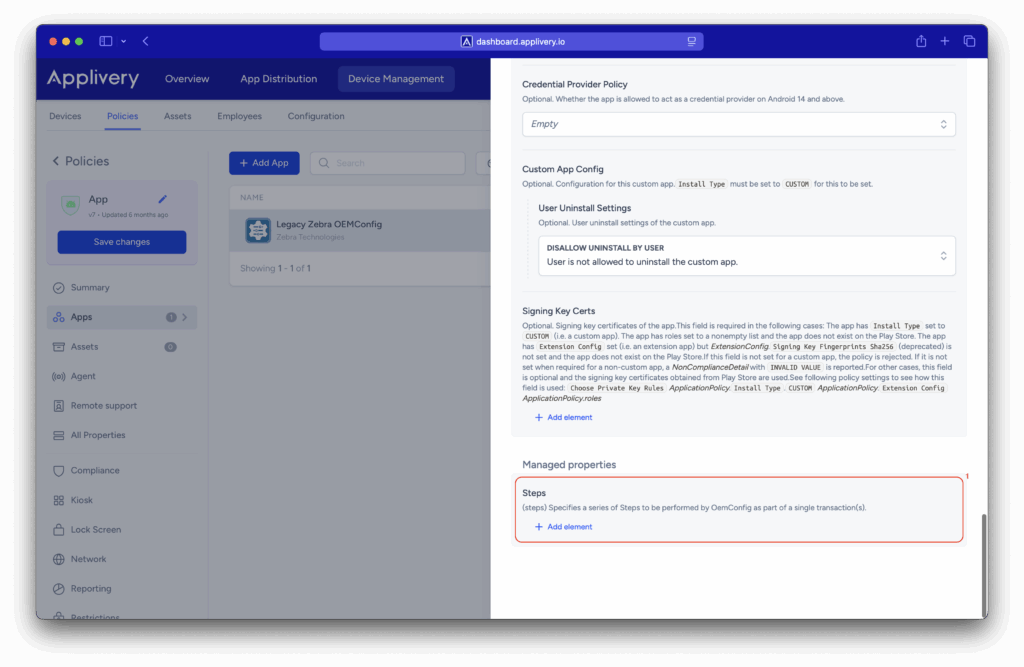
Once the app has been added, open its managed properties and click + Add element under the Steps (1) section.

The configuration options will now be displayed. With so many settings, scrolling through them can be time-consuming.
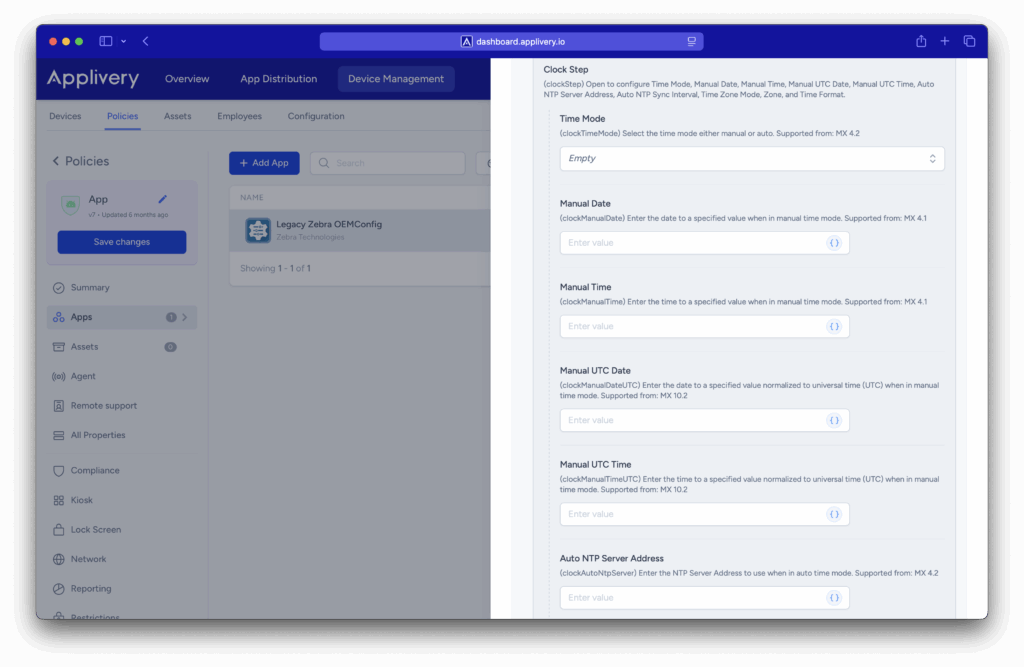
To find the section you need more efficiently, use the search feature to locate Clock step.

Configure the fields as follows:
- Time Mode: Automatic.
- Manual Date: Leave as is.
- Manual Time: Leave as is.
- Manual UTC Date: Leave as is.
- Manual UTC Time: Leave as is.
- Auto NTP Server Address:
ntp.pool.org. - Auto NTP Sync Interval: Defines how often the app connects to the NTP server to update the time. Select the interval that best fits your needs.
- Time Zone Mode: Manual.
- Zone: Enter the appropriate time zone (e.g.,
America/New_York) - Time Format: Choose how the time will be displayed — 12h or 24h.
Once the changes are saved, all devices linked to this policy will have the Legacy Zebra OEMConfig app installed. Based on the configuration defined in its managed properties, the app will automatically connect to the NTP server and apply the correct date and time according to the specified time zone.
Zebra OEMConfig Powered by MX (Android 11+) #
For devices running Android 11 or higher, use the current version of the Zebra OEMConfig app to configure the time zone.
Add the app to your policy through the Managed Google Play iFrame. If you need help with this step, you can find more information here.
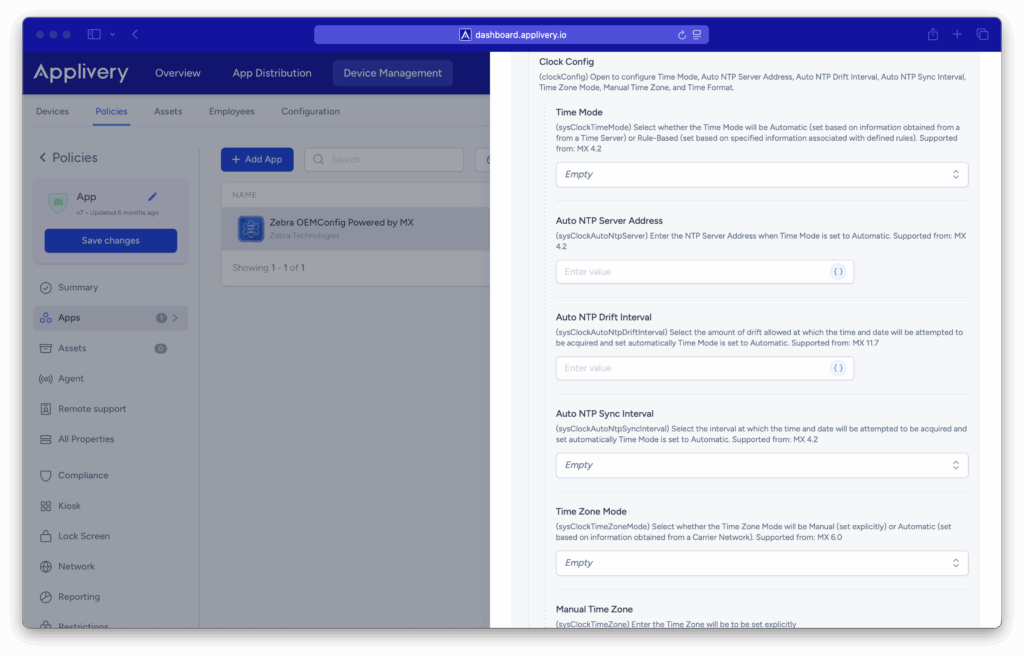
Once the app has been added, use the search feature to locate Clock Config. Configure the fields as follows:
- Time Mode: Automatic.
- Auto NTP Server Address:
ntp.pool.org. - Auto NTP Drift Interval: Leave as is.
- Auto NTP Sync Interval: Defines how often the app connects to the NTP server to update the time. Select the interval that best fits your needs.
- Time Zone Mode: Manual.
- Manual Time Zone: Enter the appropriate time zone (e.g.,
America/New_York) - Time Format: Choose how the time will be displayed — 12h or 24h.

Once the changes are saved, all devices linked to this policy will have the Zebra OEMConfig app installed. Based on the configuration defined in its managed properties, the app will apply the date and time of the specified time zone.
As you can see, properly setting up the time zone and NTP server on Zebra devices is simple—and it ensures that all devices stay synchronized, preventing log errors, communication issues, and failures in critical apps.
With the Zebra OEMConfig and Legacy Zebra OEMConfig apps, this process can be managed centrally and adapted to each device’s Android version, helping you maintain a consistent, reliable environment that aligns with your organization’s operational needs.