Samsung Knox Mobile Enrollment (KME) is a powerful onboarding framework that allows organizations to provision Samsung devices automatically and at scale. It ensures that every corporate device—new or freshly reset—configures itself with the correct management settings as soon as it connects to the internet.
When combined with Applivery Smart Enrollments, KME enables a fully automated, secure, and hands-off provisioning flow, making device deployment faster, more consistent, and error-free.
Step 1 - Obtain the JSON configuration #
The first step is to collect the JSON configuration needed for Samsung KME. This JSON contains the enrollment parameters required for Applivery to configure the device automatically during provisioning.
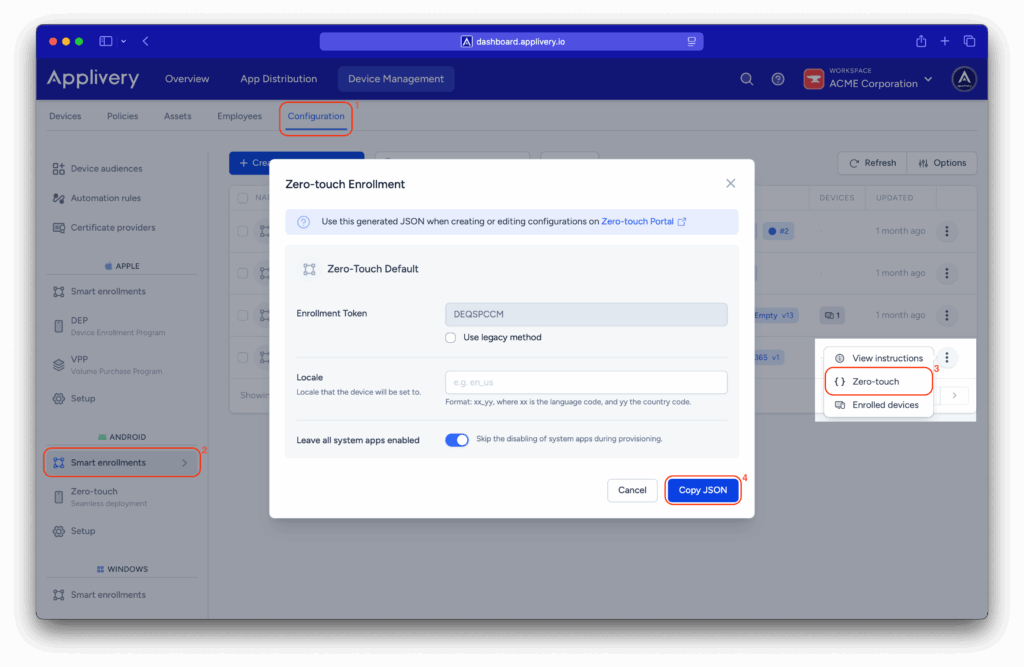
Once in the Applivery Dashboard, go to Device Management > Configuration (1) and choose Smart enrollments (2) from the Android left menu.
On the Smart Enrollment you want to use, click the three-dots menu on the right side and select Zero-touch (3). Next, select the Copy JSON (4) button to copy the JSON block.

Validate the JSON configuration #
Once you’ve copied the JSON code, you must validate its structure and prepare it for KME use.
Open a JSON validator, such as jsonlint, and paste the copied JSON into it. Validate the structure and ensure there are no syntax errors.
If errors appear, revise the JSON for missing commas, quotation marks, or brackets.
Remove non-required JSON sections #
Samsung KME requires a simplified version of the JSON. Some fields generated by Applivery Smart Enrollment must be removed before uploading.
- Review the validated JSON code.
- Identify elements not required for the KME integration.
Remove unnecessary sections carefully without altering the structure.
The resulting JSON should look similar to the provided example:
					{
    "com.google.android.apps.work.clouddpc.EXTRA_ENROLLMENT_TOKEN": "YOUR_TOKEN_HERE"
}
Step 2 - Configure KME Portal #
Create a new KME profile #
You will now create a Samsung KME profile that includes the Applivery configuration.
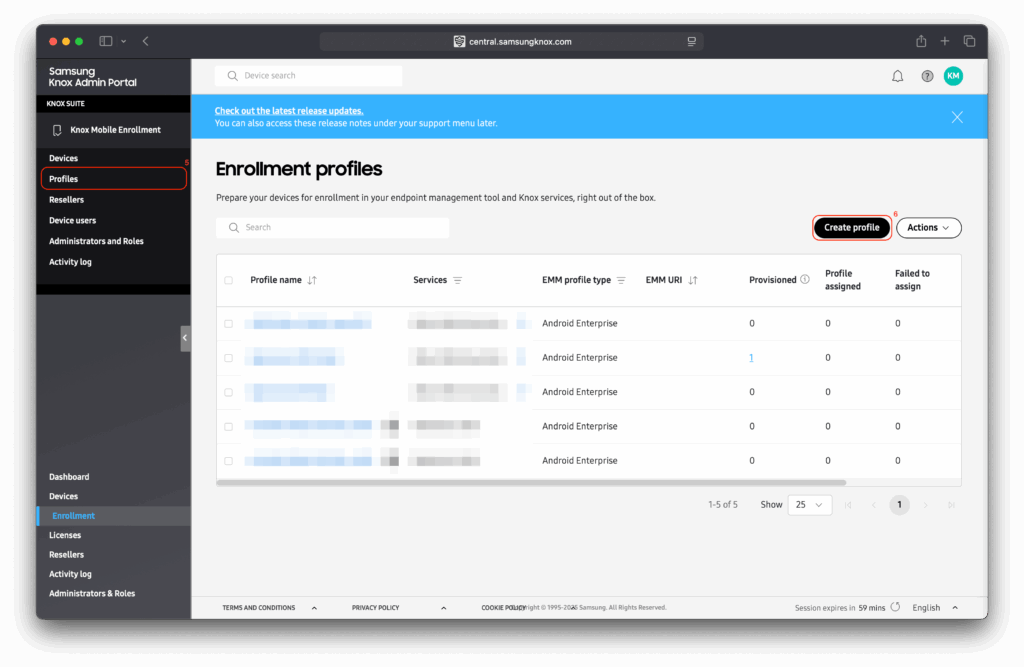
First, navigate to the Profiles (5) section, then click the Create profile (6) in the upper-right corner.

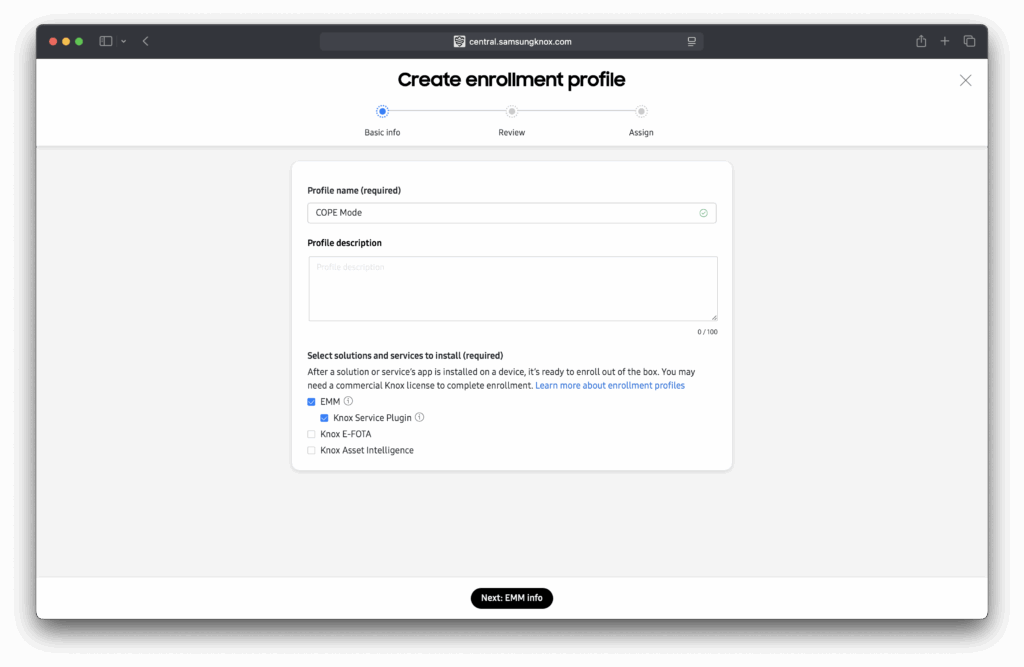
Name the profile according to the deployment type (DO, COPE, Dedicated, etc.) and select the EMM checkbox and optionally Knox Service Plugin. Then, click Next.

Fill in the Company name, Support email, and Support phone umber fields. Then, under EMM Information, from the dropdown select Other.
For Link to agent APK, use https://play.google.com/managed/downloadManagingApp?identifier=setup.
Then click Next.

On the next page, locate the DPC Extras section and paste the cleaned JSON directly into the field.
Complete any additional settings your organization requires, including:
- System apps for corporate profile.
- Enrollment screens configuration.
- Legal agreement (optional).
Once completed, click Next.

Assign the profile to devices #
Verify that all settings—including the Applivery JSON—have been correctly added, then
click Create and assign to save the profile.
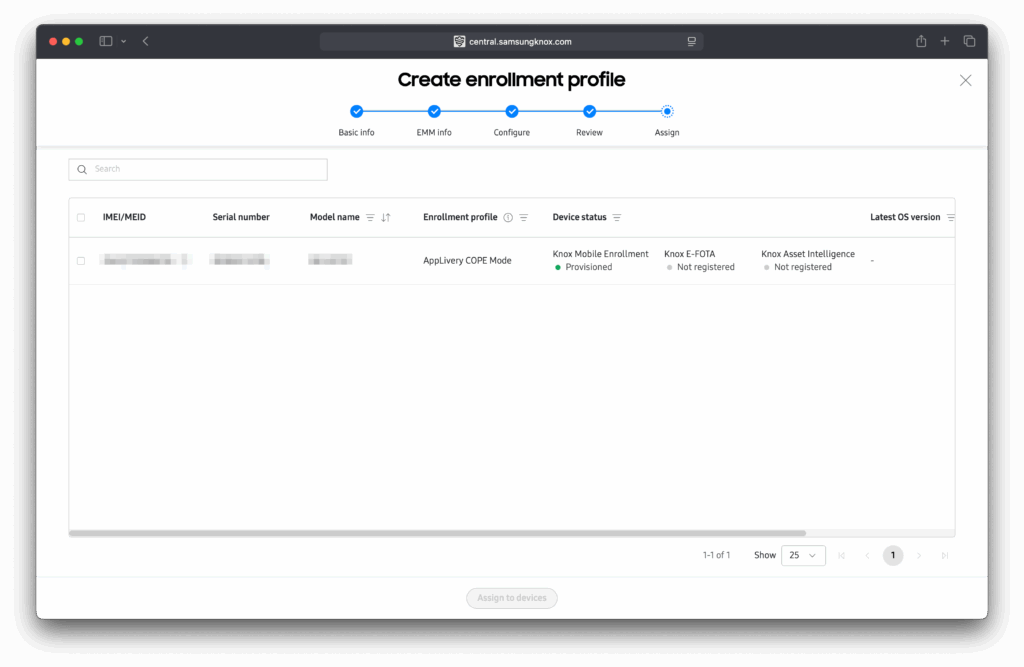
Finally, assign your new profile to the Samsung devices you want to manage. Select the devices you want to provision, choose the profile you created and assign it, and confirm the assignment to push the configuration.

Once assigned, any device that is factory-reset or turned on for the first time will automatically trigger Samsung KME as soon as it connects to the internet, starting a fully automated Applivery enrollment.
Your KME provisioning workflow is now ready for deployment!