In this tutorial, we will learn how to integrate Applivery with your Azure Active Directory through SAML. Please follow carefully the next steps:
Step 1 - Get the Service Provider information from Applivery #
The usage of custom domains will modify certain configurations of this step (callback domain name for instance) so if you plan to use this feature, make sure you have already configured custom domains before starting with this step.
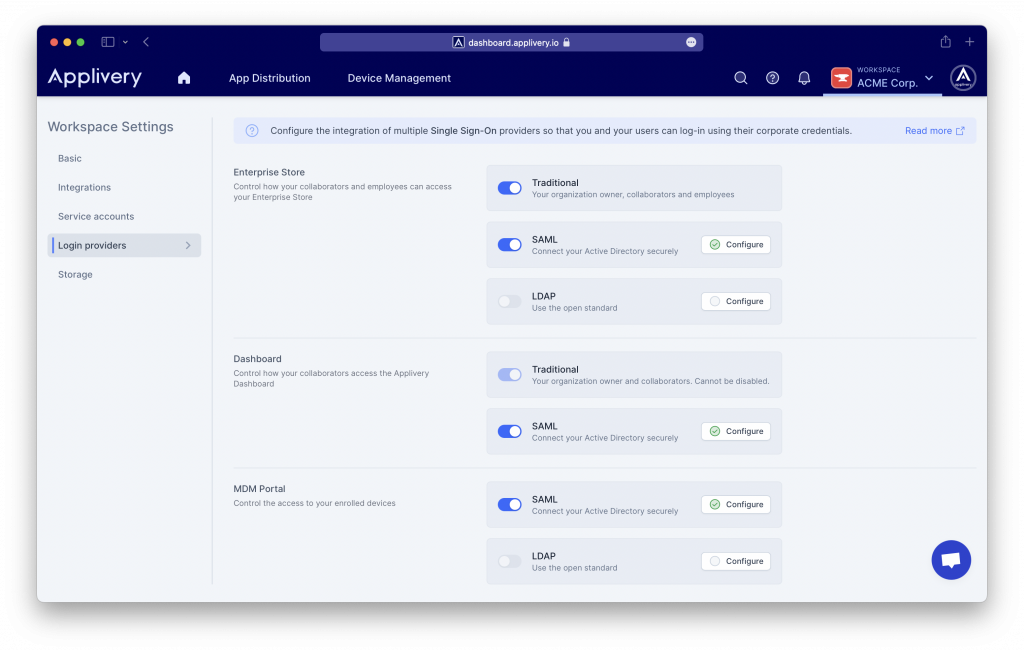
Go to your Workspace dropdown menu >Settings and go to Login providers section. Now click the Configure button beside the SAML row depending on whether you want to configure it for the Dashboard, App Store or MDM Portal.
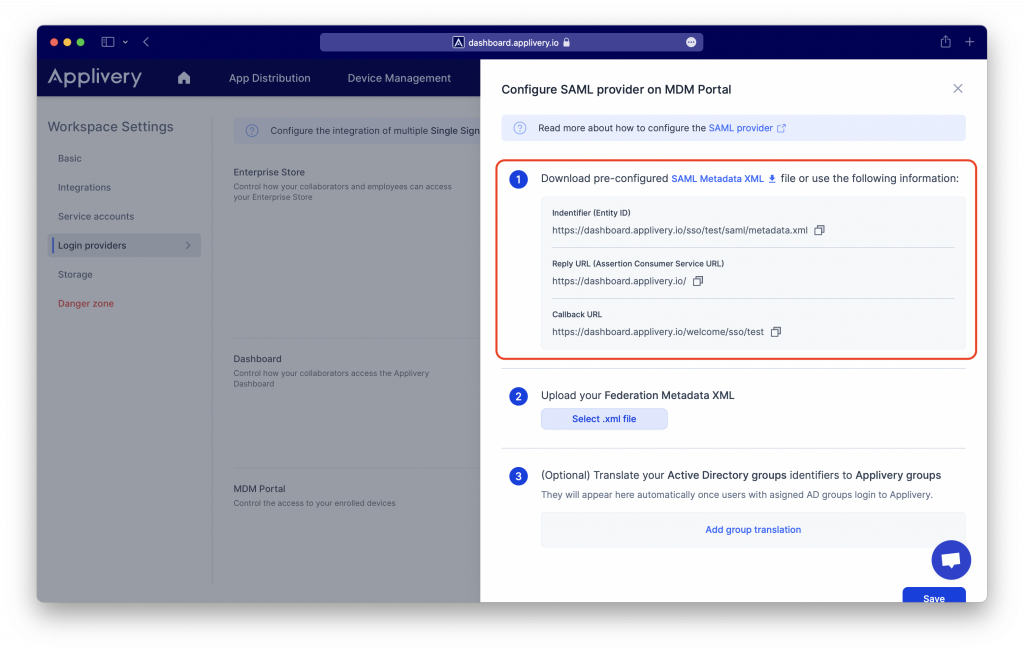
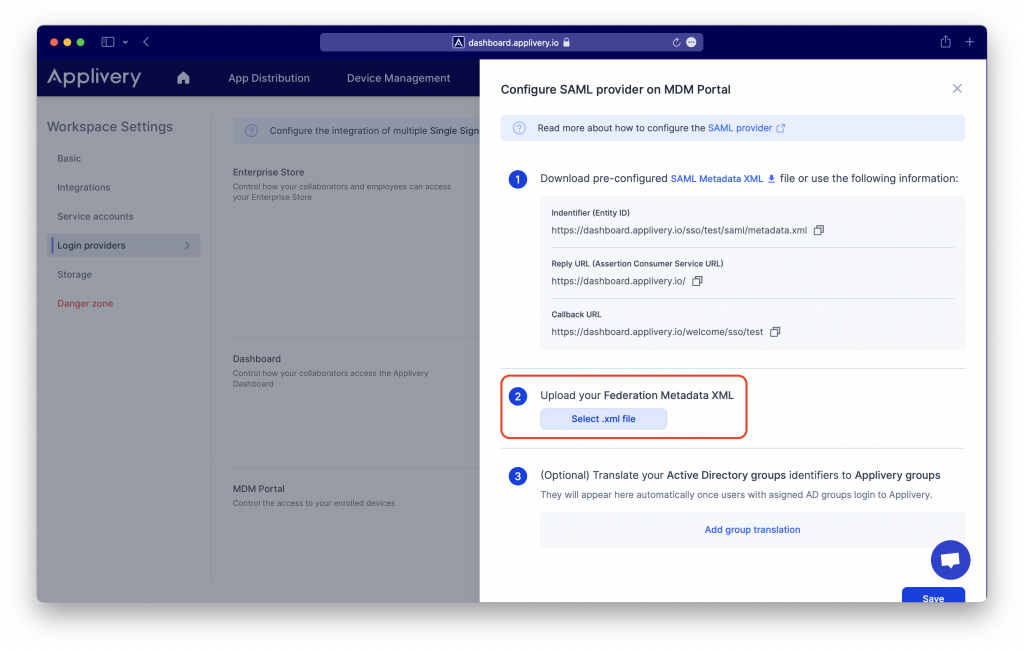
You will see now your SAML configuration, including a pre-configured SAML metadata XML file that you will be able to import into your Identity Provider (such as Azure AD).
In case your IP does not allow you to upload a SAML metadata file, you can use the other fields provided under the Step 1 to manually connect to Applivery as a Service Provider:
- Identifier (Entity ID)
- Reply URL (Assertion Customer Service URL)
- Callback URL
Step 2 - Configure your Identity Provider (i.e. Azure AD) #
Now that you have your Service Provider information, it’s time to configure it in your IdP. For this example we will use Azure Active Directory platform that allows you to configure any Service Provider supporting SAML 2.0
Step 2.1 - Configure your Identity Provider (i.e. Azure AD) #
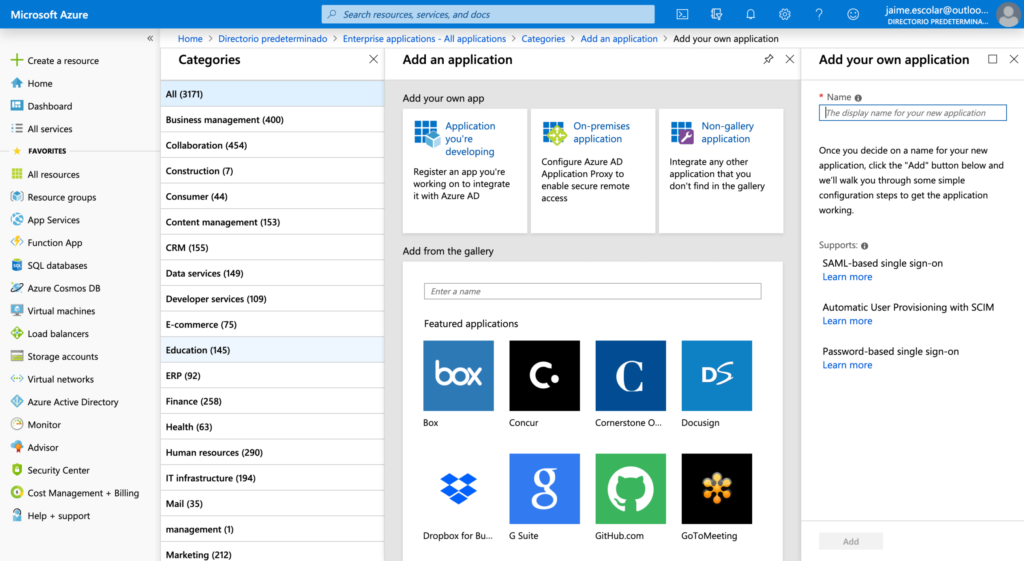
Login into your Azure Portal and go to Azure Active Directory > Enterprise applications. Then click + New application blue button at the top of the page and then choose Non-gallery application. Lastly, give a name to the App (i.e.: Applivery).
Step 2.2 - Configure SSO #
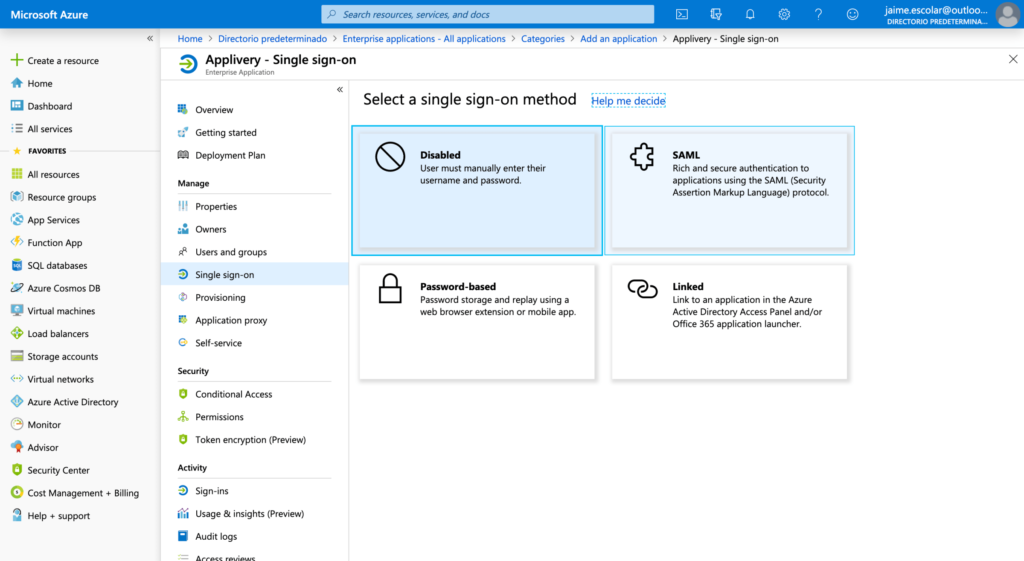
Now go to Single Sign-on from the left side menu and choose SAML option from the Single sign-on methods list.
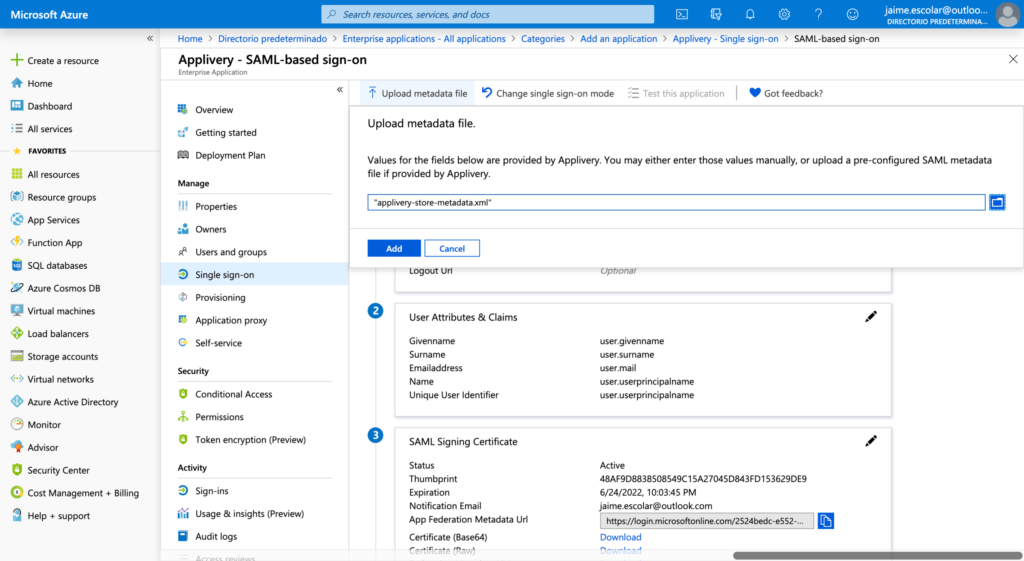
You will be redirected to a new dashboard with 4 Steps. At the very top of the page, click the Upload metadata file button and browse your disk to choose the Applivery SAML metadata XML file you downloaded in the Step 1. It will fill the form automatically with the information contained into the XML file. Optionally you can fill it out manually suing the information provided into the Step 1.
Step 2.3 - Download Federation Metadata XML file from Azure #
Last, go to the Step 3 out of the 4 steps in Azure and click the Download Federation Metadata XML link and save the file.

Go back to Applivery Dashboard > SAML Provider screen (same as in Step 1 of this tutorial) and upload the Federation Metadata XML file under the Step 2. Then click Save changes.
Step 3 - Test it out #
And that’s it! Now that you have both ends (Azure & Applivery) connected, you can Add some authorized users to Azure (going to Users and groups under the SSO Application) and then navigate to your App Store URL and try to login with an authorized user.
Mapping Azure Security Groups to Applivery Groups #
Azure is one of these IdP that do not send the real group name to Applivery on each authentication. Instead it sends the Group ID.
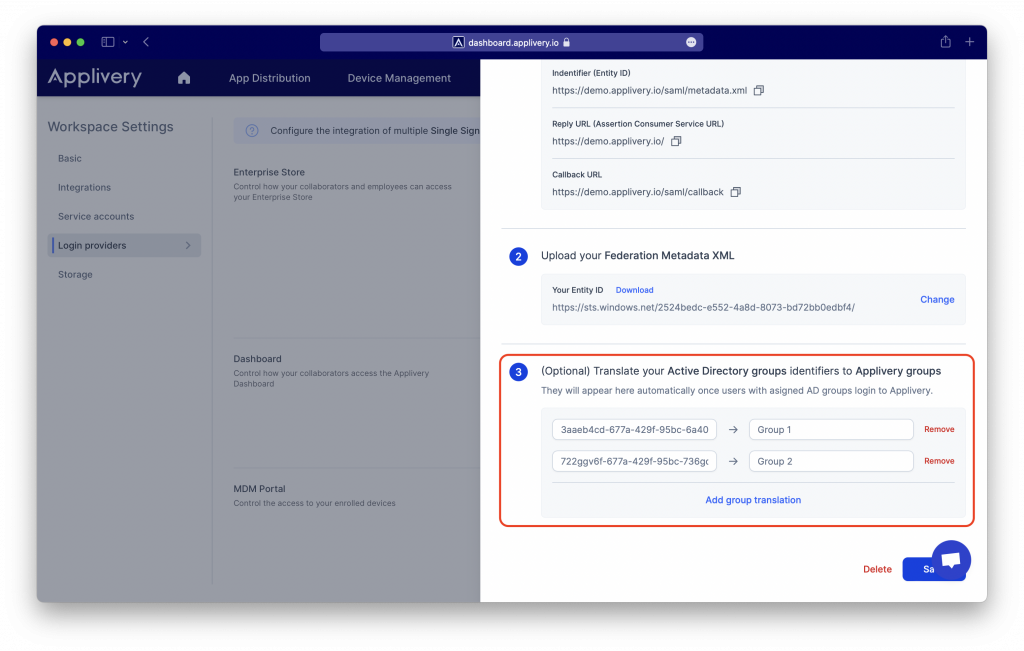
You can do that from the Configuration button of each SAML configuration using key/value pairs .Applivery will automatically discover new groups from each authentication and will add them to the list. However you can map them out upfront if you know the IDs.
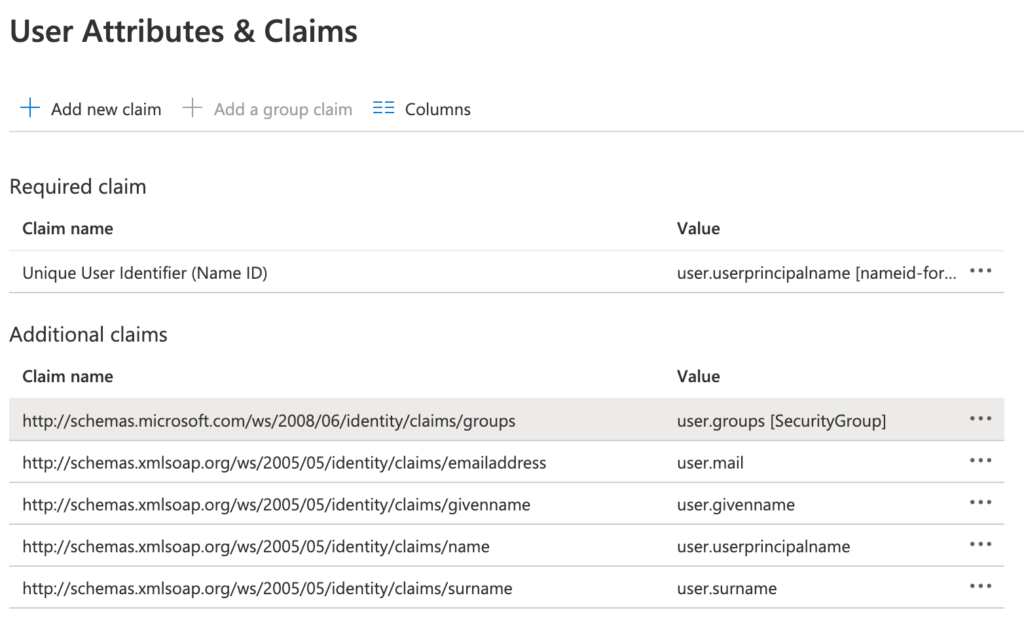
In order to start sending the Security Groups to Applivery, you have to go to your Azure Portal and go to User Attributes & Claims section. Make sure user.groups[SecurityGroup] are included in the list under Additional claims list. If not add it, making sure it’s pointed to the following schema: http://schemas.microsoft.com/ws/2008/06/identity/claims/groups as follows:
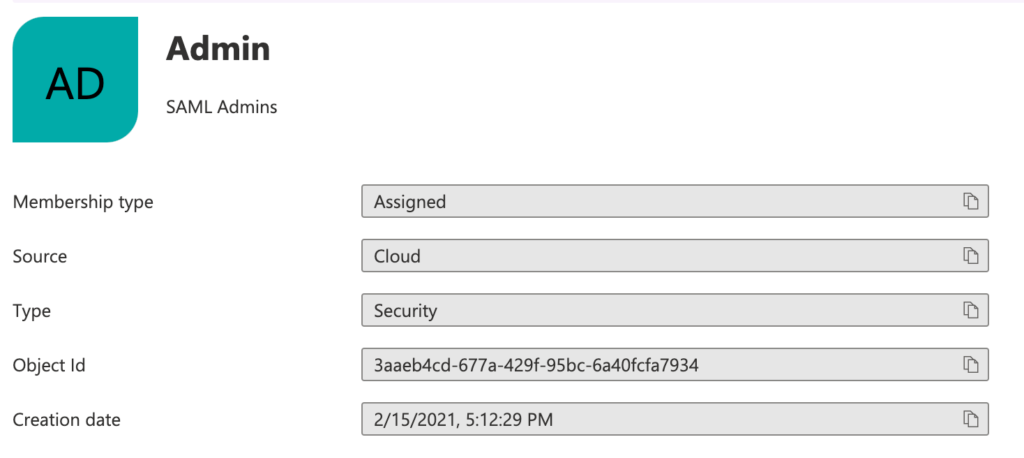
Once done, you can go to your Azure Groups management section and find each group ID under the Object Id field. Copy & Paste the Object Id to Applivery and map it with one of your Applivery groups (or a new one, since they will be assigned dynamically).
