Check the availability in our pricing page.
System for Cross-domain Identity Management (SCIM) represents an open standard designed to streamline cloud identity management. It facilitates the automation of user provisioning across multiple domains.
SCIM enables the effortless transfer of user identity information between an enterprise’s identity provider and diverse cloud service providers. It offers a straightforward means of authorizing user access to cloud-based applications while safeguarding the confidentiality of sensitive data.
What does the SCIM protocol involve? #
The SCIM protocol represents an application-level standard designed to facilitate secure management and exchange of identity data across different domains. Using REST APIs, the SCIM standard simplifies operations such as creating, modifying, retrieving, and discovering identity resources, including users and groups.
When employing SAML SSO for authentication and authorization with Okta as the identity provider, you have the option to use SCIM 2.0 to push user and group information to Applivery. Enabling this functionality enables the identity provider to periodically transmit user and group data, facilitating the provisioning of new users, deactivation of existing ones, and ensuring synchronization between each user’s SAML groups and roles with their corresponding roles in Applivery.
Applivery hosts SCIM endpoints, which the identity provider can leverage to execute specific operations, including user and group management tasks such as the creation, deactivation, or updating of user attributes. To access these SCIM endpoints, it’s necessary to create a provisioning app as a SCIM client within Okta.
Setting up SCIM with Applivery and Okta #
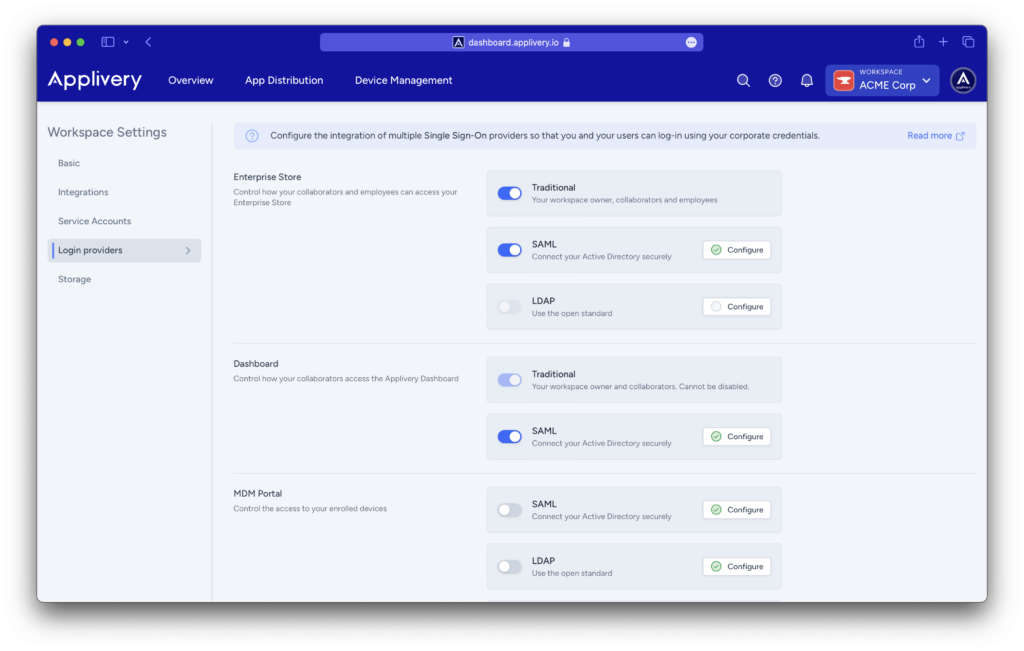
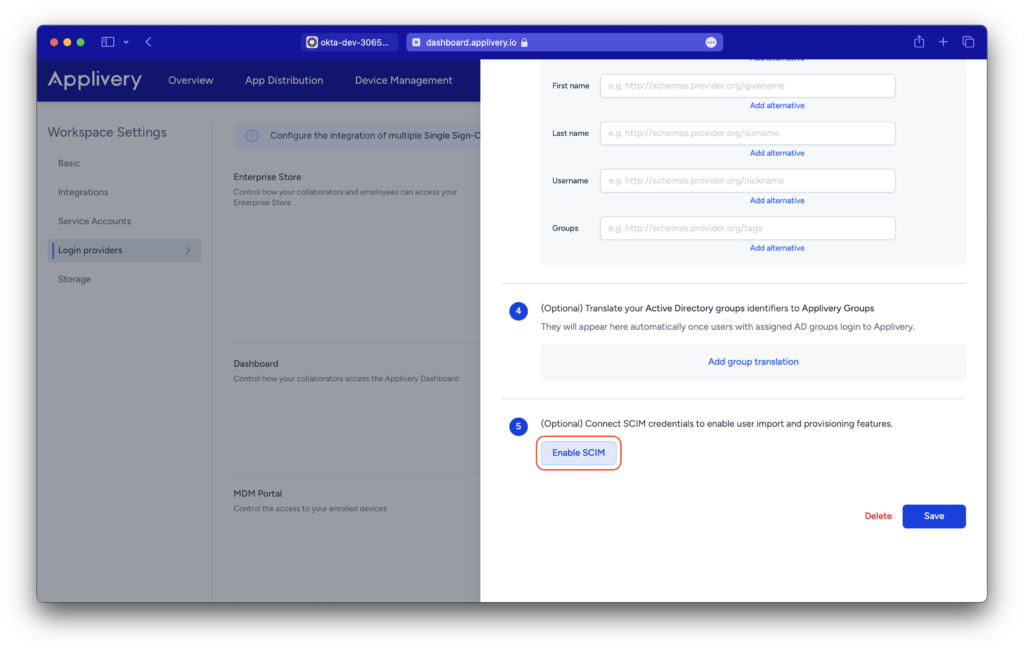
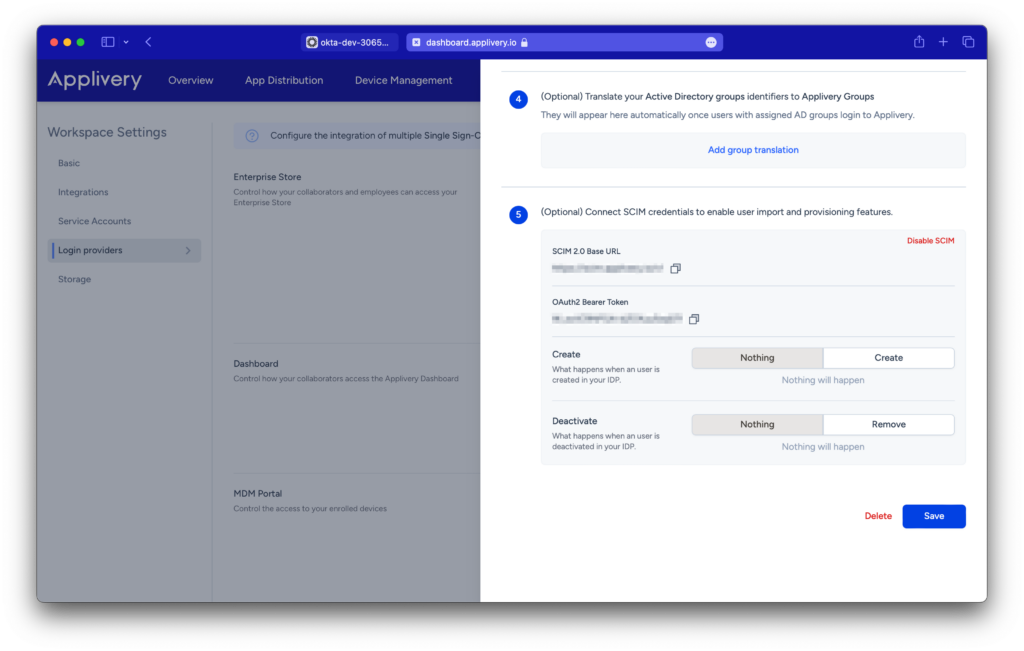
Step 1 - Enable SCIM 2.0 in Applivery #
Creation and Deactivation for Enterprise Store users #
If you configure SCIM for your Enterprise Store users, you will see options for creation and deactivation.
- When a user is created in your IDP, you will have the option for either no action or for an employee to be created.
- Similarly, when a user is deactivated from your IDP, you will have the option for either no action or for the employee to be removed.
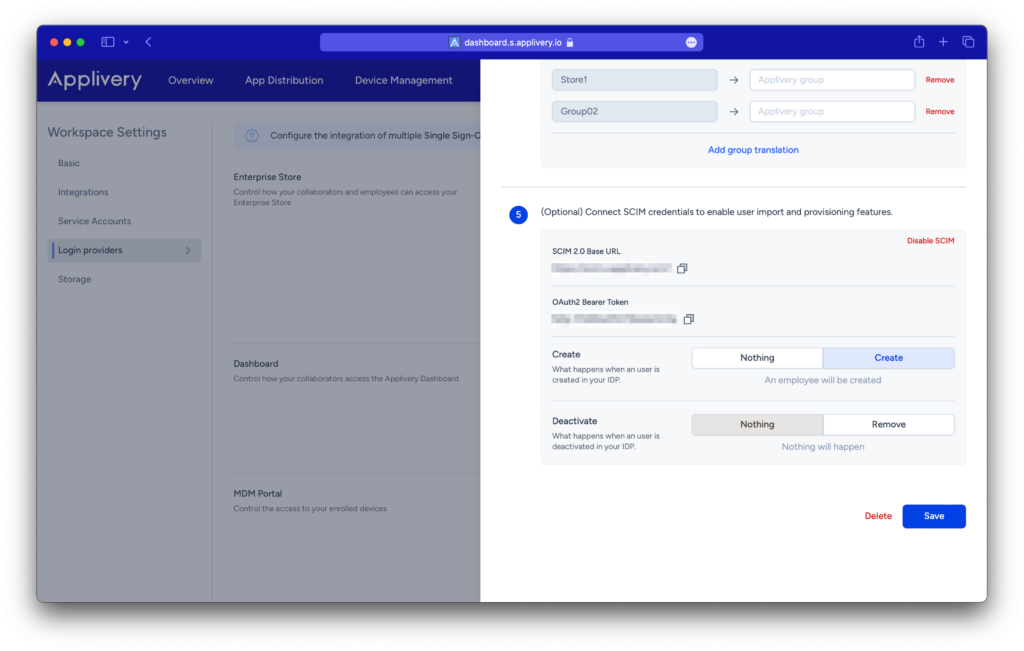
Creation and Deactivation for Dashboard users #
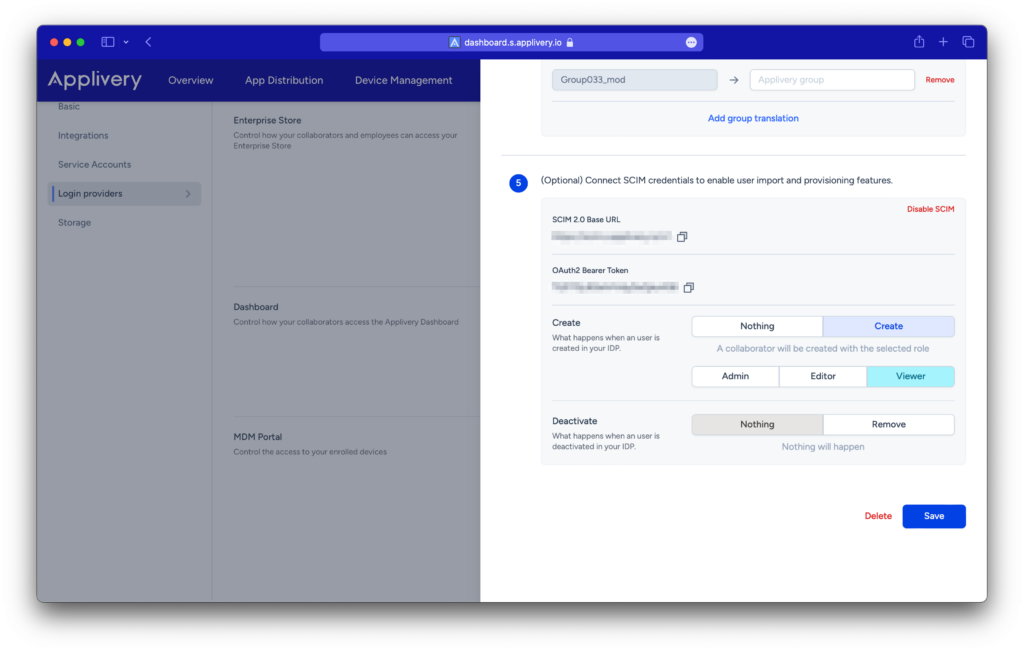
If you configure SCIM for your Dashboard users, you will see options for creation and deactivation.
- When a user is created in your IDP, you will have the option for either no action or for a collaborator to be created with the role you select (Admin, Editor, or Viewer).
- Similarly, when a user is deactivated from your IDP, you will have the option for either no action or for the collaborator to be removed.
Creation and Deactivation for MDM Portal users #
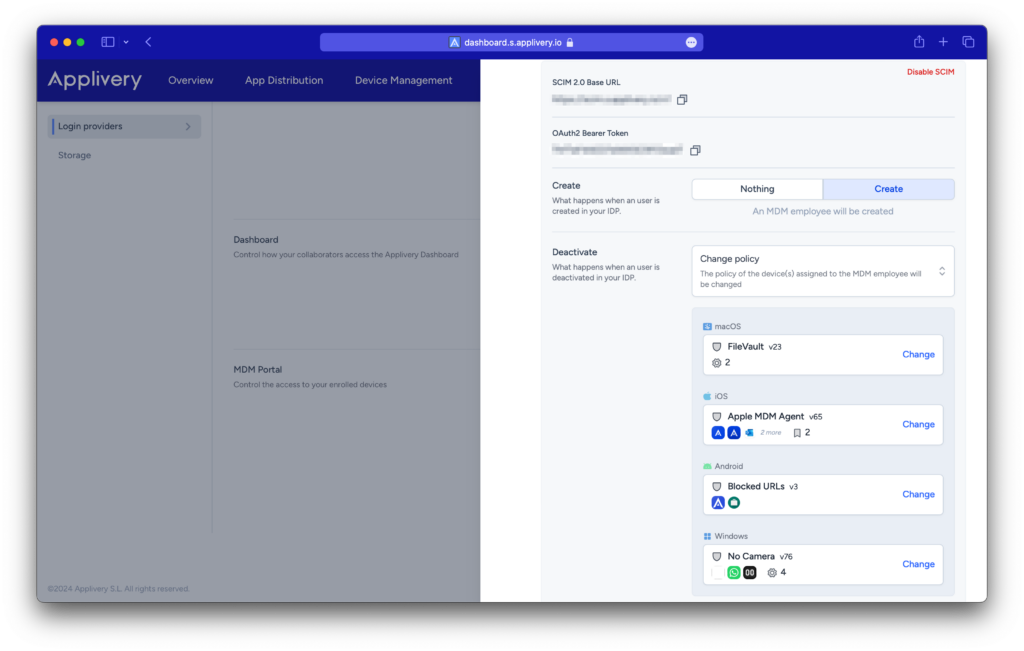
If you configure SCIM for your MDM Portal users, you will see options for creation and deactivation.
- When a user is created in your IDP, you will have the option for either no action or for an MDM employee to be created.
- However, when a user is deactivated from your IDP, you will have several options for deactivation:
- Nothing: nothing will happen.
- Unassign: The MDM user will be unassigned from any devices they had assigned.
- Change policy: The policy of the devices assigned to the MDM employee will be changed.
- Remove user: The MDM employee will be removed.
- Remove user and devices: The MDM employee and all its devices will be removed.
Step 2 - Enable SCIM 2.0 in Okta #
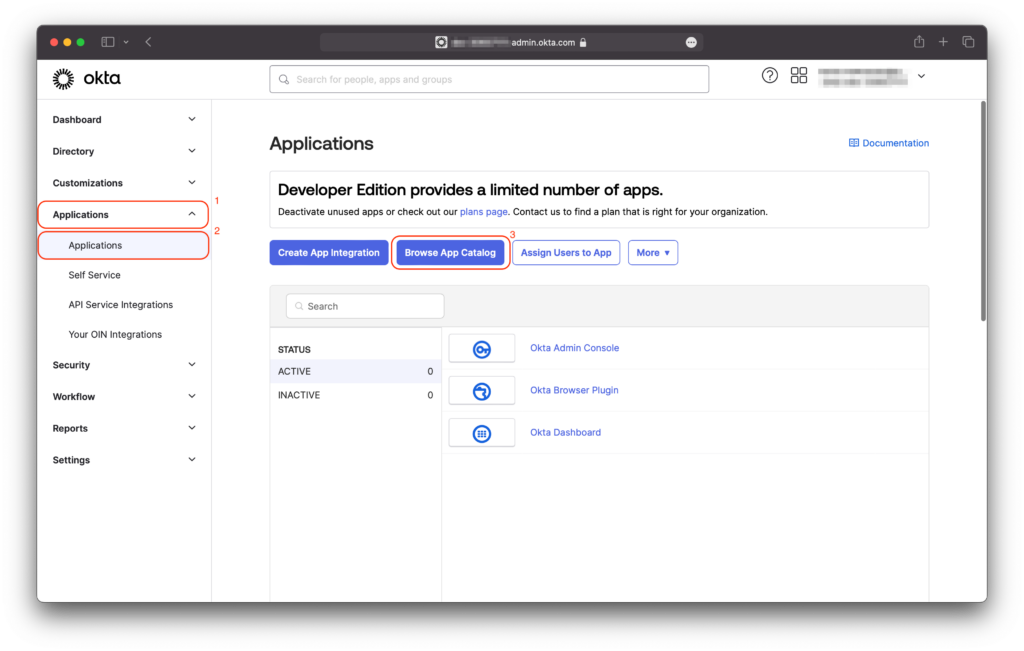
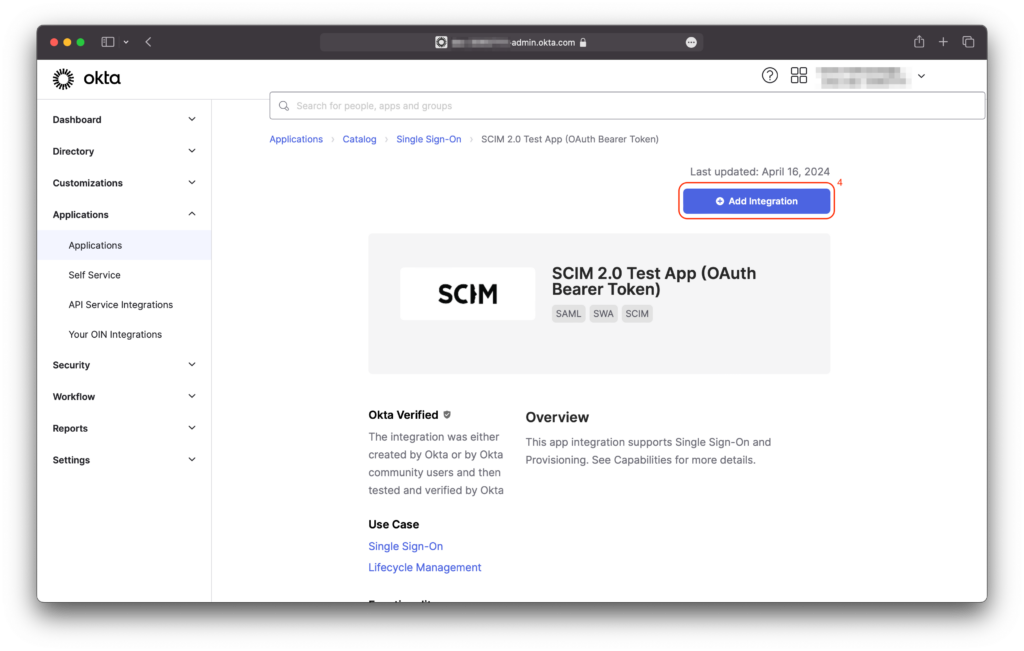
When setting up SCIM, you will have the option to configure both General Settings (such as the Application label), and Sign-On options.
Once these steps are completed, click the Done button and navigate to the Provisioning tab. You will need to enable provisioning to automate your SCIM app user account creation, deactivation, and updates by clicking the Configure API Integration button.
At this point, all you need to do is copy the Base URL and Bearer Token obtained from activating SCIM on the Applivery Dashboard. Click the Test API Credentials button to verify your integration. The system will send a GET request to your application to retrieve the users. If the connection is successful, you can proceed to add your integration by clicking the Save button.
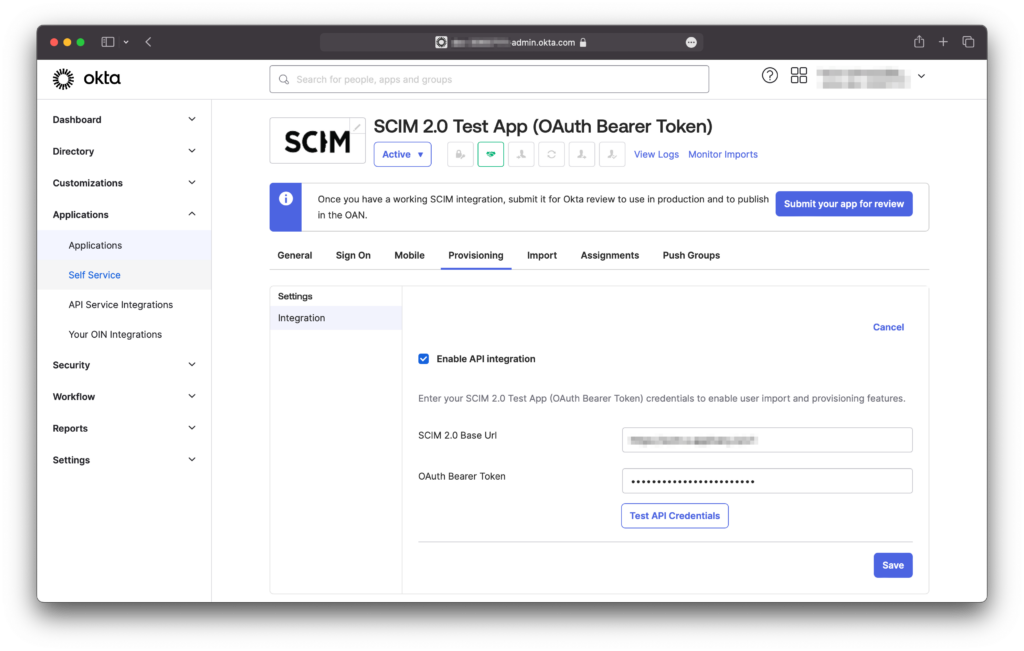
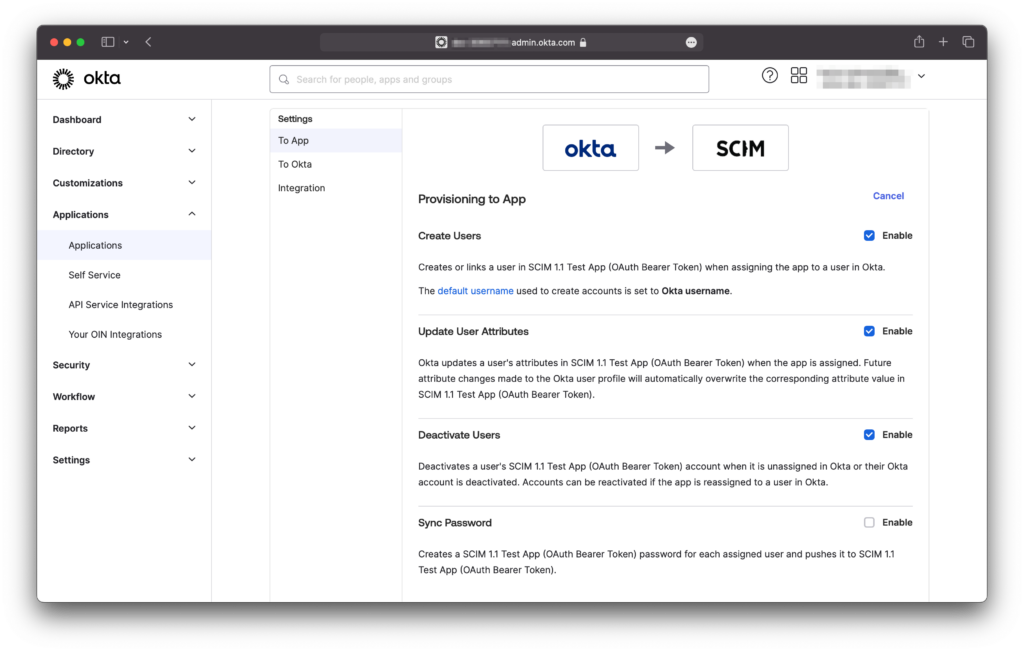
Once the API integration is enabled, you will need to define provisioning for the app: You will have to edit the initial configuration and check the settings for Create users, Update User Attributes, and Deactivate Users.
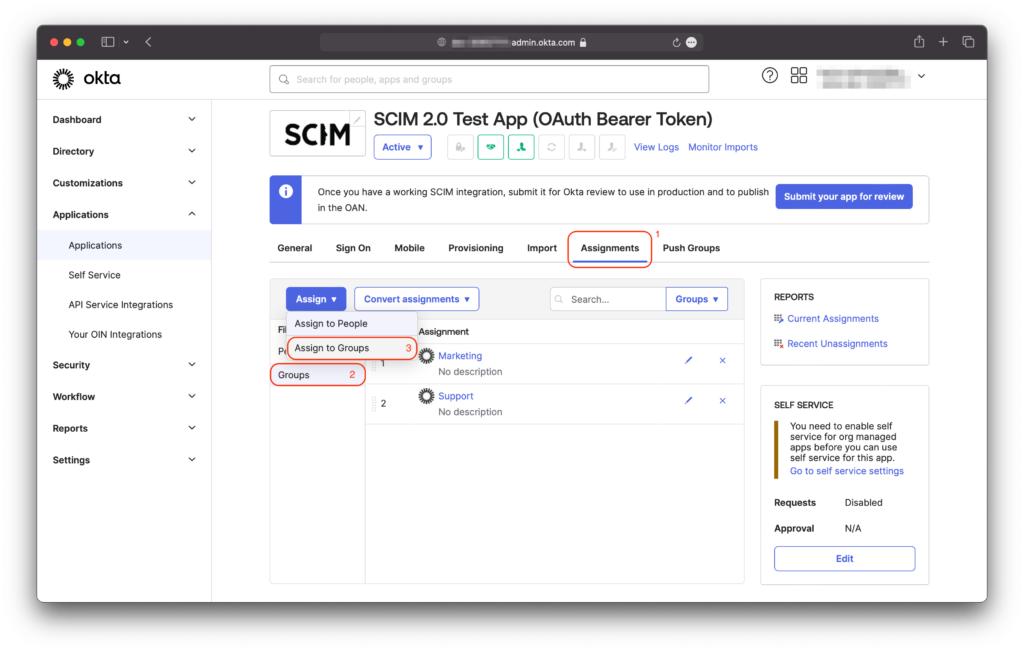
Final step: Now it’s time to synchronize your groups! Navigate to the Assignments (1) section and select Groups (2) from the left sidebar menu. At the top, click on Assign > Assign to Groups (3) and select the groups you want to assign to your SCIM app.
Role mapping #
When configuring SCIM for login to the Applivery Dashboard, you can also map user roles based on their assigned groups when they first access the platform.
If a user logs in via SCIM and does not already exist (i.e., they are a new user), their role will be assigned according to the group they belong to:
- If a user belongs to the
applivery-admingroup in your SCIM, they will be created as an Admin collaborator. - If a user belongs to the
applivery-editorgroup in your SCIM, they will be created as a Developer/Editor collaborator. - If a user belongs to the
applivery-viewergroup in your SCIM, they will be created as a Viewer collaborator. - If a user belongs to the
applivery-unassignedgroup in your SCIM, they will be created as an Unassigned collaborator.