This guide explains how to migrate Apple devices to Applivery as the new Mobile Device Management (MDM) solution using Apple Business Manager (ABM). It covers the complete process for transferring device management from an existing MDM provider to Applivery without requiring a factory reset on supported systems.
It applies to devices running iOS 26, iPadOS 26, or macOS 26, and is intended for users with Administrator or Device Enrollment Manager roles in ABM.
The migration process allows organizations to maintain business continuity while securely transitioning management, preserving apps and data, and minimizing user disruption.
Overview #
Apple Business Manager enables smooth transitions between MDM solutions—ideal for organizations moving from on-premises to cloud management, consolidating devices after a merger, or switching providers.
Key migration features include:
- Setting a migration deadline (1–90 days).
- Preserving Managed Apps and data on iPhone and iPad.
- Managing Activation Lock settings.
- Enforcing migration through device restarts when users don’t take action.
- Canceling migrations before they start, reverting devices to the original MDM.
- Migrating iOS and iPadOS devices without a factory reset.
Requirements #
Devices must meet the following conditions to be eligible for migration:
- Run iOS 26, iPadOS 26, or macOS 26.
-
Be organization-owned and enrolled via Automated Device Enrollment (ADE).
- For macOS 26, profile-based enrollment is also supported.
-
Devices enrolled via Apple Configurator must be past the 30-day provisional period.
Before you begin #
Step 1 - Prepare your Applivery dashboard #
Before starting migration, ensure your Applivery environment is properly configured:
The first step is to create your Apple Enterprise account by uploading your Apple Push Certificate to Applivery.
Once in the Applivery Dashboard, navigate to the Apple Setup (1) section (under Device Management > Configuration) and follow this guide for detailed instructions.
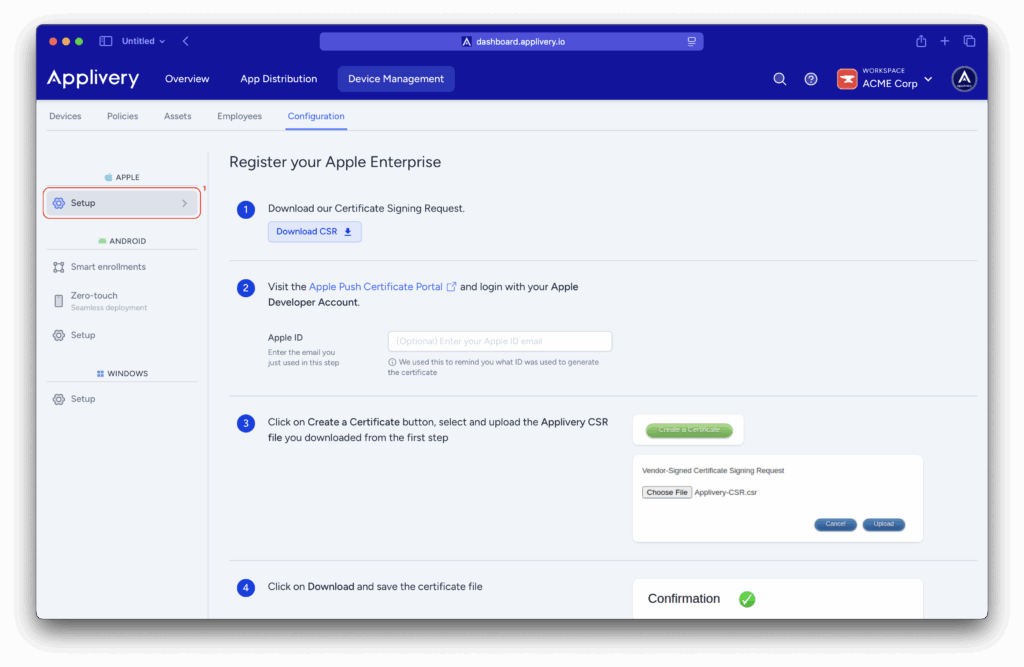
Once your Apple Enterprise account is set up, the next step is to configure your Apple Business Manager integration. Start by connecting your DEP and VPP tokens, which will allow Applivery to import your devices and manage app licenses automatically.
You can follow this guide to learn how to connect your DEP token, and this one for configuring VPP licenses.
Once this is completed, you can begin creating DEP profiles by following this guide and assign them as the default for any device enrolled via ABM.
If applicable, set up a Smart Enrollment as the default for ABM devices. Finally, ensure that all device policies include the previously installed Managed Apps to prevent any data loss during the migration process.
Step 2 - Migration process #
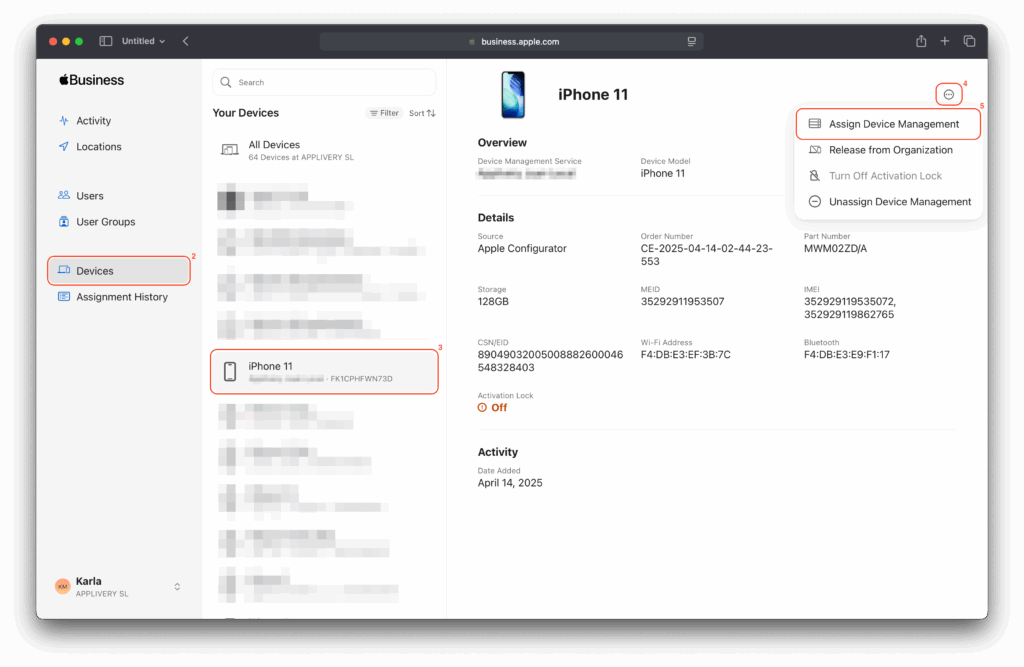
Sign in to Apple Business Manager as an Administrator or Device Enrollment Manager, navigate to the Devices (2) section and select the target device (3).
In the top-right corner, click the three horizontal dots (4) and select Assign Device Management (5). Choose Applivery as the destination MDM. Optionally, you can set a migration deadline (1–90 days); if this option is unavailable, the device does not meet the migration requirements.
Once you have verified all settings, click Confirm to proceed.
Step 3 - Sync with Apple Business Manager #
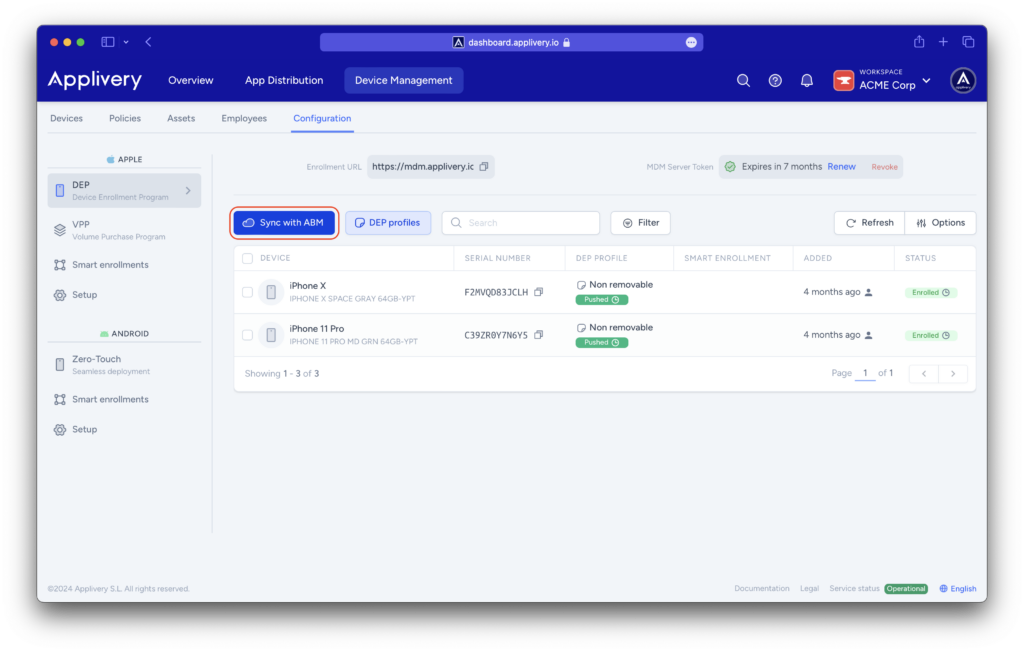
Back in the Applivery dashboard, simply click the Sync with ABM button to start the synchronization process and retrieve the latest updates from Apple Business Manager. Any newly added devices will appear in the list below.
Step 4 - End-user experience #
Initial notification #
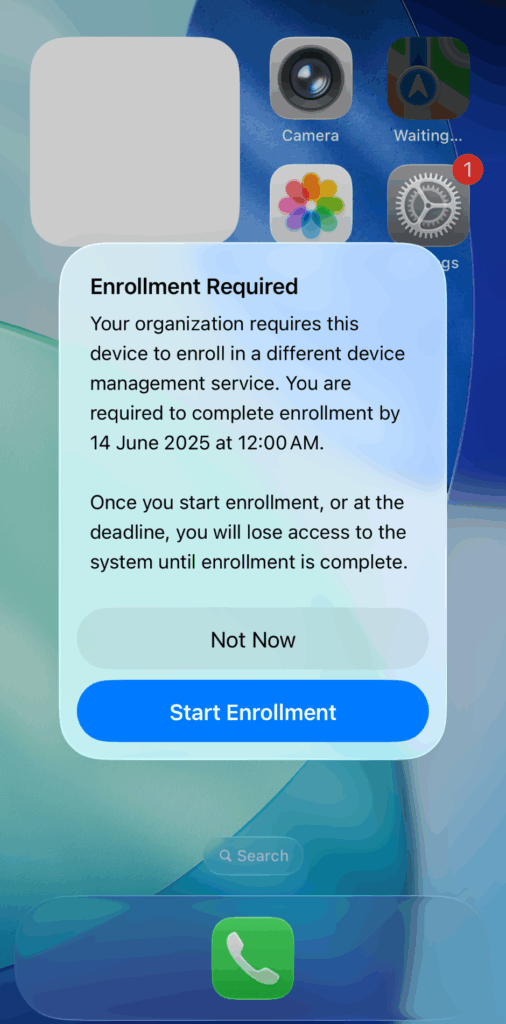
Users receive a notification that migration to Applivery has begun. They can choose Start Enrollment or Not Now (to postpone).
Enrollment #
Selecting Start Enrollment redirects users to Settings > VPN & Device Management to initiate Applivery enrollment.
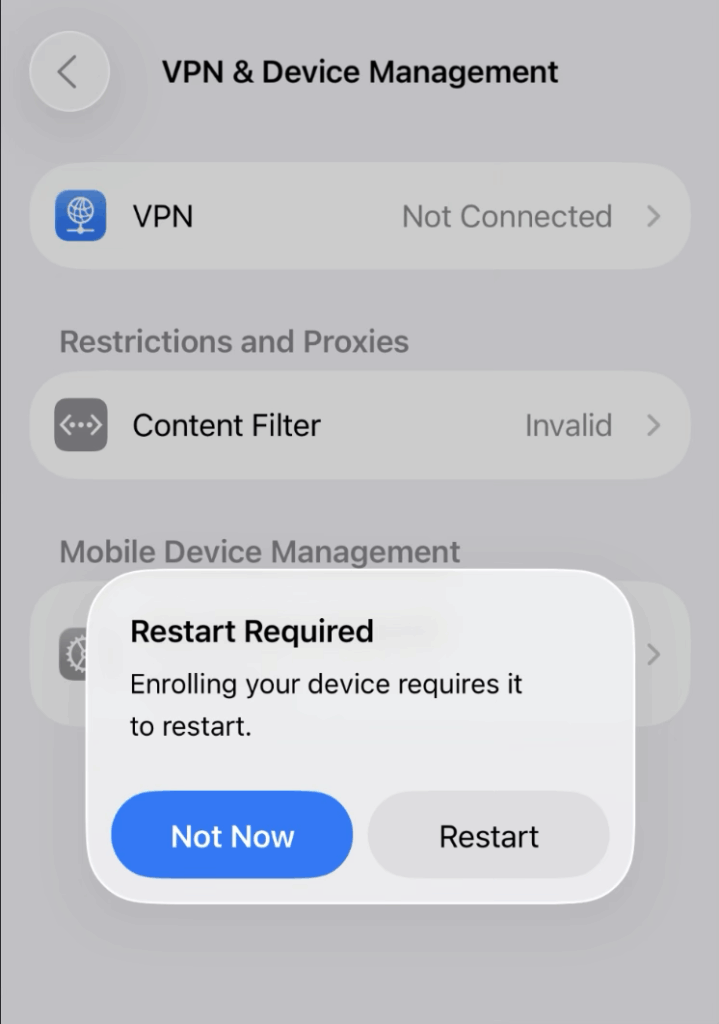
When enrollment starts—or when the migration deadline is reached—the device automatically restarts to apply the new configuration. After the restart, users are prompted to complete the enrollment process. If the deadline has not yet passed, they can choose to delay one final time; otherwise, enrollment is required.
After migration, a device may either complete successfully or fail. In a successful enrollment, the device confirms the migration and reinstalls apps and configurations over the air. In the case of a failed enrollment, the device becomes unmanaged, and you should contact the administrator for assistance.
Step 5 - Editing or canceling a migration #
To modify or cancel a migration for a single device, sign in to Apple Business Manager, navigate to Devices, select the target device, click Change Deadline to modify or remove it, and then click Save.
For multiple devices, select the desired devices in ABM, click Unassign or Reassign, adjust the deadline as needed, and click Save.
Step 6 - Activation Lock management #
During migration, Applivery manages the device’s Activation Lock status depending on its pre-migration state.
If no Activation Lock is present before migration, Applivery can enable it during the process.
When a device already has an Activation Lock from the previous MDM, the migration automatically removes it, and Applivery can apply a new one, invalidating any previous bypass codes.
As part of this process, Applivery sends an Activation Lock request to Apple Business Manager (ABM) before the migration completes to obtain a new bypass code.
In the event of a migration failure, ABM retains the Activation Lock, allowing administrators to unlock the device directly through ABM, as prior locks and bypass codes will no longer be valid.