Integrar Check Point Harmony Mobile VPN dentro de tu Workspace de Applivery refuerza la protección de los dispositivos, garantizando que todo el tráfico de red se enrute de forma segura a través de la infraestructura confiable de Check Point.
La funcionalidad de VPN añade una capa de seguridad fundamental a las capacidades de prevención de amenazas de Harmony Mobile, ayudando a proteger a los usuarios frente a conexiones maliciosas o inseguras incluso cuando están fuera de las redes corporativas.
Al combinar la implementación Zero-Touch de Harmony Mobile con la configuración automatizada de la VPN, las organizaciones pueden ofrecer una protección constante y siempre activa para los dispositivos móviles sin requerir ninguna configuración manual por parte de los usuarios.
Pasos de implementación #
Paso 1 – Generar el certificado de la política en Check Point #
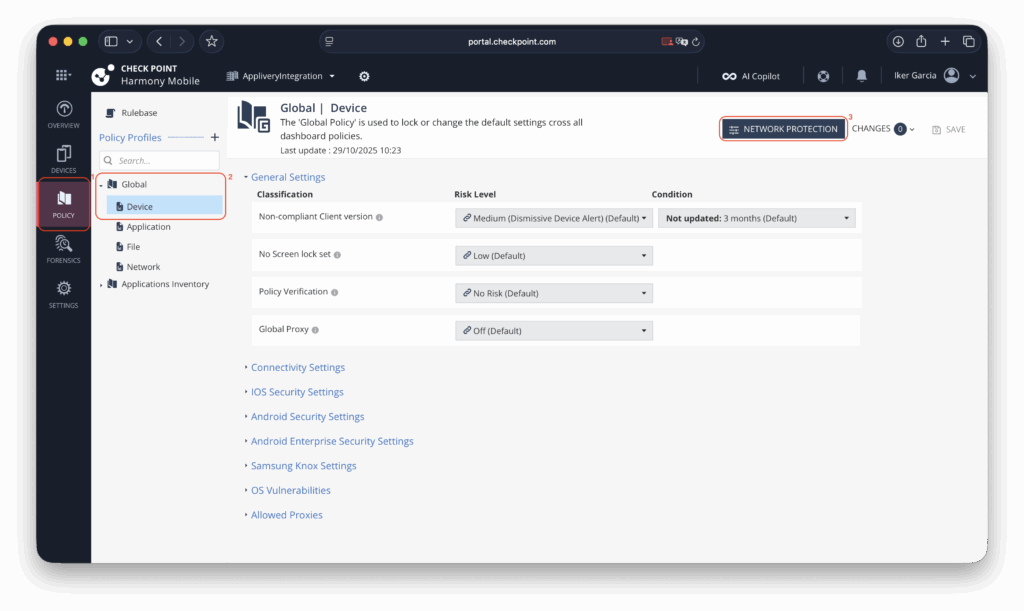
Para comenzar, accede al portal de Check Point y abre la sección Policy (1). Expande la Global Policy (2) (o la política del workspace relevante para tu entorno) y navega a los ajustes de Network Protection (3).

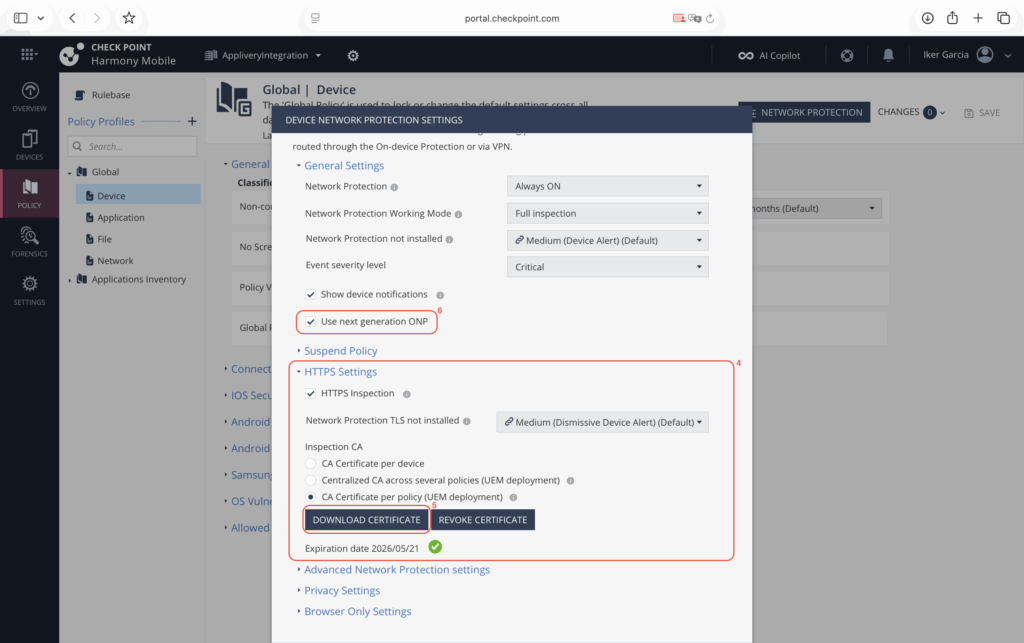
Dentro de esta sección, localiza el panel de HTTPS Settings (4) y genera un nuevo certificado de política de red (5). Asegúrate de guardar este certificado de forma segura, ya que será necesario más adelante al configurar la política en Applivery.
Antes de salir de esta página, también se recomienda habilitar la opción Use next generation ONP (6) para garantizar la aplicación de las funciones de protección más actualizadas.

Paso 2 – Configurar la política en Applivery #
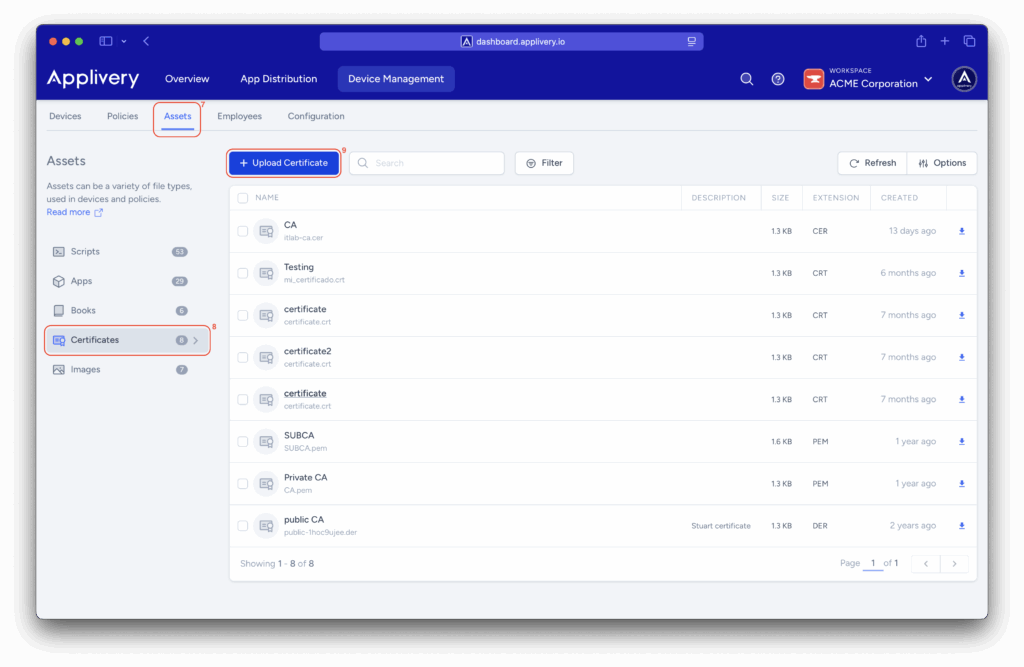
Una vez en el panel de Applivery, dirígete a la sección Gestión de Dispositivos y selecciona Recursos (7).
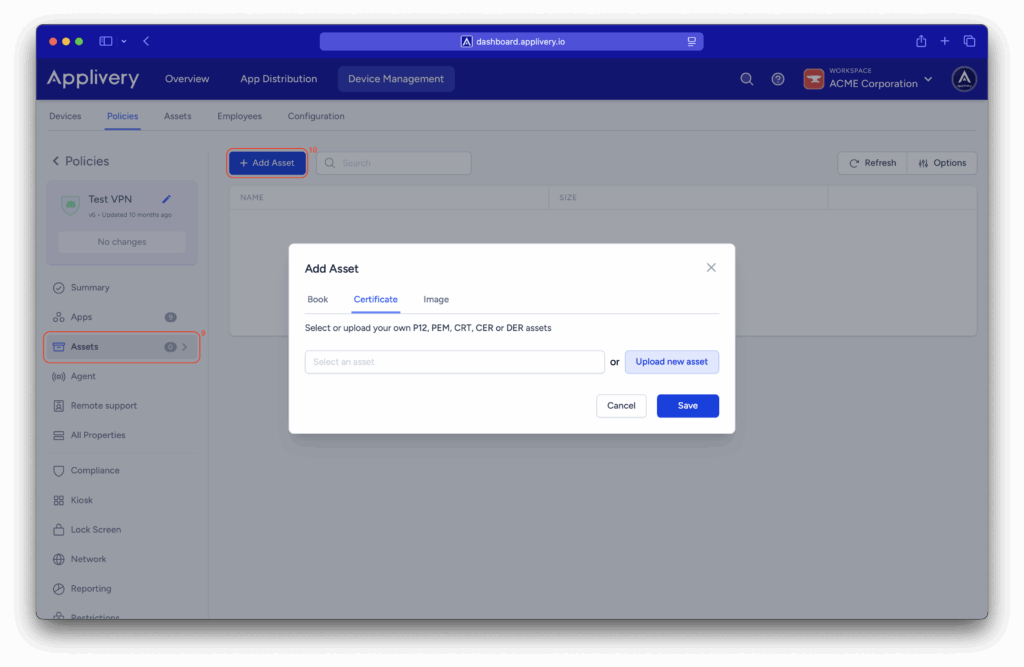
En el menú lateral, selecciona Certificados (8) y utiliza el botón + Cargar Certificado (9) para subir el certificado que descargaste previamente desde el portal de Check Point.

