Check the availability in our pricing page.
In this tutorial, we will learn how to integrate Applivery with your Okta Users Directory through SAML. The Okta Single Sign-On integration provides a secure authentication solution that leverages managed Okta account credentials.
Please follow carefully the next steps.
Step 1 - Get the Service Provider information from Applivery #
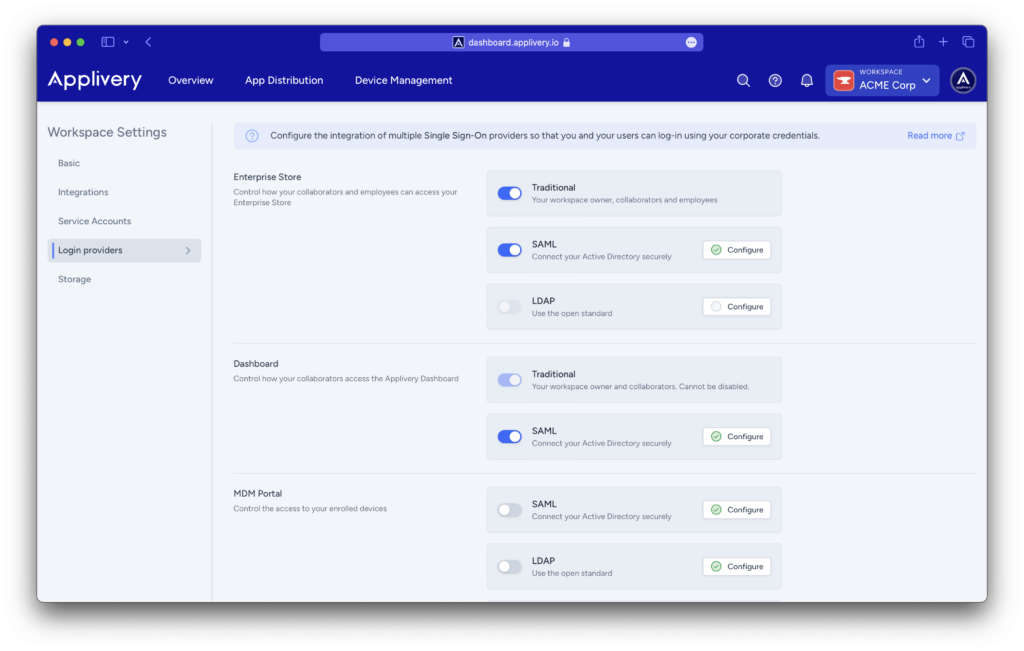
You will see now your SAML configuration, including a pre-configured SAML metadata XML file that you will be able to import into your Identity Provider.
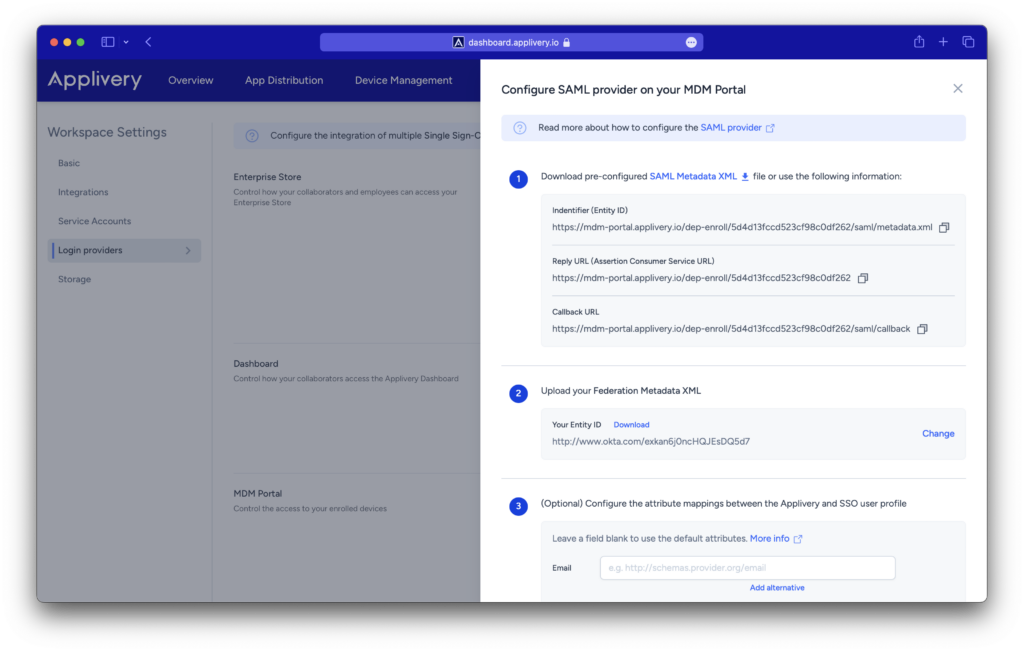
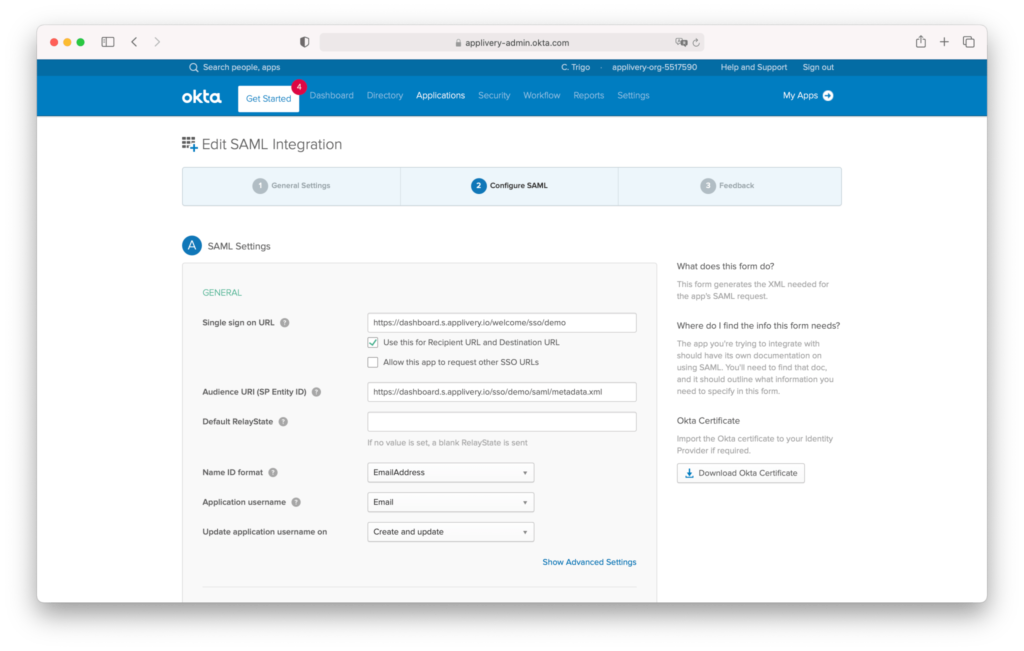
Since Okta does not allow uploading the Applivery pre-configured metadata XML, you can use the fields below to map the required params:
- Single Sign On URL:
- Dashboard:
https://dashboard.applivery.com/welcome/sso/{organization_slug} - App Store:
{organization_slug}.applivery.iooryou.yourcompany.com
- Dashboard:
- Audience URI (SP Entity ID):
https://dashboard.applivery.com/sso/{organization_slug}/metadata.xml
Step 2 - Configure your Okta Identity Provider #
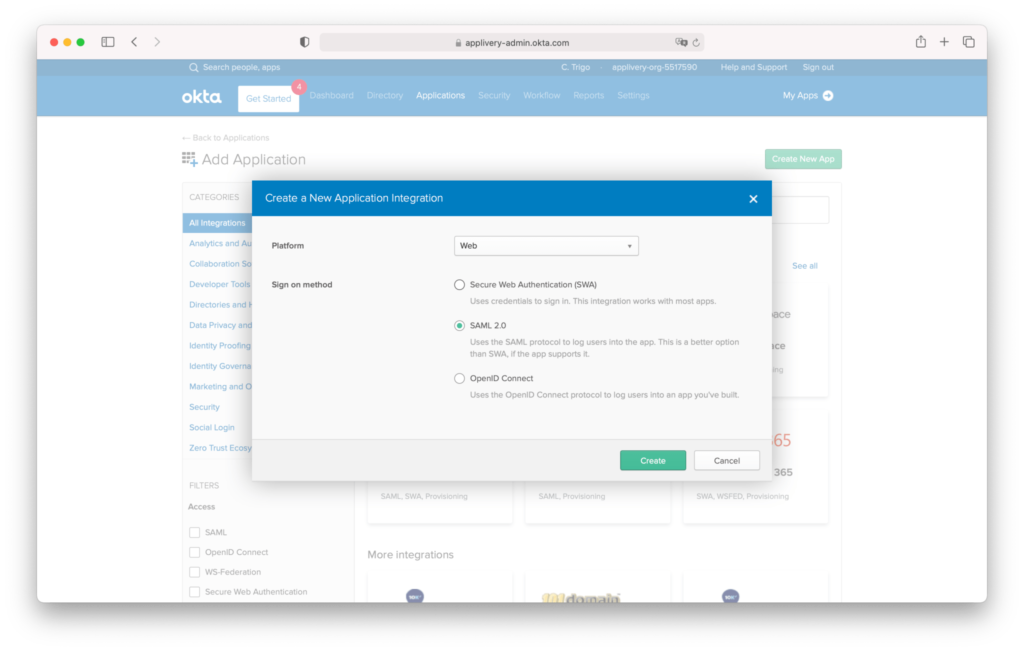
Now that you have your Service Provider information, it’s time to configure it in your IdP. For this example we will use Okta platform that allows you to configure any Service Provider supporting SAML 2.0
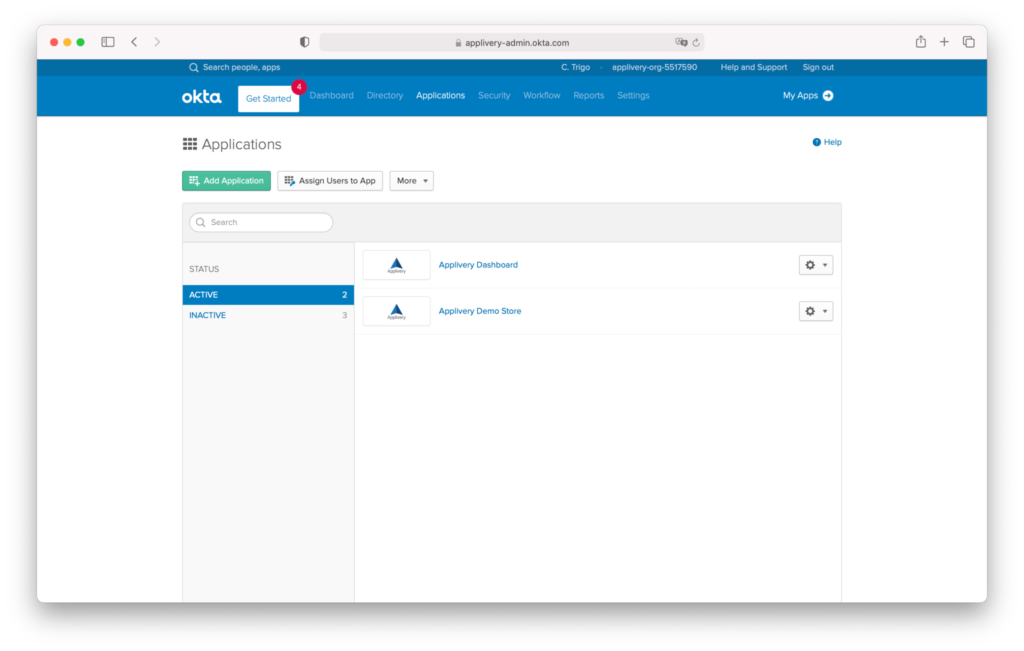
Step 2.1 - Login into Okta Admin Portal and create an App #
Step 2.2 - Configure SAML #
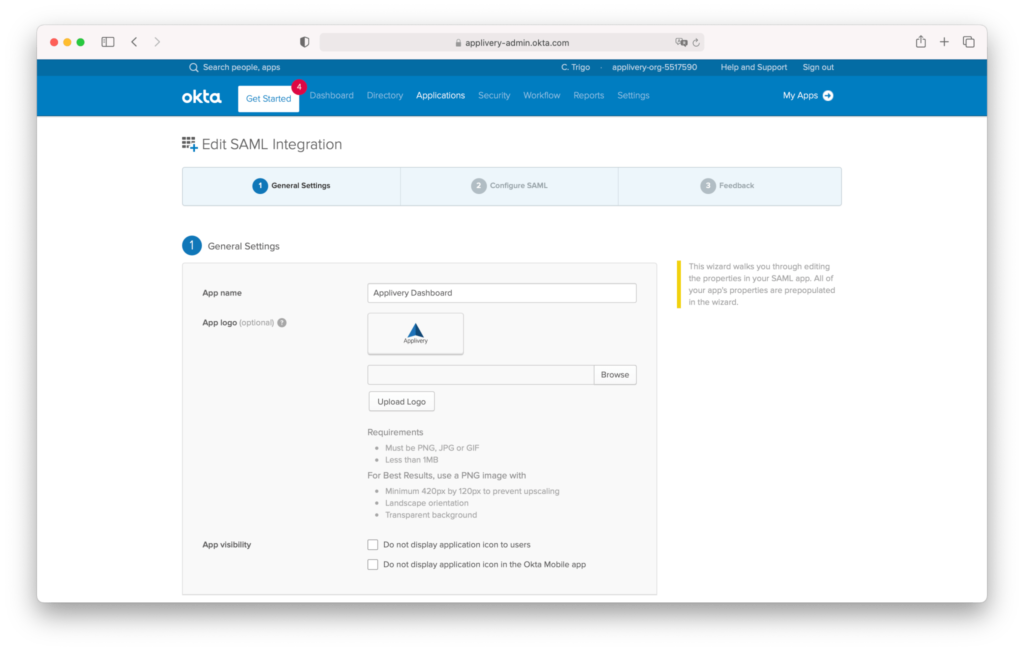
Give a name to your new App and optionally upload the Applivery logo to easily identify it. Then click Next.
In the next screen fill out the Single sign-on URL and Audience URI with the values mentioned above. Additionally, select Name ID format = EmailAddress and Application username = Email. Leave the rest of the fields with the default values.
Then scroll down to the GROUP ATTRIBUTE STATEMENTS section and use the following configuration to enable sending Okta groups to Applivery:
- Name:
http://schemas.microsoft.com/ws/2008/06/identity/claims/groups - Name format: URI Reference
- Filter: User your preferred configuration based on your needs. For instance, you can choose Start with and type something that will be used as a prefix so that all groups matching that prefix in your Okta Directory will be sent to Applivery or choose Matches regex and type
.*to always send all groups or define any other regular expression.
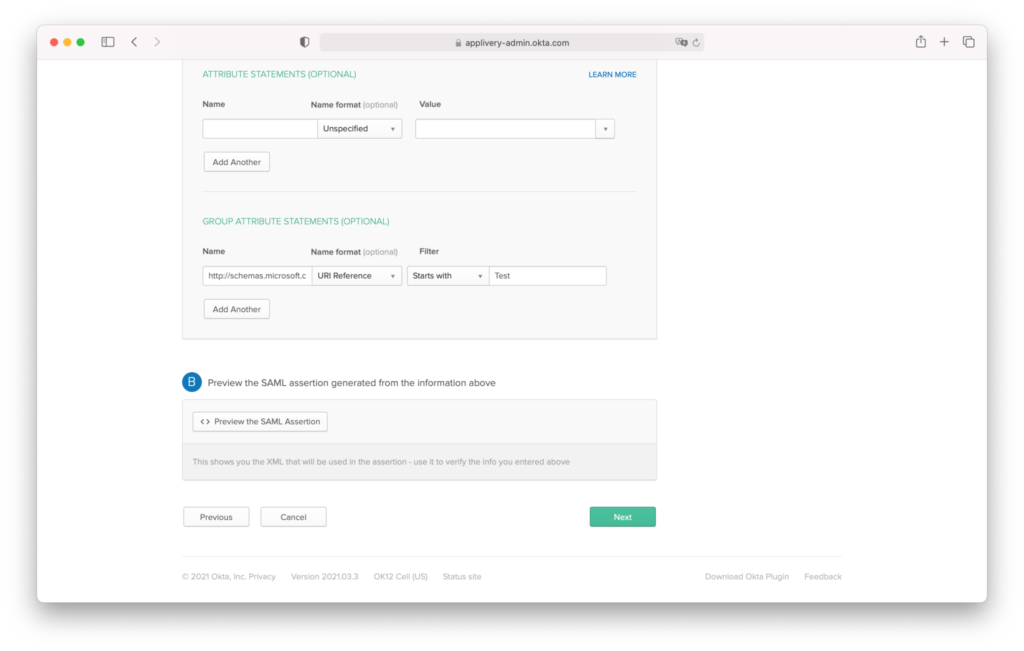
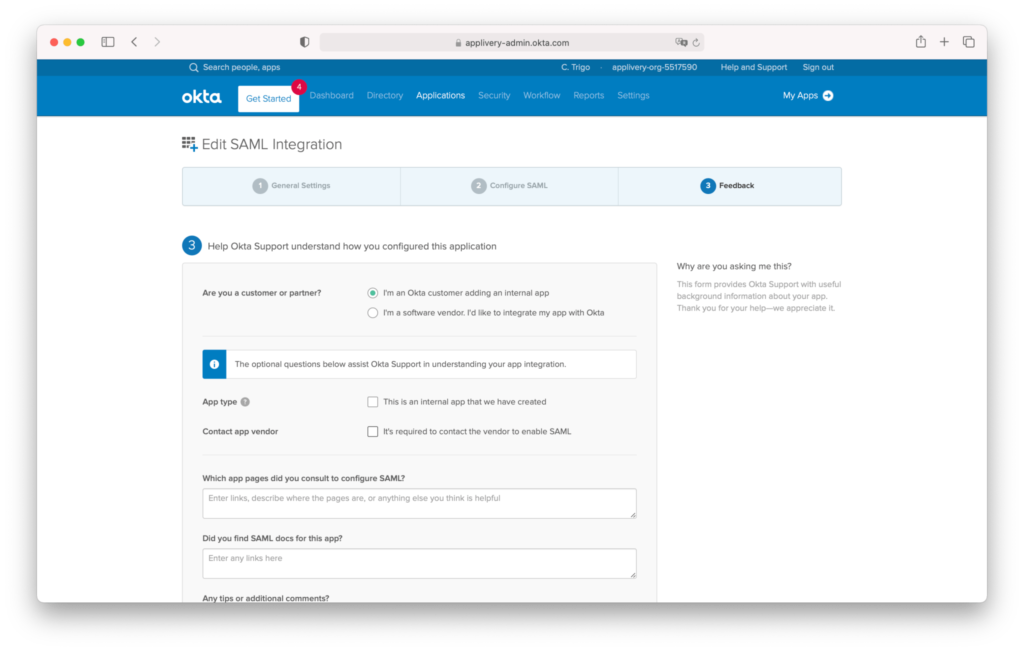
Once configured, click Next.
Step 2.3 - Download Federation Metadata XML file from Okta #
You will be redirected to the Sign On screen where you will be able to download the Federation Metadata XML under the link Identity Provider Metadata. Click the link and save the XML file.
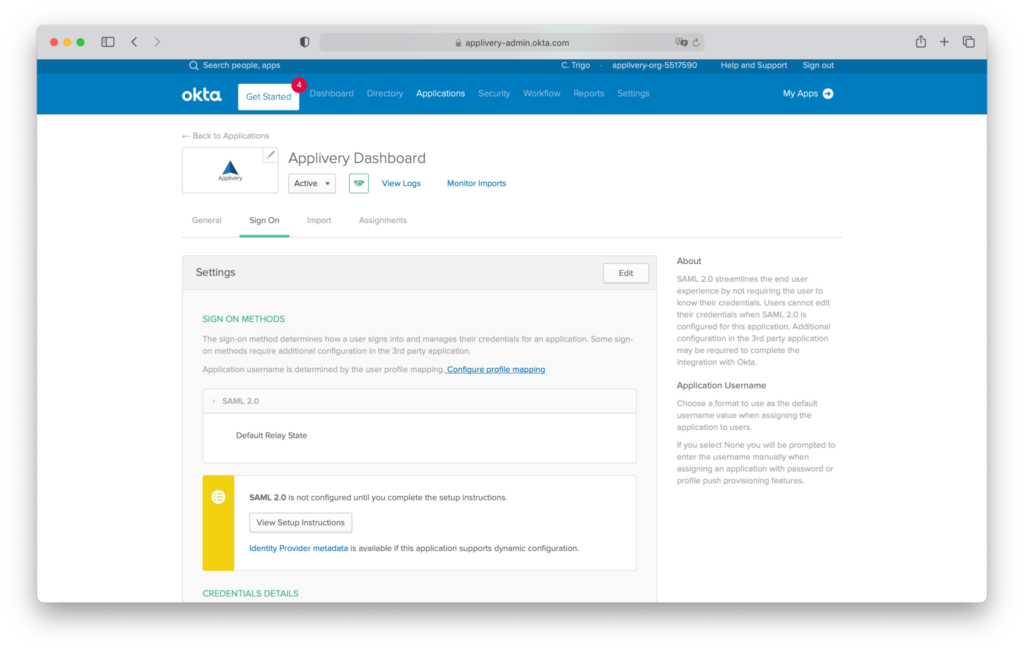
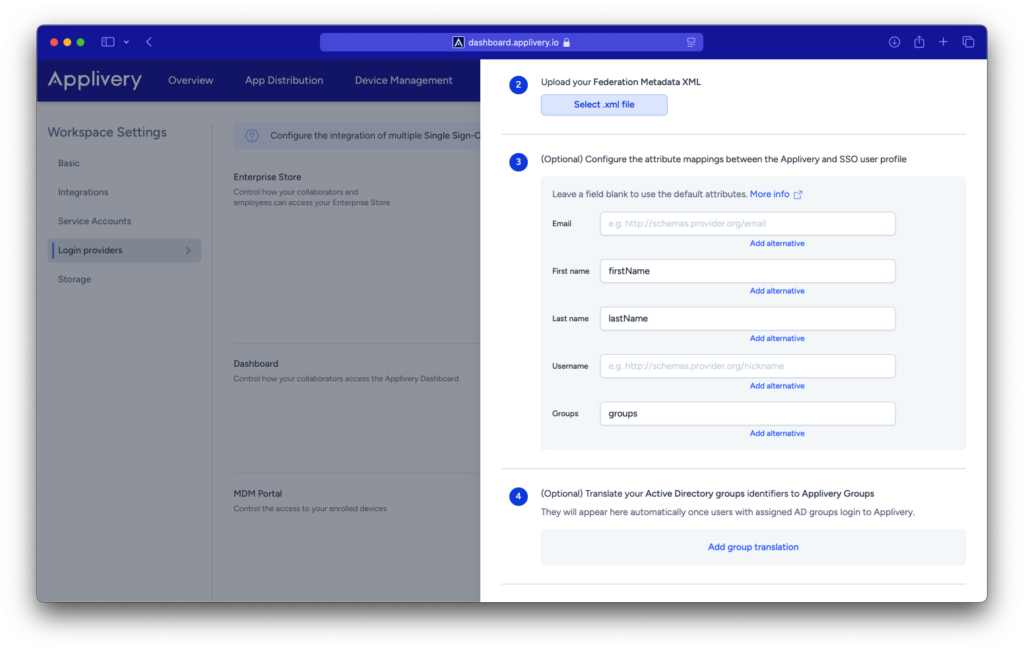
Go back to the Applivery Dashboard > SAML Provider screen (same as in Step 1 of this tutorial) and upload the Federation Metadata XML file under Step 2. Then click Save changes.
Once saved, use the switch button to enable your new SAML integration in your organization.
Step 3 - Test it out #
And that’s it! Now that you have both ends (Okta & Applivery) connected, you can Add some authorized users to Okta (going to Directory > People), making sure you add this new Okta App to each of them). Then navigate to your App Store URL or Dashboard Login Screen (https://dashboard.applivery.io/welcome/sso) and try to log in with an authorized user.