What is Apple Configurator? #
Apple Configurator is a tool created by Apple that allows administrators to create device configurations and apply them to devices. This is commonly used to enroll Apple devices in Apple Business Manager (ABM) and take advantage of Apple Device Enrollment Program (DEP) to handle device provisioning and through MDM solutions such as Applivery.
Apple Configurator is available in two versions:
- Apple Configurator for Mac: a macOS app that supports an extensive range of configurations that can be deployed to devices such as security requirements, passcodes, VPN configurations, certificates, WiFi configurations, apps, etc. Bear in mind that all these configurations are also available in Applivery. It supports deploying configurations to iPhones, iPads, and Apple TVs.
- Apple Configurator for iPhone: an iPhone App that allows administrators to enroll Mac devices running T2 or M1 chip running macOS 12.0.1 or later in Apple Business Manager. Older devices can only be added to Apple Business Manager at the purchase moment, through the wholesaler, or by entering the order number in Apple Business Manager
iPhone and iPad enrollment using Apple Configurator for macOS #
Devices are normally enrolled using the Enrollment link method where a link is sent to the employee who proceeds with the enrollment autonomously. That method makes sense for small organizations with a small number of devices.
However, it does not scale for companies with a large number of company-owned devices that need to be set up. Instead, organizations normally decide to use Apple Device Enrollment Program (DEP) but not all the devices will be already included in Apple Business Manager so, in those cases, they can be added through Apple Configurator.
Let’s take a look at the different steps:
Step 1 - Download Apple Configurator for Mac #
To start, if you haven’t already, download Apple Configurator from the Mac App Store. Install the app and run it.
Step 2 - Prepare Apple Configurator #
There are some preliminary configurations that you must do before starting to enroll your devices.
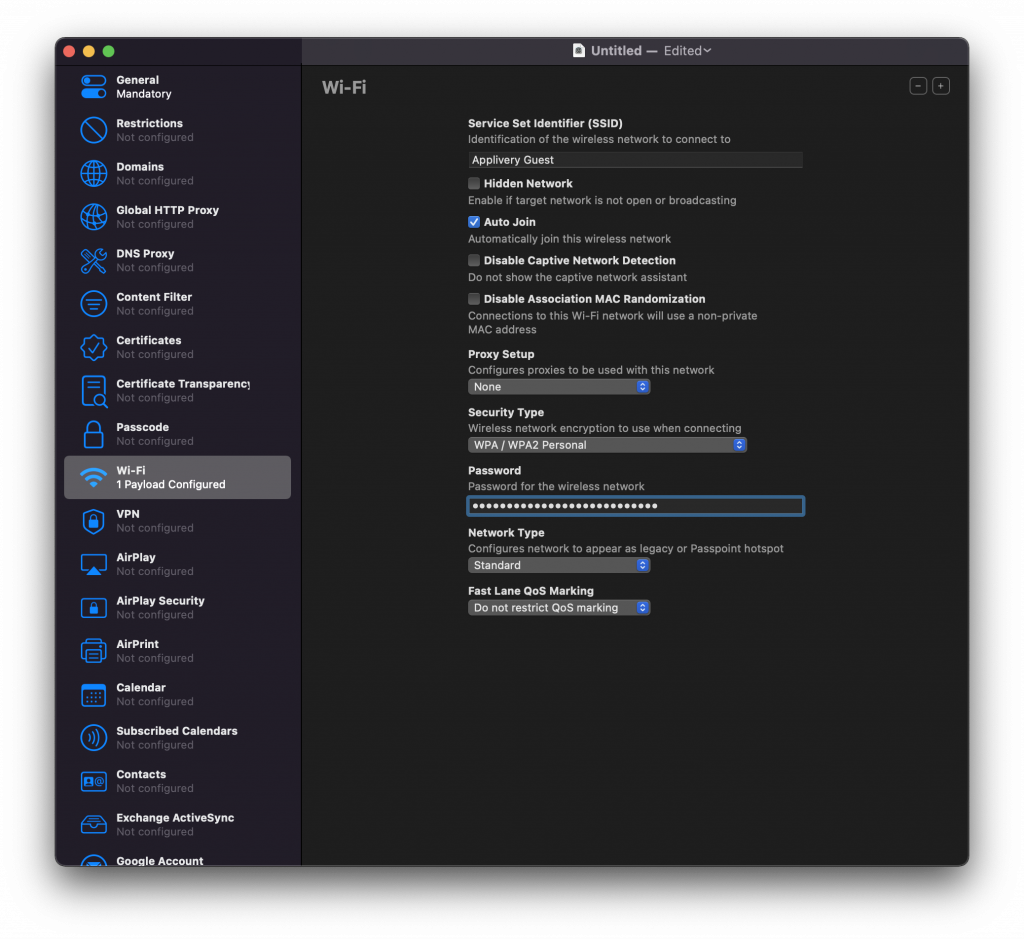
- On Apple Configurator, click File > New Profile and then select Wi-Fi and click Configure.
- Then, create a Wi-Fi profile by entering the SSID, Password, and Security type of your Wi-Fi network and save it.
Step 3 - Prepare the device #
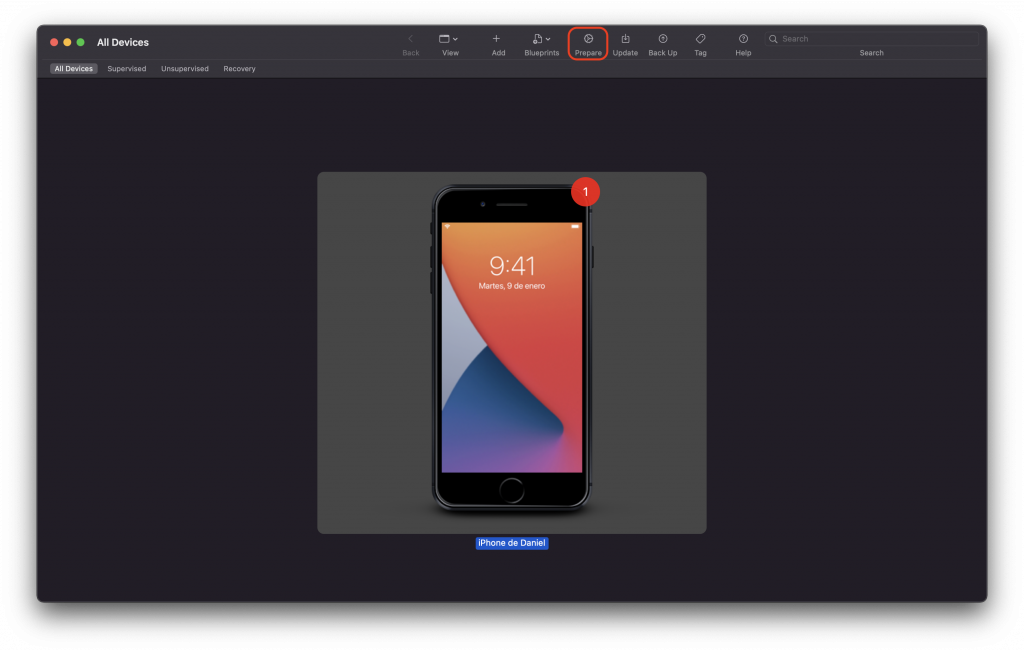
Plug your device into the computer. You might have to click Trust on your device to allow the connection. Once your device is recognized and appears in the middle of the screen, select it and click the Prepare button from the top bar of the app.
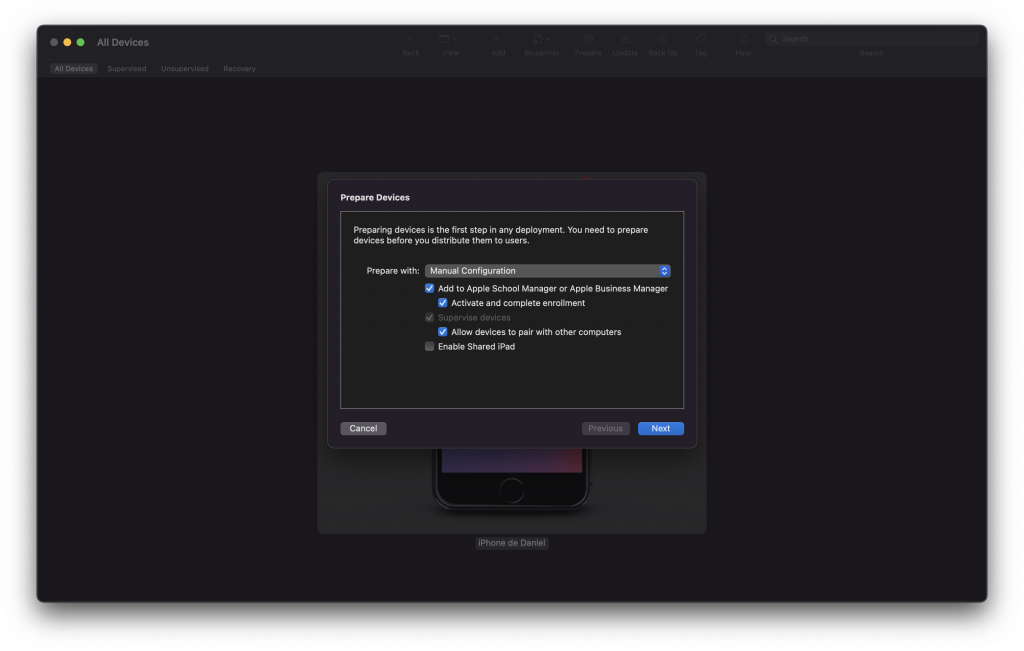
You can choose from the following options:
- Add to Apple School Manager or Apple Business Manager: choose this option if you want the device to be enrolled in ABM or ASM.
- Activate and complete enrolment: Don’t select this option if you have a new or existing device that requires unique user authentication to enroll in MDM. The device is left at the Setup Assistant, and the user completes the enrollment. Select this option if you have an existing device that already has a record, and is managed by your MDM solution. This can include managing all the Setup Assistant steps so that the user gets a device that’s ready to use.
- Supervise devices: whether the device will be supervised or not.
- Allow devices to pair with other computers: discontinued feature from iOS 13
- Enable shared iPad: whether shared iPad will be enabled or not.
"Invalid Profile [MCProfileErrorDomain – 0x3E8 (1000)]"In that case, just unselect the Activate and complete enrollment option and prepare again your device.
Step 4 - Create a new MDM server #
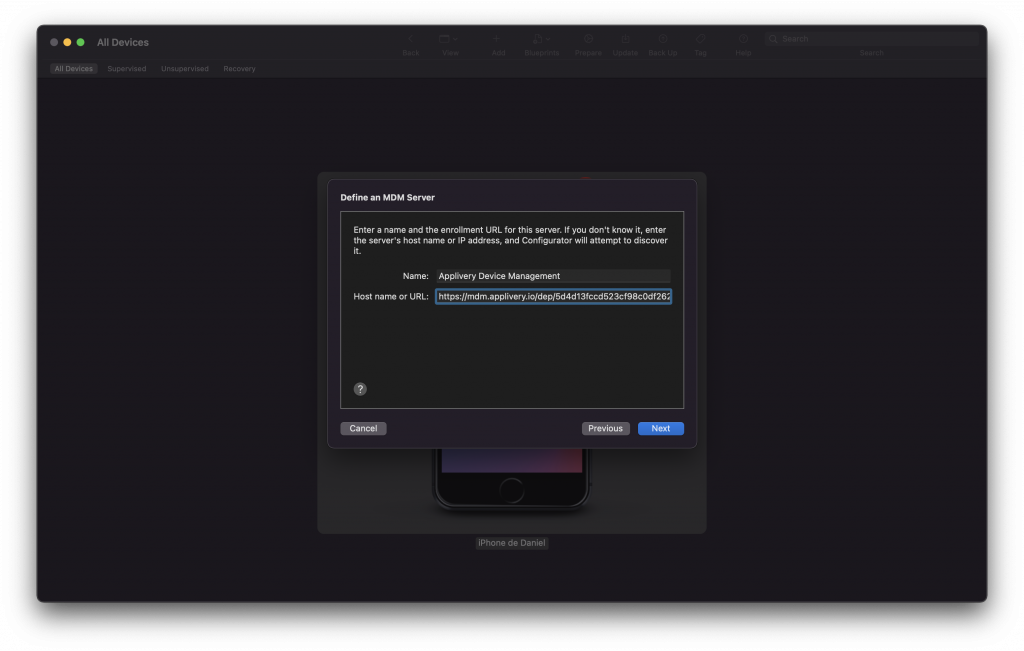
Considering that you selected Manual in the previous step, Apple Configurator will ask you now to assign the device to an MDM Server.
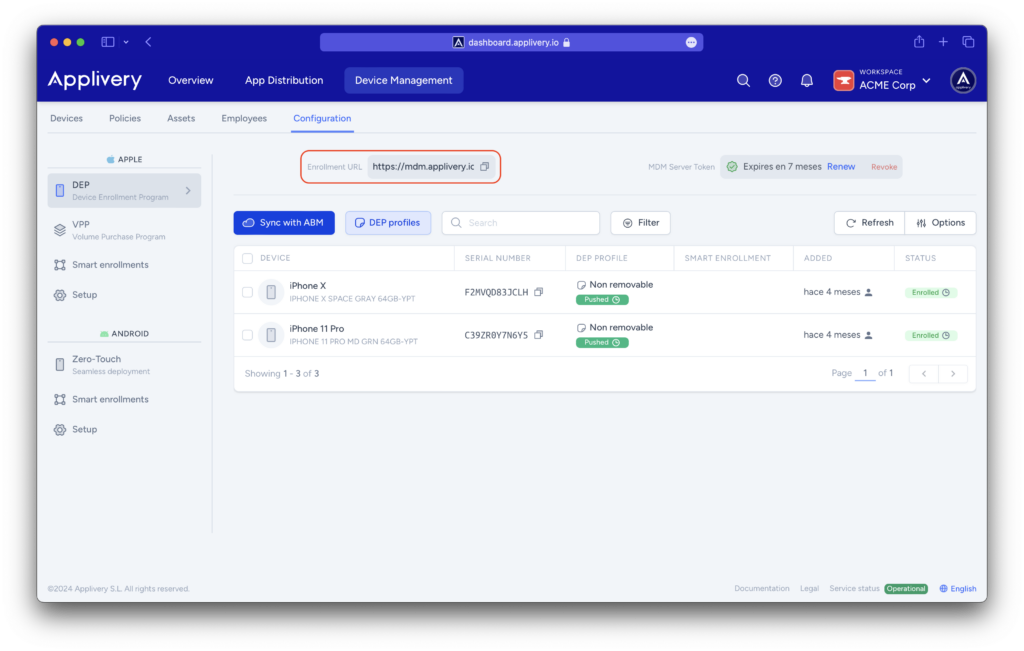
Select New Server… if you haven’t completed this process before. The next screen will allow you to specify a name for your MDM as well as the enrollment URL.
Step 5 - Trust certificates #
Trust anchor certificates are automatically added. If Apple Configurator takes too long to fetch anchor certificates, skip and proceed directly to the Assign to Organization step by clicking on Next.
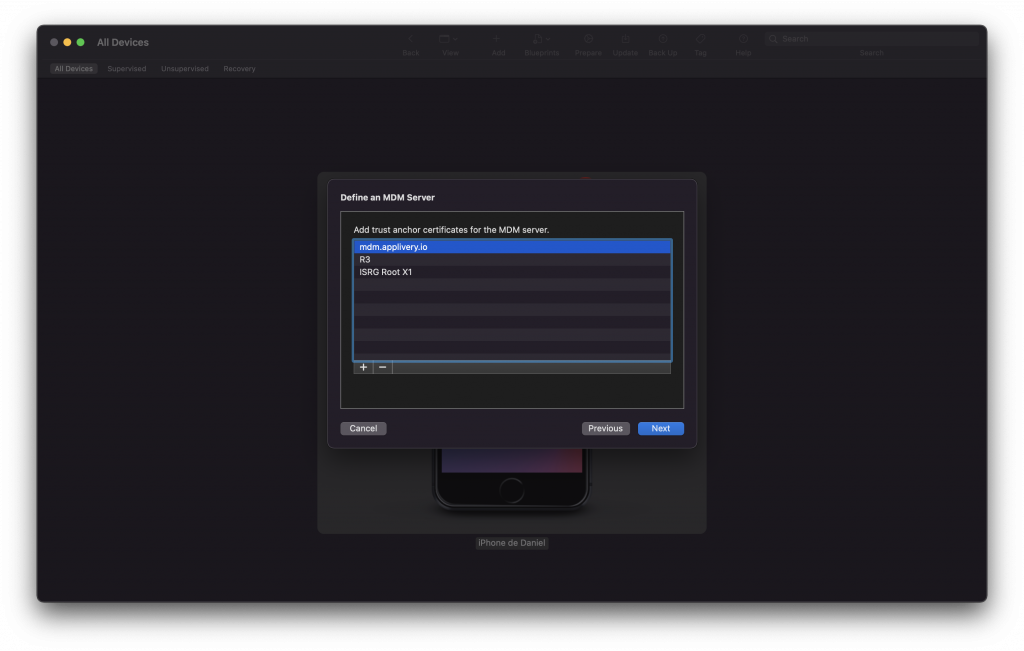
If you selected Add to Apple Business Manager in Step 3, you will be prompted with a login screen. Log in with your Apple Business Manager account and click Next.
Step 6 - Create a new Organisation in Apple Configurator #
Sign in to Apple Business Manager (if you selected that option).
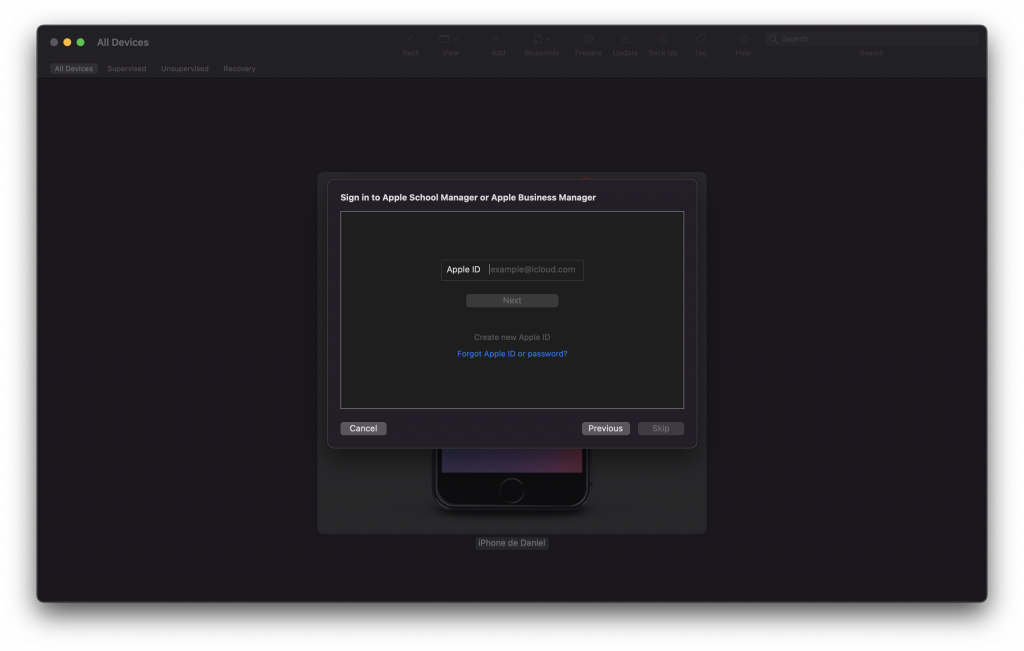
After login, specify the name and details of the organization. This will create a new organization on Apple Configurator.
Step 7 - Generate supervision identity #
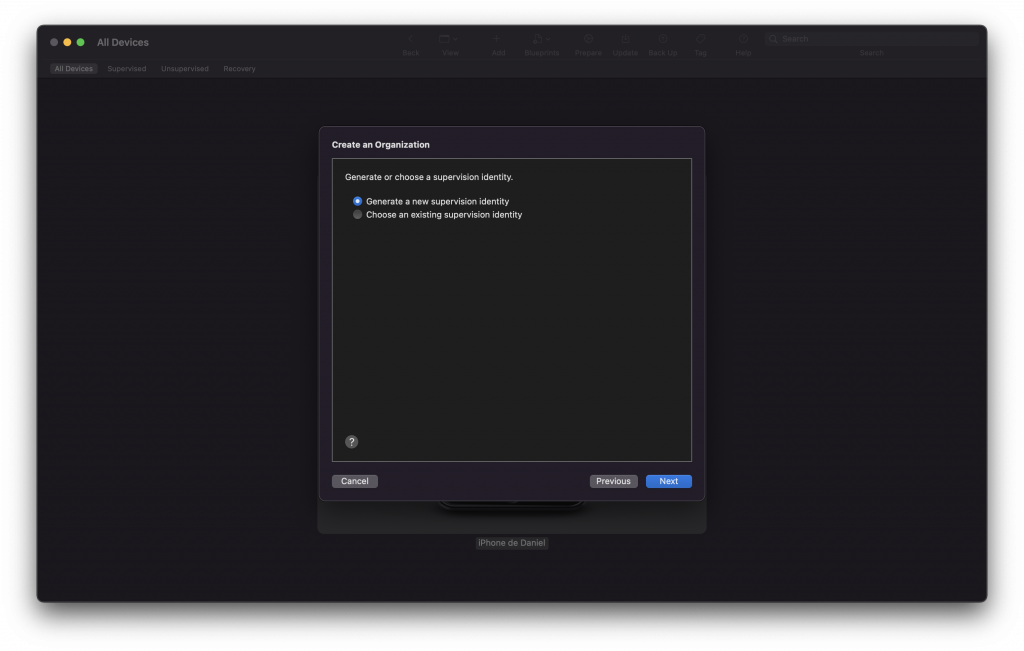
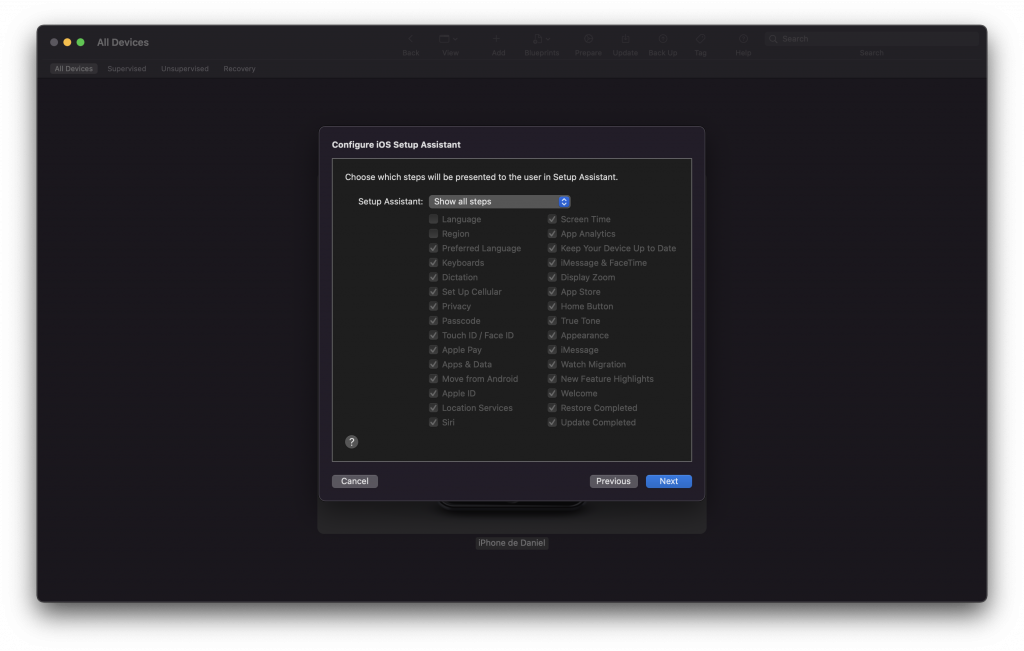
Choose Generate a new supervision identity to create a new Supervision identity on Apple Configurator.
You can also configure it to skip some setup steps:
Step 8 - Choose network profile #
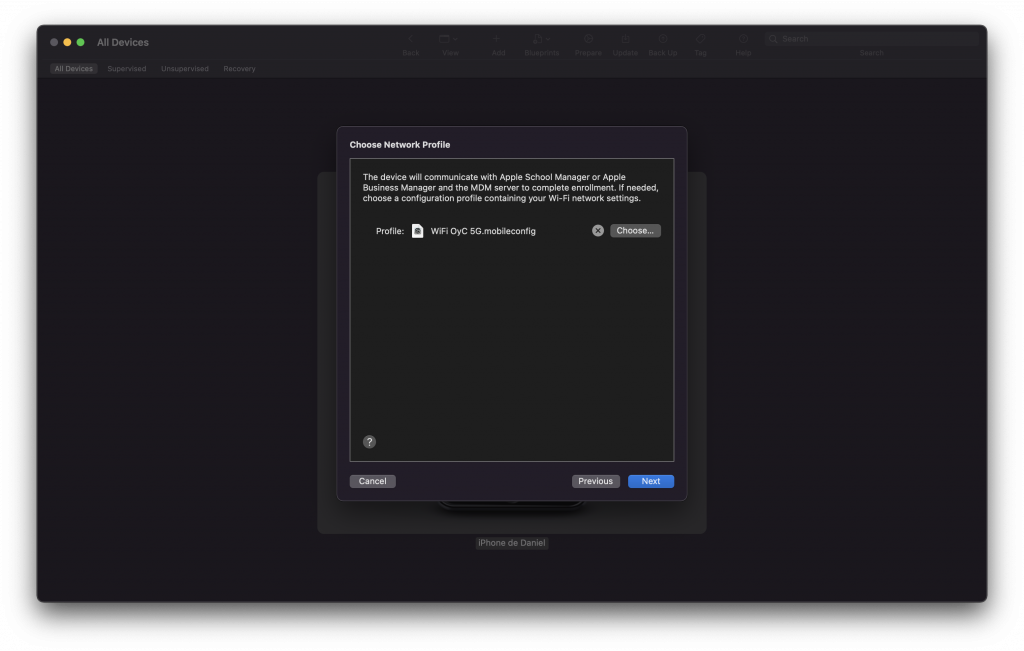
Next, you have to add a network profile. Just select the Wi-Fi profile you created during Step 2 and then click Next.
Step 9 - DEP credentials and finish #
Optionally if you had enabled the option to add devices to DEP using Apple Configurator, enter your ABM account credentials. Once done, click Prepare.
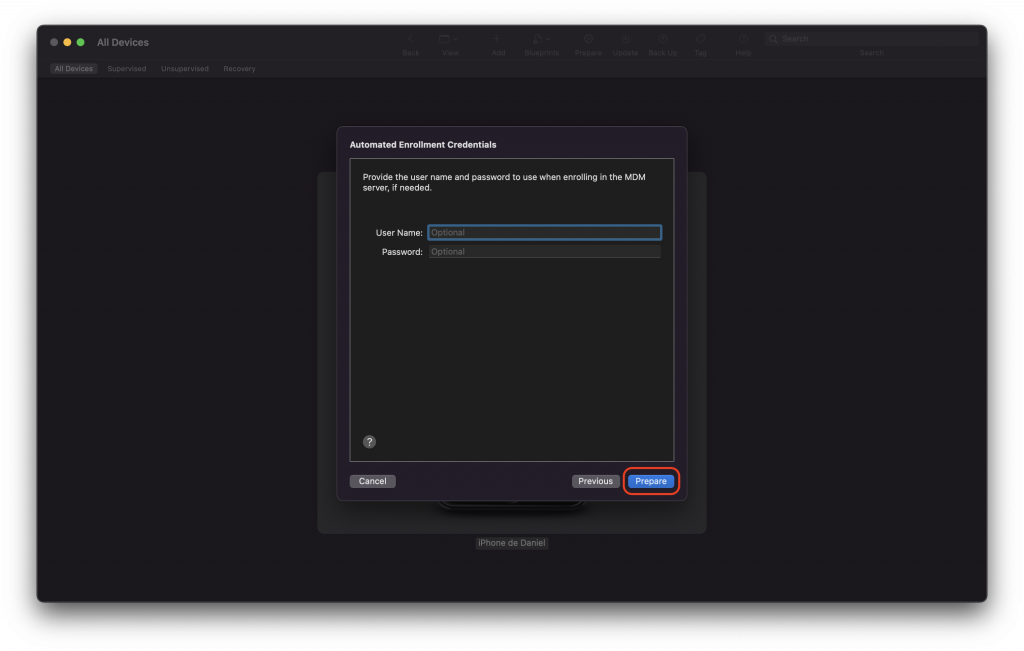
The device will start the preparation. This may take a few minutes so please be patient. During the process, the device might restart several times. Do not unplug it from your Mac until you see a confirmation message from Apple Configurator and your device is on the Welcome screen.
Mac enrollment using Apple Configurator for iPhone #
As mentioned before, with iOS 15 and macOS 12.0.1, you can now enroll any new (or factory reset) Mac with an Apple Silicon or T2 chip, and running macOS 12.0.1 or later, into an MDM solution through Apple Business Manager (DEP).
Let’s take a look at the process:
Step 1 - Download Apple Configurator for iPhone #
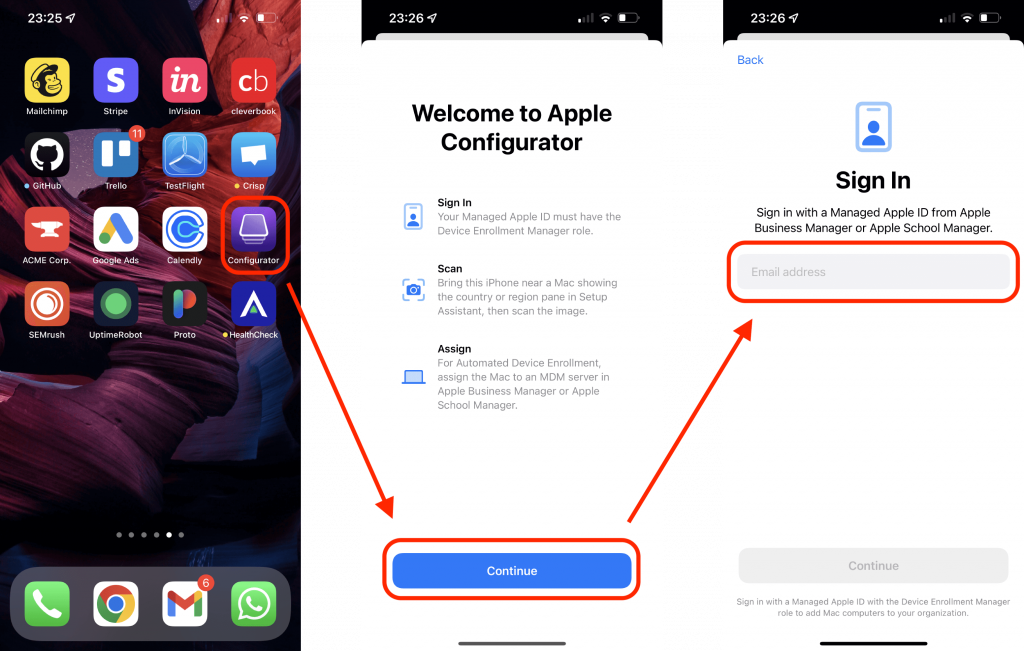
To start, if you haven’t already, download Apple Configurator for iPhone from the Apple Store. Install the app and run it.
Step 2 - Open Apple Configurator App in your iPhone #
Step 3 #
Have the Mac you want to add in front of you and plugged into a power source.
If the Mac has already gone through the Setup Assistant process previously or is already set up, you need to erase it before moving on to the next step.
If the Mac is brand new and has not been set up before, move on to the next step, select the language, and click Continue.
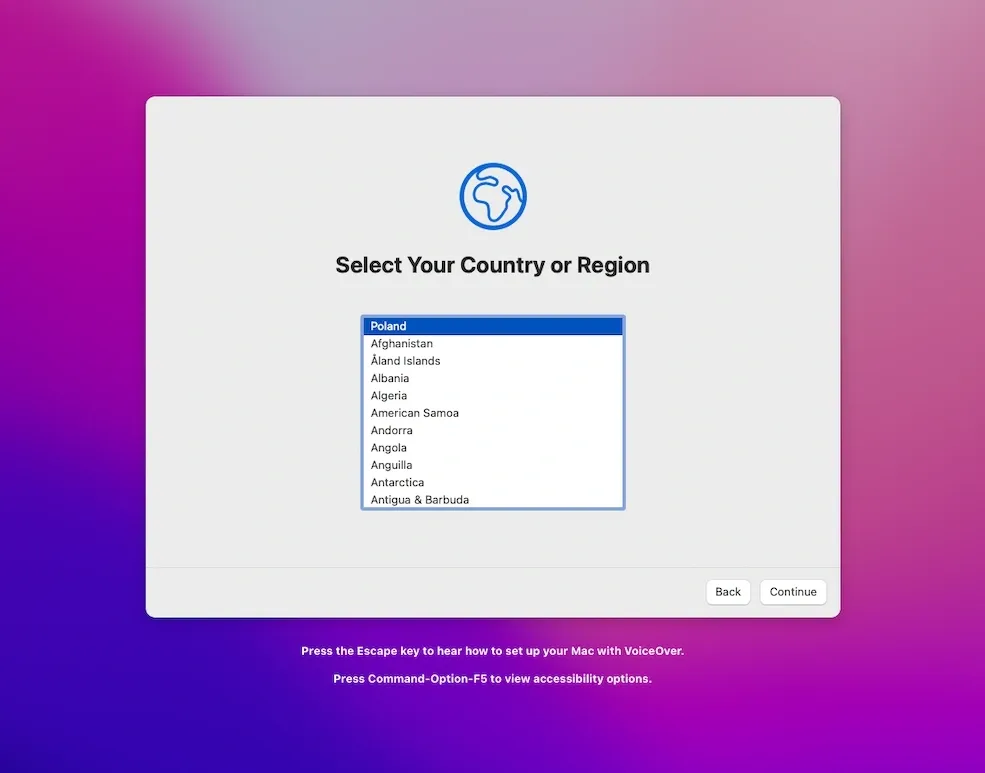
Once in the next step, stop and don’t move to the following one.
Step 4 #
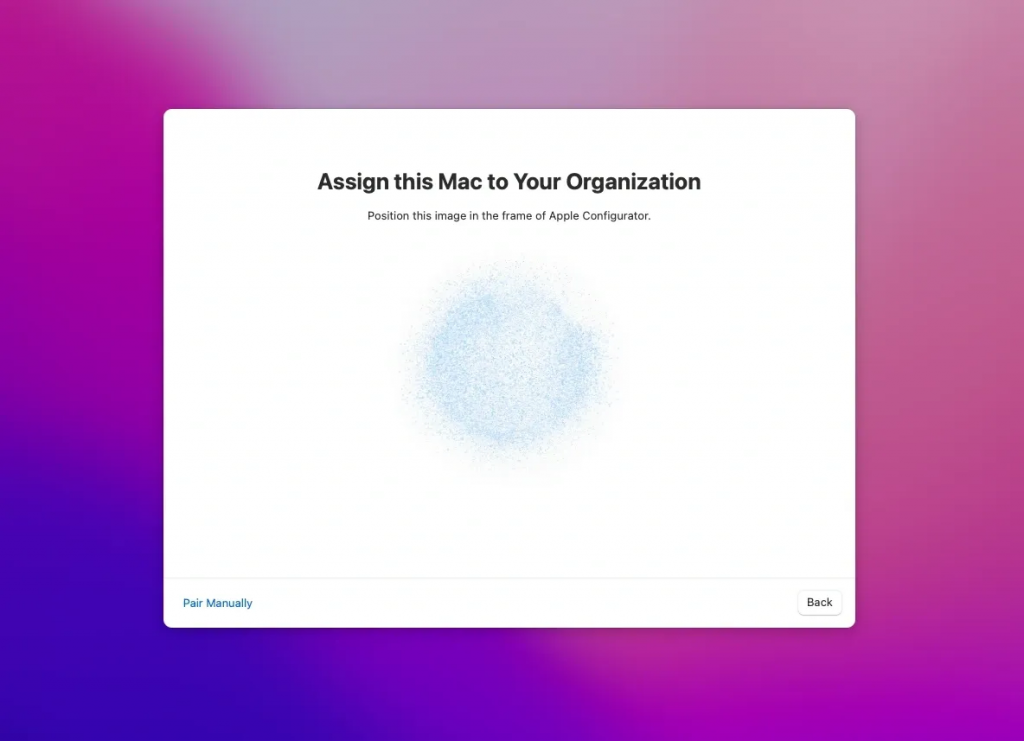
From this screen, you have two options:
- Use the iPhone camera (with the Apple Configurator app open) to scan the image on the screen.
- Select Pair Manually on the iPhone and click Pair Manually on your Mac. You will be shown a 6-digit code and be prompted to enter it.
You should see a notice on the screen saying the pairing was successful.
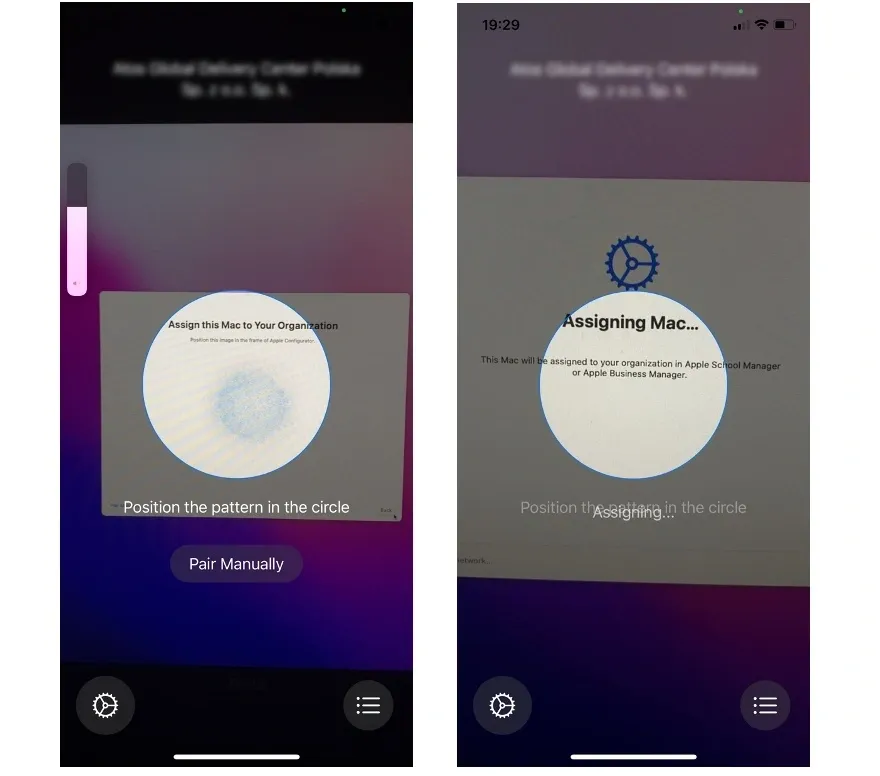
Step 5: #
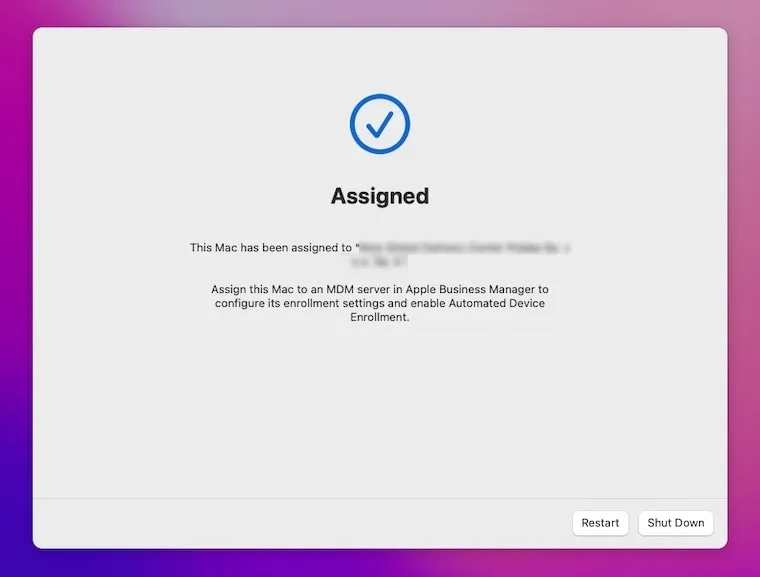
Next, you should see a screen saying Assigned: This Mac has been assigned to [your organization name].
This means the device has been successfully added to your Apple Business Manager account. However, at this point, the device has not yet been enrolled in Applivery. On the Mac’s screen, you will see the options to Restart or Shutdown.
Now you can just follow the instructions of the Apple Device Enrollment Program here to finish the enrollment of your device in Applivery.