App Live is a mobile app testing platform offered by BrowserStack that allows developers and testers to run their apps on real iOS and Android devices directly from the cloud—no need to set up a device lab. You can interact with the app just like a user would, test across different device models and OS versions, and debug issues in real-time.
In other words, if you’ve ever wanted to see how your mobile app behaves on a brand-new iPhone or an older Android phone without having those devices physically in your hand, App Live makes that possible.
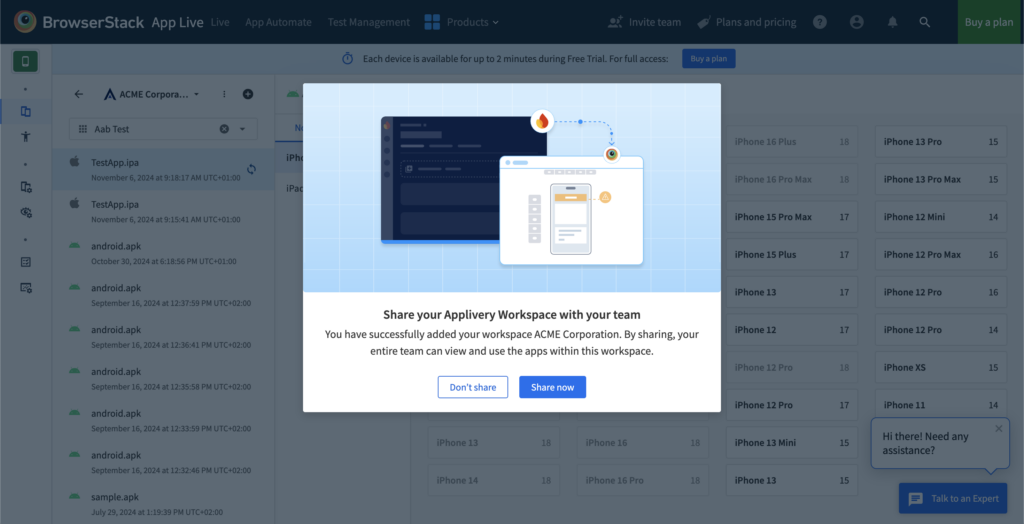
Once the integration is completed, you can easily add your Applivery Workspace to App Live and share it with your team. This allows everyone involved to access and test apps directly from the shared Workspace, making collaboration smoother and streamlining the entire testing process.
Integrate Applivery and set up your project in App Live #
App Live supports .apk files for Android and .ipa files for iOS. Before you get started with the integration, make sure you have a few things ready:
A BrowserStack account. If you haven’t created one yet, you can sign up for a free trial to get started quickly.
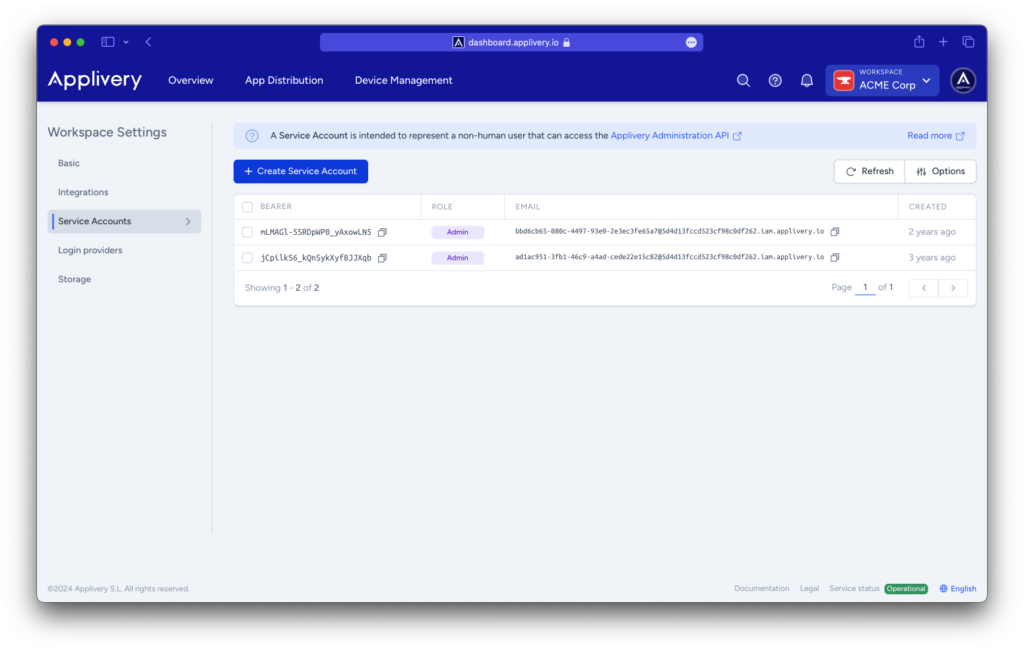
An Applivery Service Account along with the corresponding Bearer token. These credentials are what App Live uses to authenticate your Applivery Workspace. If you’re not sure how to create a service account, you can check out our step-by-step guide here.
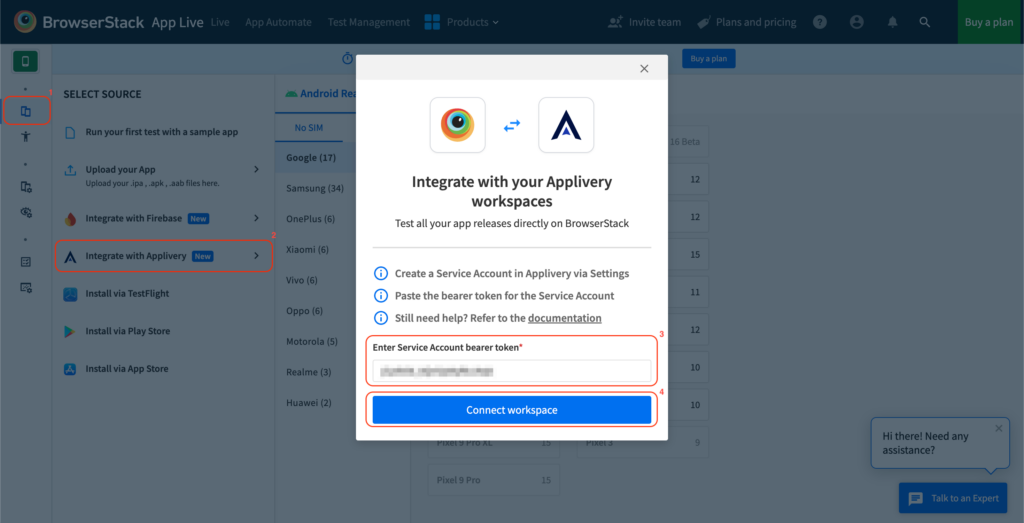
To integrate Applivery and add a project in App Live, navigate to the App Live dashboard. On the Select Source (1) panel, click Integrate with Applivery (2). When prompted to integrate with Applivery, enter the bearer token (3) you previously configured in Applivery and select Connect workspace (4).
You’ll be successfully authenticated and redirected to the App Live dashboard.
View apps #
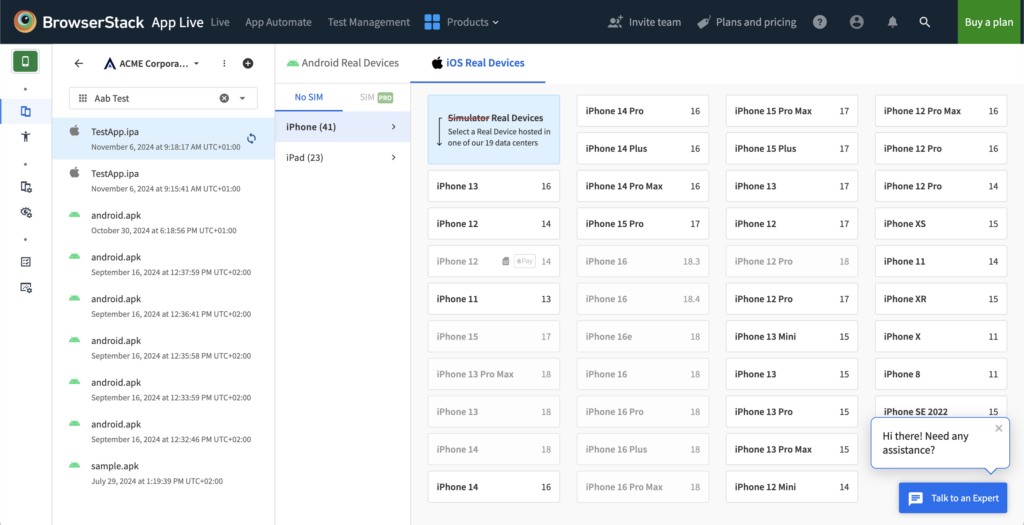
Once you add apps to your Applivery Workspace, they will appear in the Select Source panel on the App Live dashboard. App Live organizes your data using a hierarchy that follows this structure: project > apps > releases.
Your project list includes both projects you’ve added yourself and those shared with you by other team members. Within each project, you’ll find an app list showing all associated apps. Selecting an app reveals its releases, where you’ll see all app versions available for testing.
Sharing projects with your team #
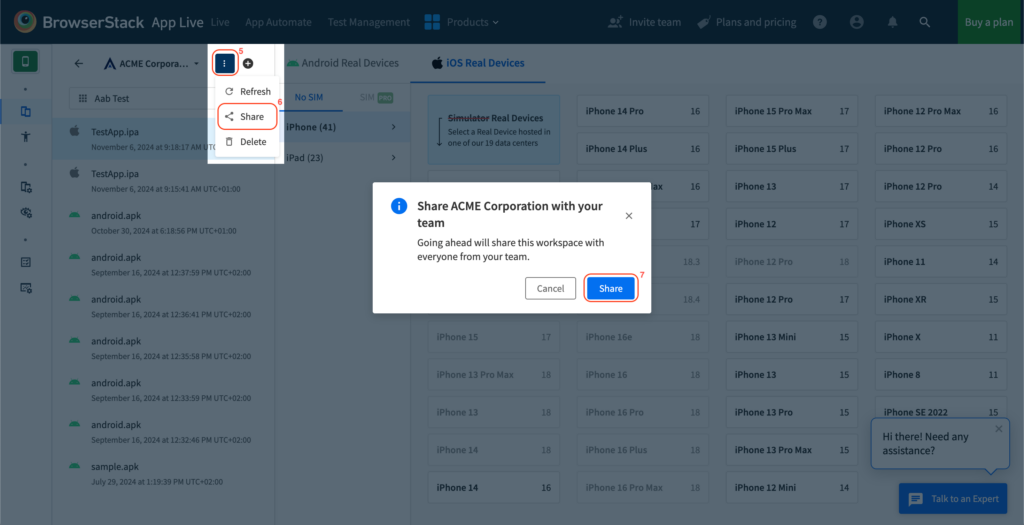
After creating a project, you can share it with your team. Once shared, the project will show up on their App Live dashboards.
To share a project, navigate to the Applivery project list and select the project you want to share. Click the more options icon (⋮) (5) next to the project name, then choose Share (6). When prompted, confirm the action by clicking the Share (7) button.
The project will now be accessible to your teammates in their App Live views.
Synchronizing App releases #
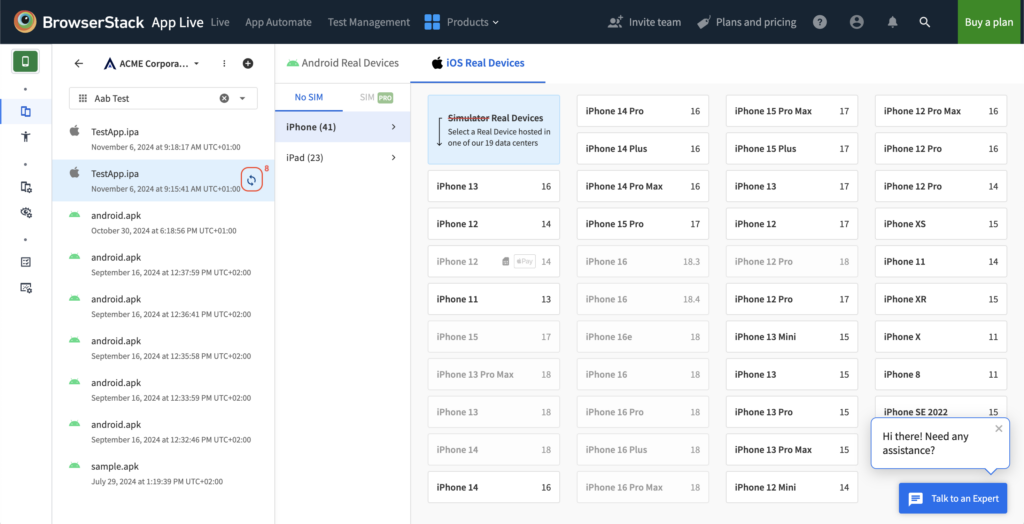
App Live lets you sync app releases directly with BrowserStack Cloud. This allows you to upload releases, keep them in sync between Applivery and BrowserStack, and apply advanced app configurations like large app support or video injection.
Synchronize an app release #
To sync an app release, select the relevant project and then choose the app you’d like to synchronize. Click the synchronization icon (8) next to the app name to begin.
Once the process completes, the sync icon changes to an unsync button, and configuration options become available. These settings remain persistent for the release.
Unsynchronize an app release #
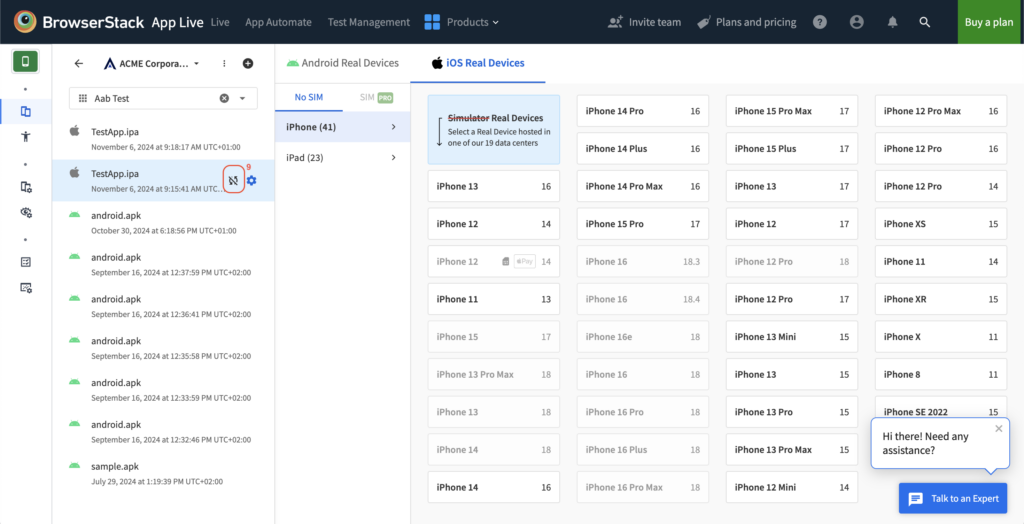
If you need to remove an app release from BrowserStack Cloud, you can unsynchronize it. To do so, return to the app list, click the unsync icon (9) next to the app name, and the app will be removed.
After this, it will no longer be available for testing in App Live, and configurations can no longer be applied.
Launching an App Live Session #
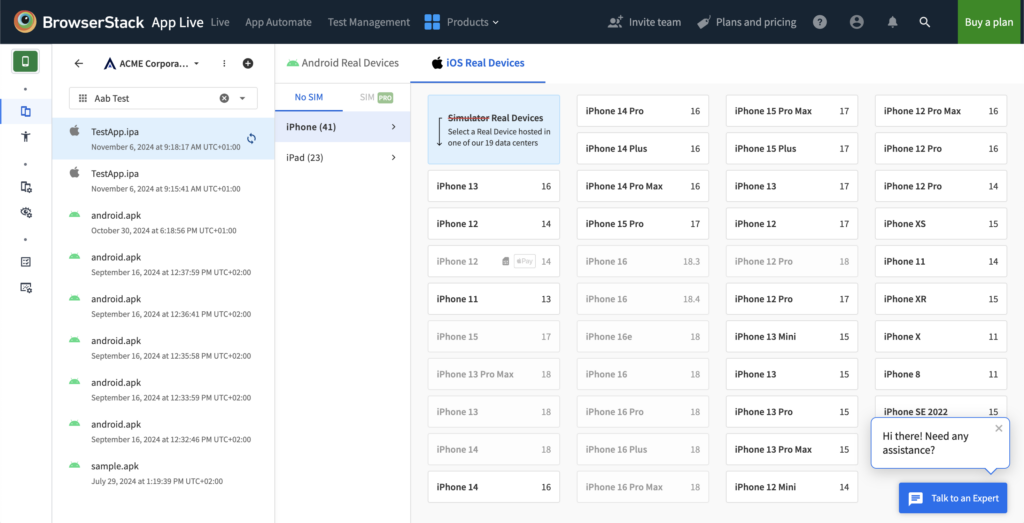
To begin a session with an Applivery app, open the App Live dashboard and select a project from the list. Choose the app you’d like to test, then select a device from the available options. The app will automatically sync to ensure the latest version is used for the session. Once selected, the session will launch with your chosen app and device.
Adding, refreshing, and deleting projects #
To add a new project, click the plus icon (+) (10) next to the project list on the App Live dashboard. Follow the steps outlined in the Applivery integration flow.
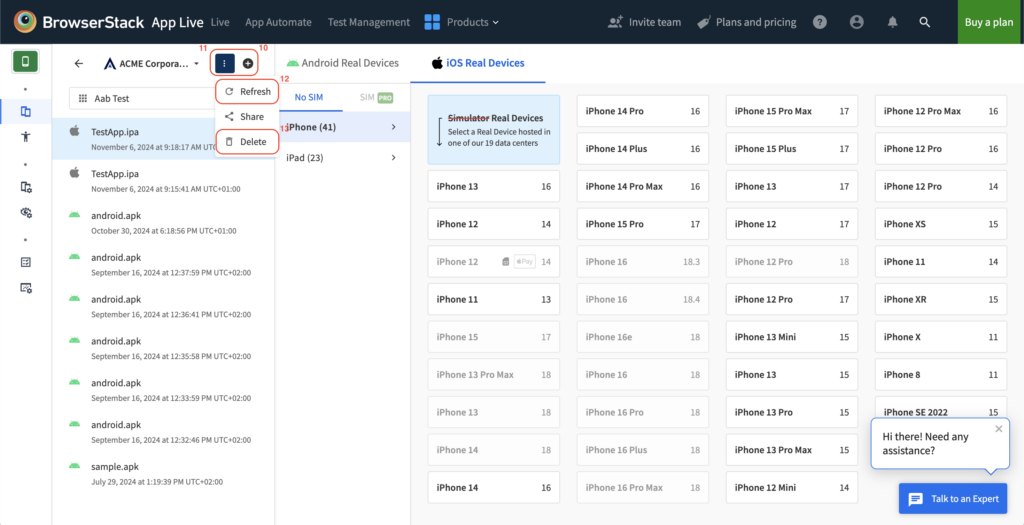
To refresh a project, select it from the list, click the more options icon (⋮) (11), and choose Refresh (12).
To delete a single project, select it, open the more options icon (⋮), and click Delete (13). You’ll be asked to confirm the deletion before the project is removed from App Live.
If you wish to remove all projects you’ve added, navigate to the Integrations page and scroll down to the Applivery tile. Click Disconnect. This action deletes all projects you personally added, while any projects shared with you remain unaffected.
