In addition to the many features the Managed Play Store provides to manage your Private Apps, you can also manage and distribute the Apps you have hosted in Applivery or other platform. There are a few requirements and steps that you should follow to enable this feature:
- You must have an active Android Developer License.
- You can not use the Google Play Managed accounts that are generated automatically when uploading Apps through your Managed Play Store since these accounts are not – and can not be – linked with an active Android Developer Account.
- Self-hosted private Apps must be configured in the Google Play Account with an active Android Developer License.
Once you are sure you meet them, you can proceed with the following configuration steps:
Step 1 - Create and configure a new App in your Google Play Console #
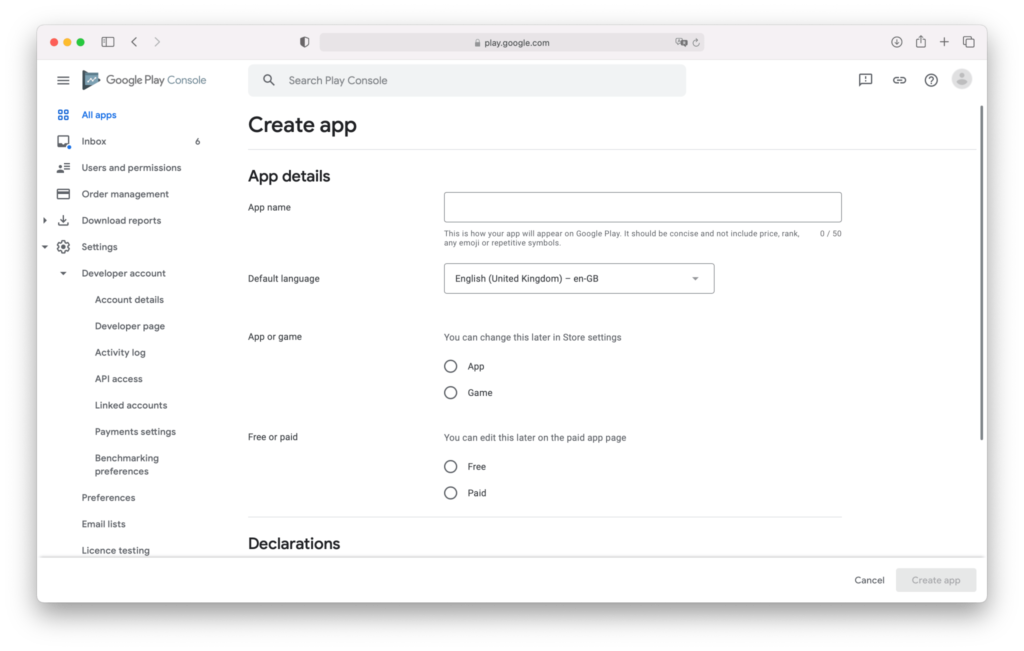
Step 1.1 - Create a new App in the Google Play Console #
Step 1.2 - Complete your Store listing information #
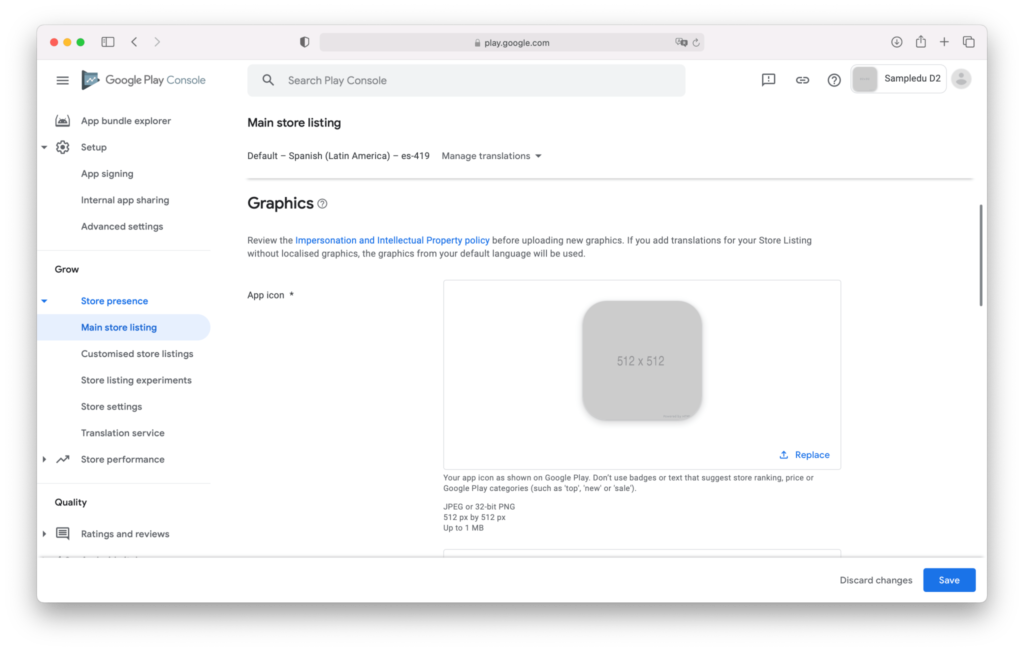
Once created you will be required to complete the App listing information with all the details of the App, including icons, screenshots, descriptions, etc.
Step 1.3 - Make it private and share it with your Applivery Managed Google Play #
You should remember that you are creating and uploading an App into your Google Play Account that is not the same account that you have configured in Applivery so the next step is quite important to:
- Make your App Private.
- Share it with the Applivery Managed Play Store.
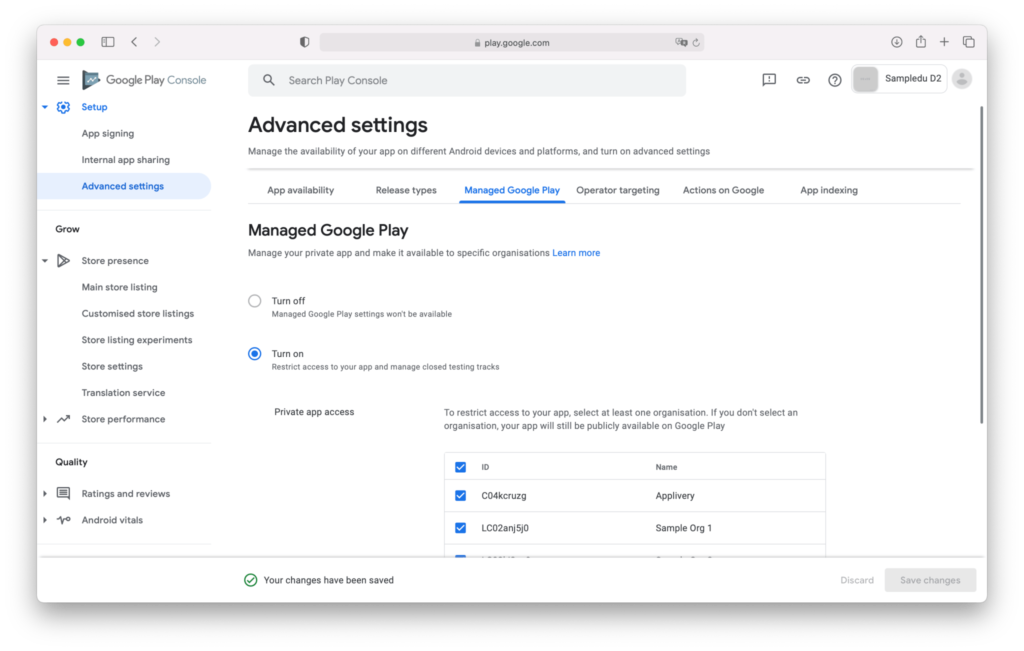
Going back to the Google Play Console and inside your App, navigate to the Setup > Advanced settings section, go to the Managed Google Play tab, and enable the Restricted access to your app and manage closed testing tracks option.
Below will appear a new section that will restrict which organizations will have access to your App.
Click the Add organization button and enter your Applivery Android MDM organization ID. You can find it in your Applivery Dashboard by navigating to Device Management > Configuration > Android Setup. It will be displayed at the top of the page as Enterprise ID.
Make sure you Save the changes. Once done, your App will be only available to the users of your Applivery MDM.
Step 2 - Configure the Applivery project #
Step 2.1 - Get the RSA Public Key of your App #
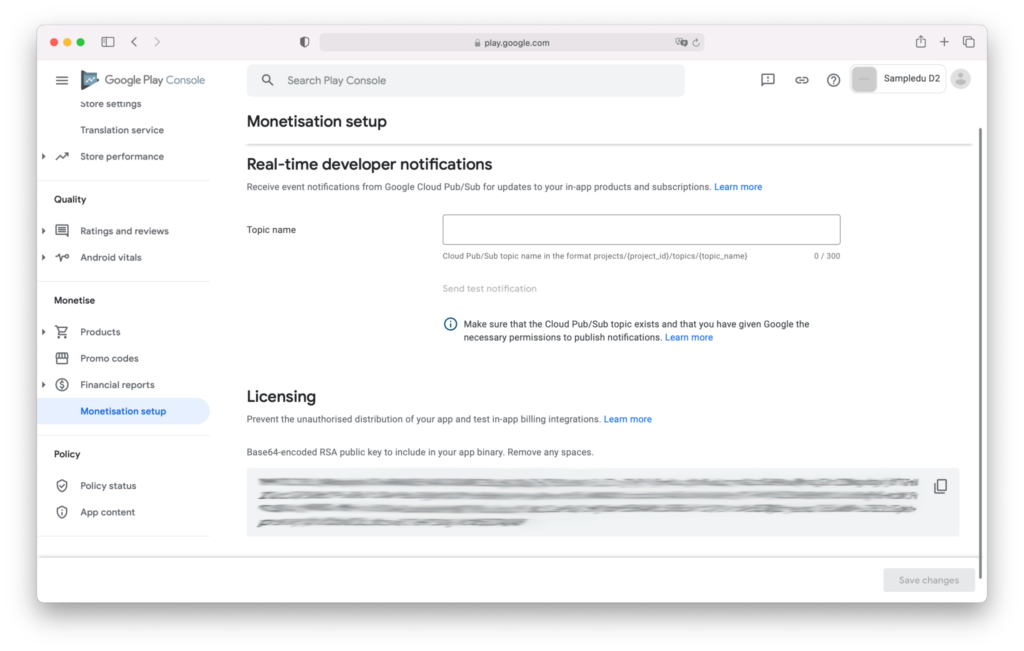
Step 2.2 - Configure your App in the Applivery Dashboard #
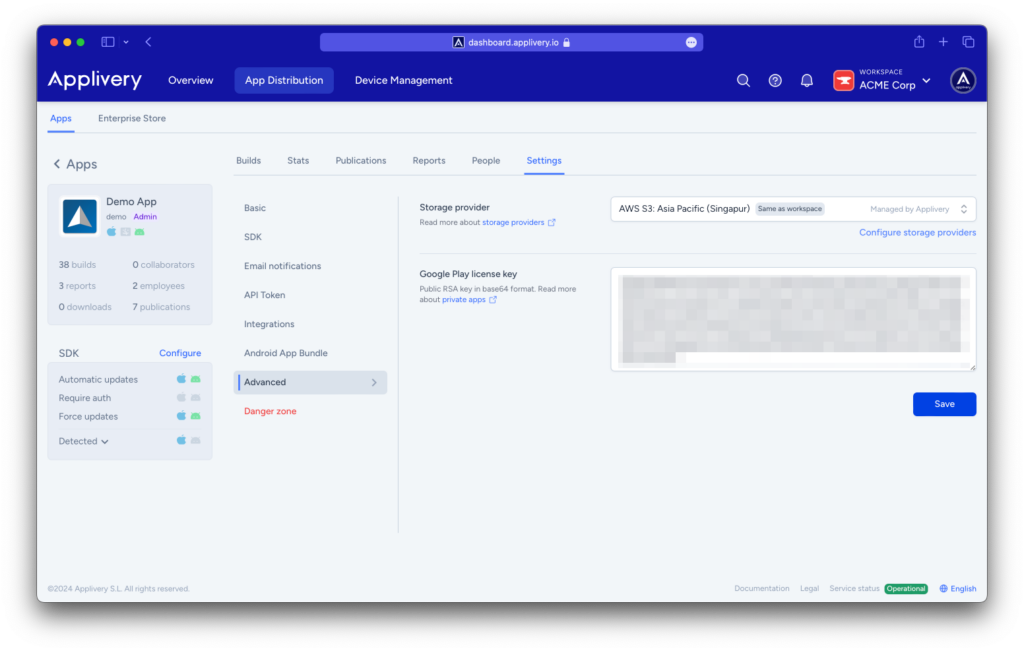
Step 2.3 - Upload a new build #
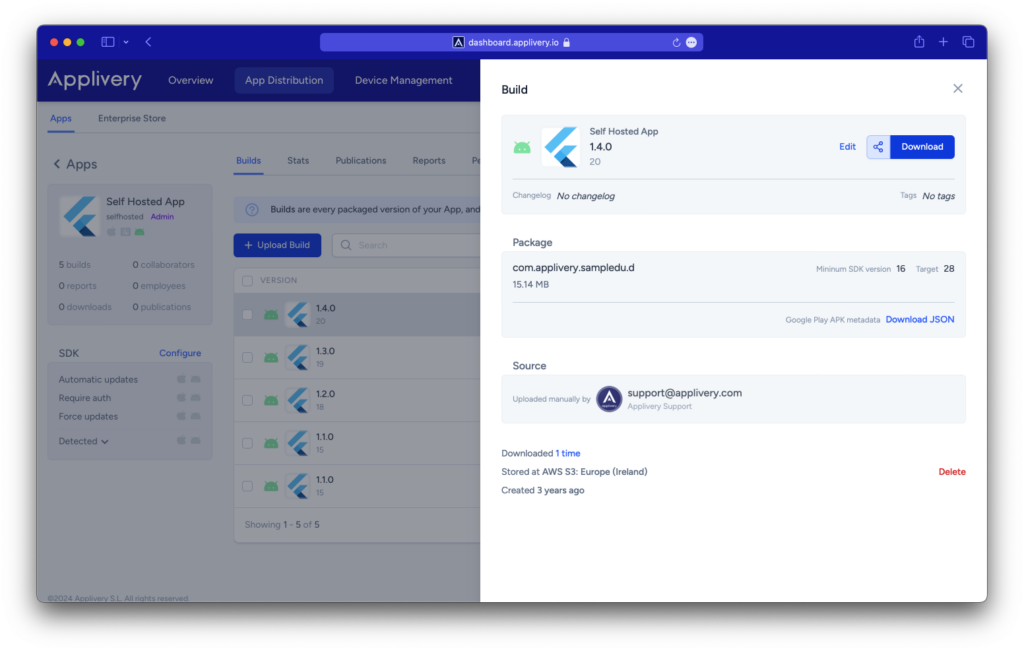
Step 3 - Upload and release the App #
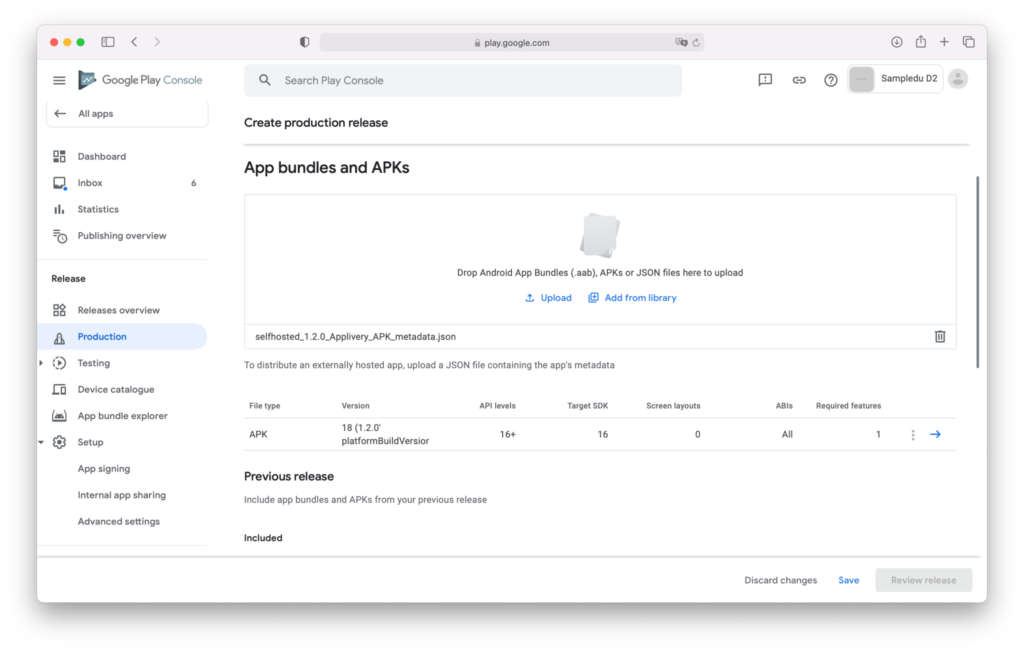
Now that everything is set and still in the Google Play Console, start a new Production release. Choose the JSON file you just downloaded in the previous step and upload it under the App Bundles and APKs section. Complete the rest of the fields. Once ready click Save and Review release to complete the process.
Review all the information in the next screen and, once ready, click Start roll-out to Production to release your App.
Please note that although there is no review by Google of the Self-hosted Private Apps, it will take a few hours for the app to be available to users.
