To begin managing Android devices with Applivery, the first step is to set up an Android Enterprise organization. This links your company to Google’s Android management infrastructure, allowing Applivery to securely deploy apps, apply policies, and control devices across your fleet.
This registration is required before any Android device management features can be used, and it establishes the connection between your organization and Google’s Android Enterprise Mobility Management (EMM) services.
Choosing the right Google account type #
Before starting the setup, it’s important to decide what kind of Google account you’ll use to register your organization. This choice affects how your environment is configured and what features will be available to you.
Google Workspace (managed domain) #
If your organization uses Google Workspace (formerly G Suite), we strongly recommend using a managed account under your corporate domain (e.g., [email protected]). This setup offers the highest level of integration, centralized management, and scalability.
To proceed with this option, a few requirements must be met:
The account you use must be an Administrator in Google Workspace — a Super Admin — with permission to authorize EMM integrations.
Your domain must already be verified in Google Workspace.
You’ll need to enable third-party EMM integration from the Google Admin Console.
Enabling this integration allows Applivery to act on behalf of your organization when managing devices, applying policies, and deploying applications via Managed Google Play.
We’ll walk you through how to configure each of these requirements in the next steps.
Gmail (unmanaged account) #
Alternatively, you can register your Android Enterprise setup using a personal Gmail account (e.g., [email protected]). This approach is quicker and easier, with no additional domain setup required — but it comes with limitations.
Since it’s not connected to a corporate domain, this method is best suited for small teams, testing environments, or organizations that don’t use Google Workspace. It lacks advanced controls like domain-based app publishing or user management, but it still allows basic Android device management through Applivery.
Configuring Google Workspace for Android Enterprise #
If you’ve chosen to use a Google Workspace (managed domain) account for your Android Enterprise setup, follow these steps to ensure your domain is properly configured and ready for integration with Applivery.
Step 1 - Verifying your domain in Google Workspace #
Before you can link your organization with Android Enterprise, make sure your domain is verified in Google Workspace. To do this, log into the Google Admin Console using a Super Admin account.
From the Admin Console dashboard, navigate to Domains > Manage Domains. If your domain hasn’t been verified yet, follow the prompts provided by Google to verify it, either by adding a DNS record or uploading an HTML file.
Verifying your domain ensures that your organization is recognized by Google and enables you to take full advantage of enterprise-level management features, such as centralized app distribution and device policies.

Step 2 - Enabling Third-Party EMM Integration #
To allow Applivery to manage your devices, you need to enable third-party EMM integration within the Google Admin Console.
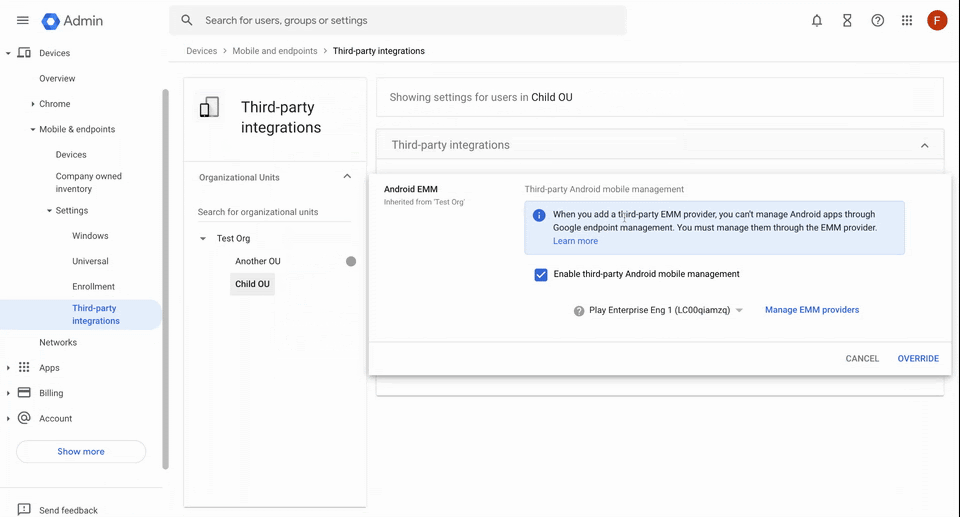
Navigate to Devices and access Mobile & endpoints > Settings > Third-party integrations, then select an Organizational Unit (OU). You can configure this setting at the parent level so that it applies to all child units, or you can customize it for individual child units if needed.
You’ll see an option to Enable third-party Android mobile management. Turn this on to allow Applivery to integrate with Google Play for Work.
Step 3 - Assigning admin roles for Android Enterprise #
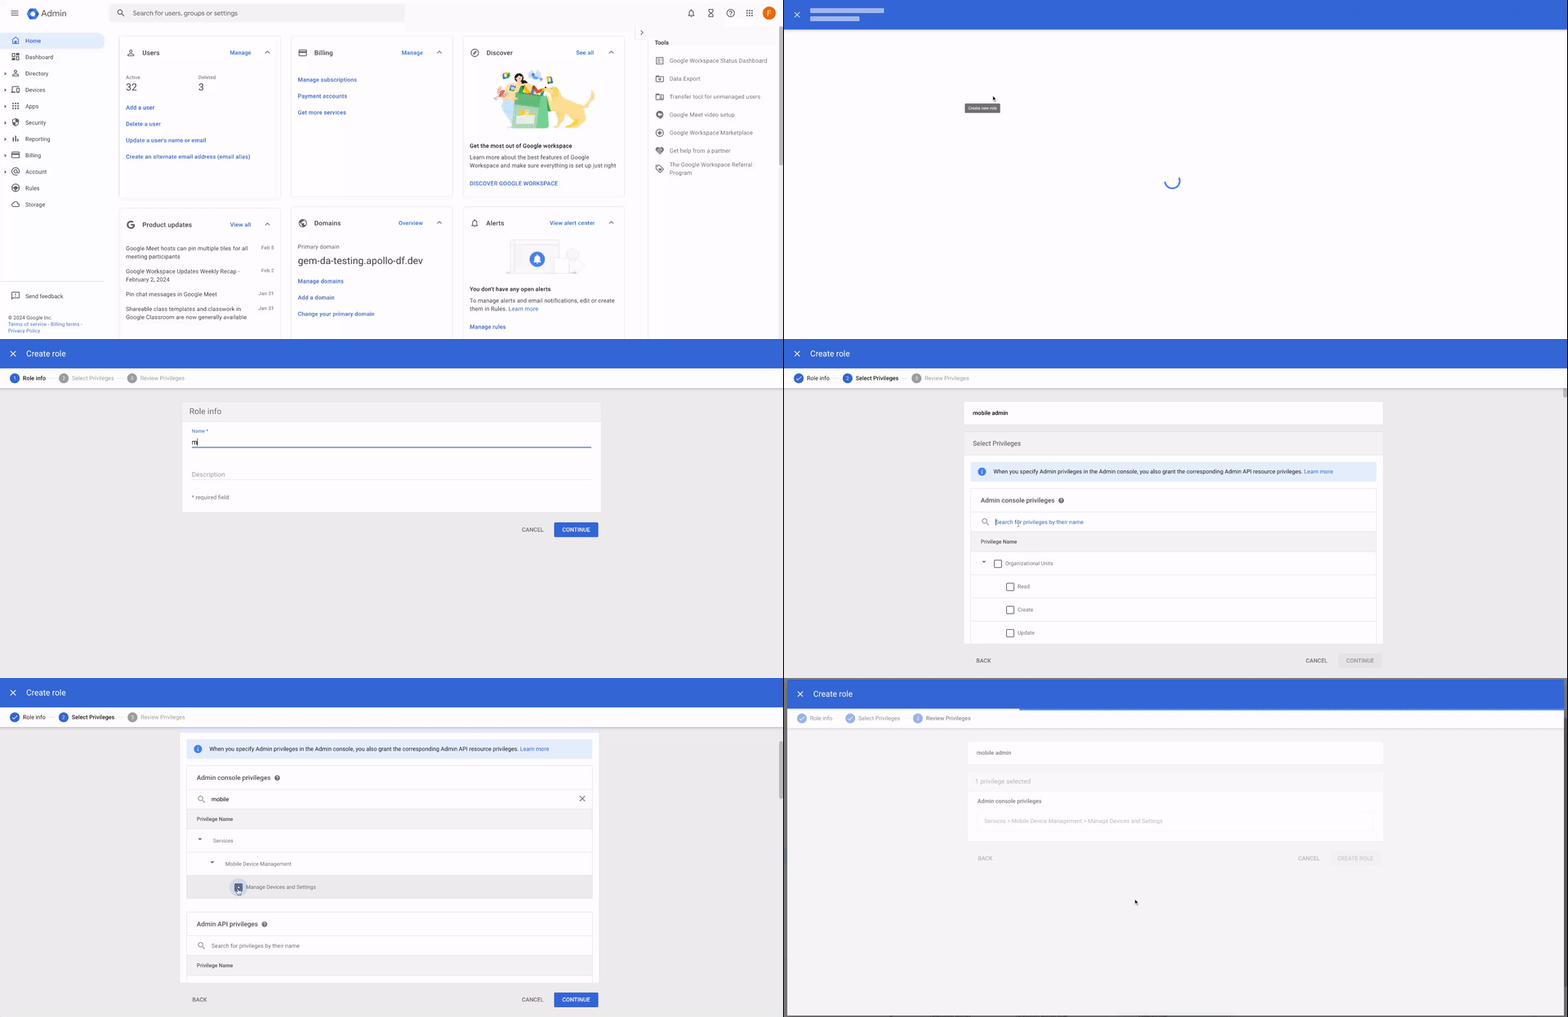
The Google account used for the Android Enterprise setup must have the appropriate permissions. If you’re not using a Super Admin account for the registration process, you’ll need to assign the necessary role. From the Admin Console, navigate to Admin roles and assign a role with the Mobile Device Management privileges, or give full Super Admin access if you want the setup to have complete control.
Super Admin is recommended for a seamless setup, as it ensures no restrictions during the process.
Configuring Android Enterprise #
Once these configurations are complete, you’re ready to proceed with the registration process in Applivery. Here’s what happens next.
Step 1 - Configuring your account #
In the Applivery Dashboard, go to Device Management > Configuration > Android section. Then follow the steps you will see on the screen.
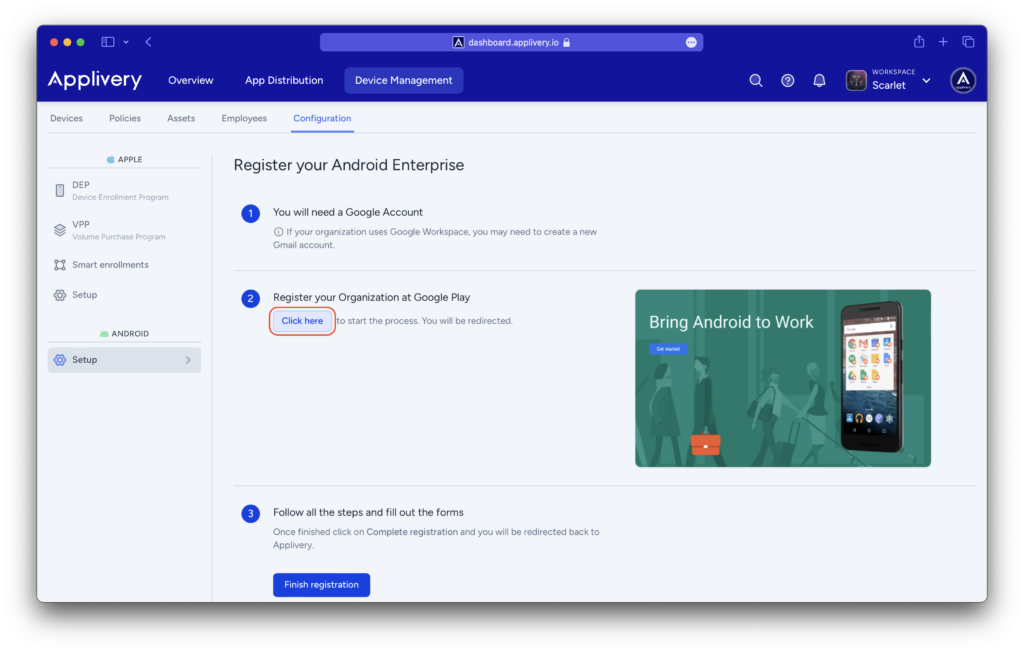
Under point #2, your browser will redirect you to the Google Play for Work website. You have to log in using a Google Account.
Step 2 - Registering your Android Enterprise #
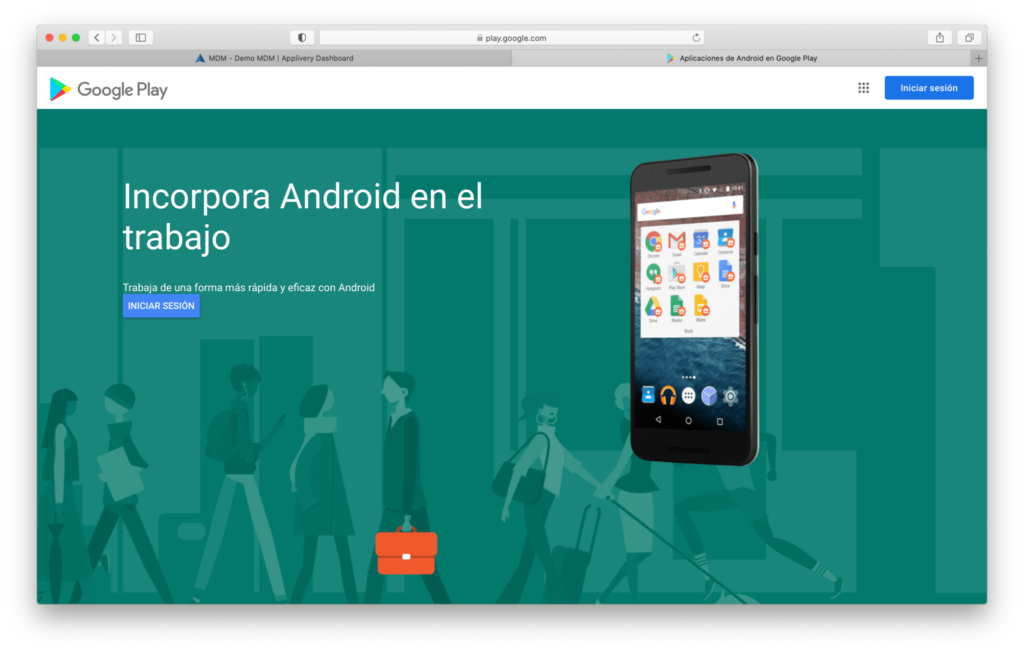
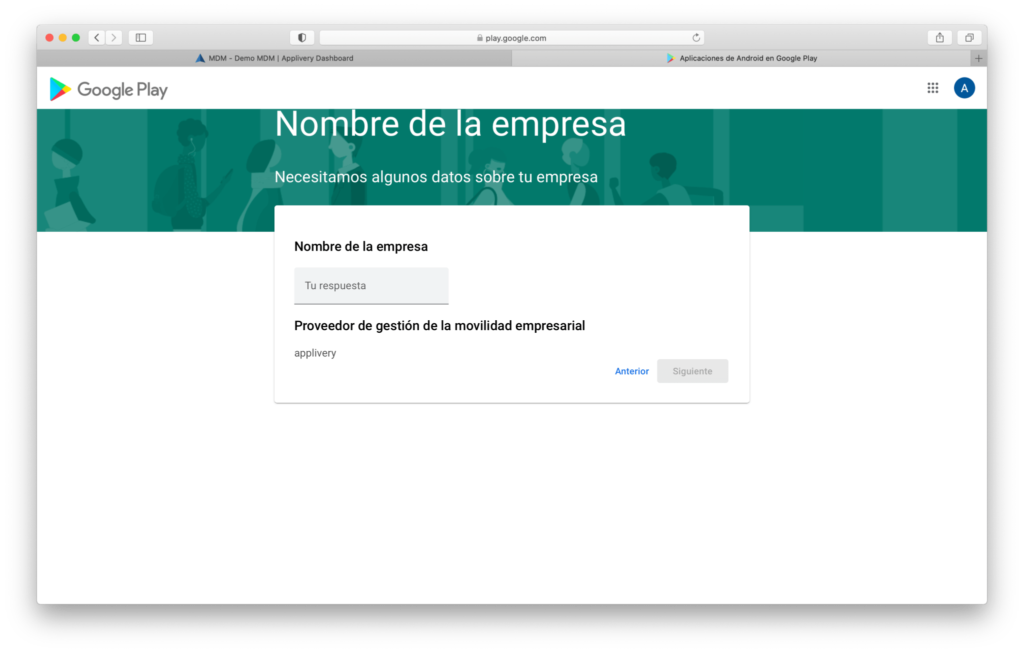
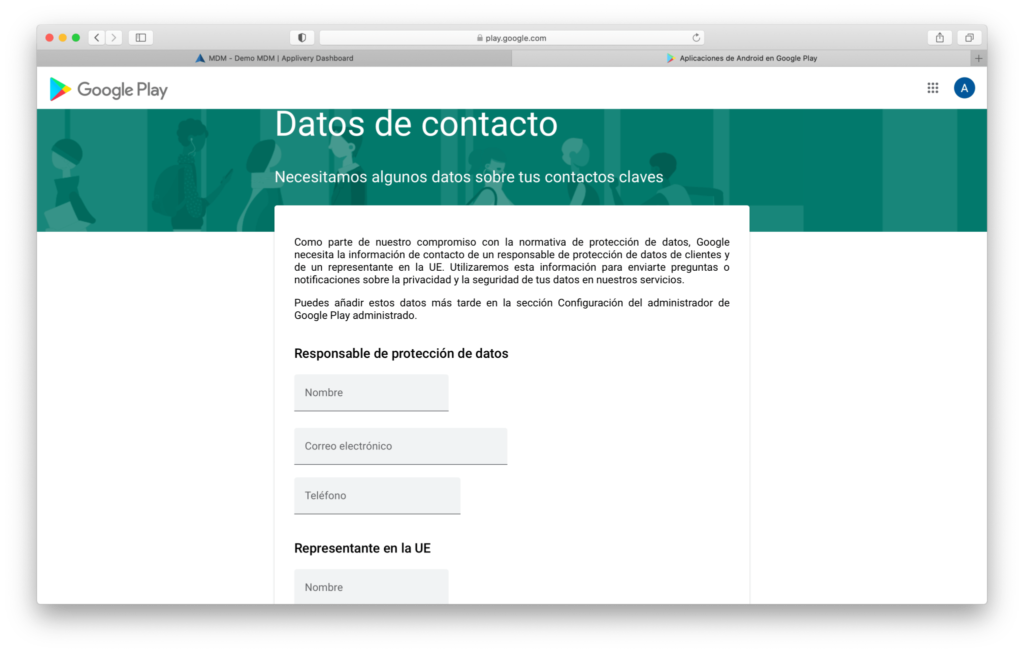
Log in using your Google account and follow the next steps, where Google will ask you about the following information:
- Name of the company.
- Contact information for data protection:
- Data Protection Officer: name, email address, and phone number.
- EU representative: name, email address, and phone number.
- Accept Managed Google Play terms & conditions.
Step 3 - Finish and return to Applivery's dashboard #
Once finished, click the Complete registration button. Your browser will be automatically redirected back to the Applivery MDM Console, where you can start configuring your devices and policies.