
Android kiosk mode is one of the most common features that administrators can use to dedicate Android devices for serving a specific use or limit the usage of those devices to a set of apps or features.
In this article you will see the main kiosk modes that Applivery provides and a deep description of all their features and configuration options.
Available Android lockdown modes #
Applivery provides 3 main kiosk modes for Android devices:
Kiosk mode
Number of Apps
Description
Single App
Just one App
Lock device to a single App. Applivery's Single App Kiosk mode is typically used when administrators want to lockdown devices to a single App, preventing users from escaping from such an application.
Basic Launcher (Multi-app)
Multiple Apps
Lock device to multiple Apps using Android's native Launcher.
Advanced Launcher (Multi-App)
Multiple Apps
Lock device to multiple Apps using Applivery's Advanced launcher that provides additional features on top of Android's default features.
Single App kiosk mode in Android devices #
How to set up Single App kiosk mode in Android devices #

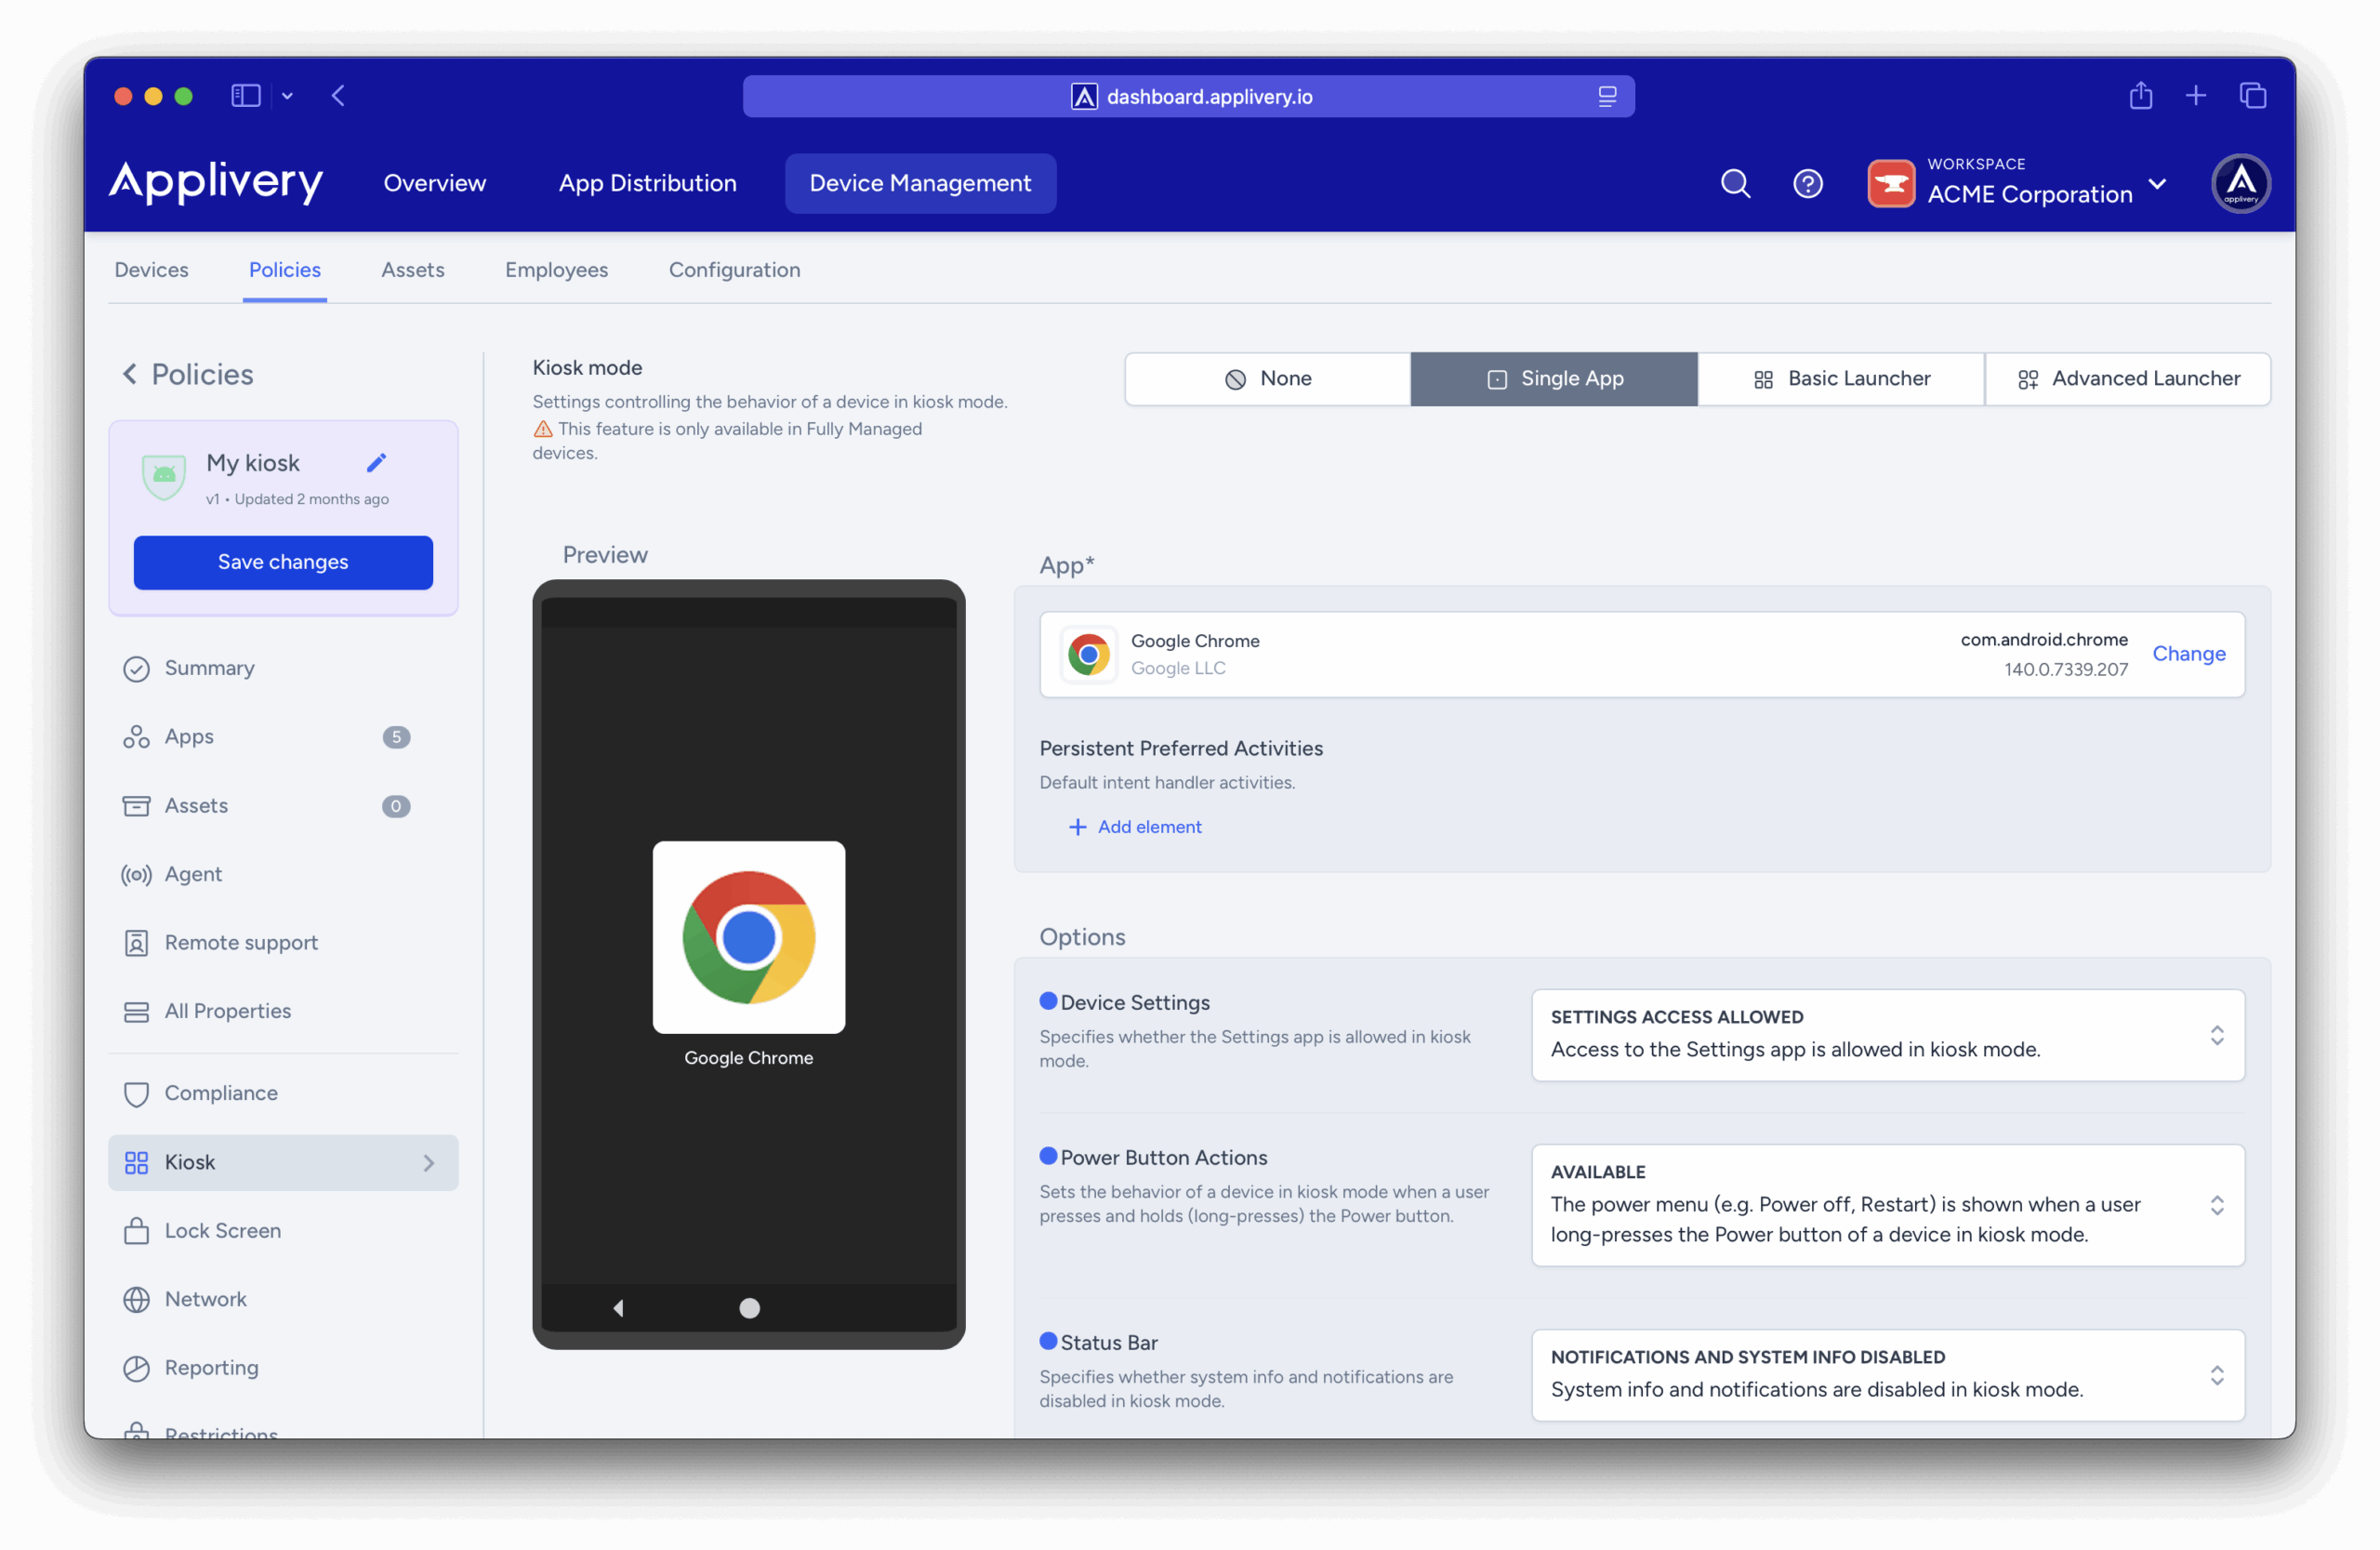
- Go to one of your policies or create a new one from Device Management > Policies (1).
- In the left-side menu click on Kiosk (2).
- Choose Single App (3) option.
- Choose an App (4) from the dropdown menu. If you still don’t have any Apps added to your policy, add at least one from the “Apps” section.
- Configure options (5) and device behaviour during lockdown:
- Device Settings: whether the Settings app is allowed on kiosk mode.
- Power button actions: sets the behavior of a device in kiosk mode when a user presses and holds (long-presses) the Power button.
- Status bar: Specifies whether system info and notifications are disabled in kiosk mode.
- System error warnings: Specifies whether system error dialogs for crashed or unresponsive apps are blocked in kiosk mode. When blocked, the system will force-stop the app as if the user chooses the “close app” option on the UI.
- System navigation: Specifies which navigation features are enabled (e.g. Home, Overview buttons) in kiosk mode.
- Network scape hatch: Whether the network escape hatch is enabled. If a network connection can’t be made at boot time, the escape hatch prompts the user to temporarily connect to a network in order to refresh the device policy.
How to prepare Android applications to be lockdown in Single App kiosk mode #
To lock down your custom app in single-app kiosk mode, there are a few steps required at the code level.
Inside the Manifest.xml, put the following intent-filter in the activity meant to be shown in kiosk mode.
android:name="android.intent.category.HOME" main activity intent-filter in your app’s manifest may prevent certain kiosk configurations, such as system navigation or the status bar, from being applied correctly.
Multi-app kiosk modes in Android devices #
There are two options to lockdown devices in multi-app kiosk mode: Basic Launcher and Advanced Launcher.
While the Basic Launcher mode is based in Android’s native Device Policy Controller (DPC) and provides basic features, the Advanced Launcher has been built to extend Android DPC’s capabilities, providing more powerful features on top. Let’s take a look into them.
How to set up Basic Launcher (Multi-App) kiosk mode #
Basic Launcher allows administrators to choose a list of android Apps and display them in a locked UI. In this mode, the administrator can block which applications will be available and will also be able to configure the permissions for browsing the operating system or access to the notification bar.

- Only the Force Installed apps will be displayed in the interface.
- All system apps will be hidden by default so you have to add the ones you want to display, one by one.

- Choose Launcher (9) option.
- Configure options (10) and device behaviour during lockdown:
- Device Settings: whether the Settings app is allowed on kiosk mode.
- Power button actions: sets the behavior of a device in kiosk mode when a user presses and holds (long-presses) the Power button.
- Status bar: Specifies whether system info and notifications are disabled in kiosk mode.
- System error warnings: Specifies whether system error dialogs for crashed or unresponsive apps are blocked in kiosk mode. When blocked, the system will force-stop the app as if the user chooses the close app option on the UI.
- System navigation: Specifies which navigation features are enabled (e.g. Home, Overview buttons) in kiosk mode.
- Network scape hatch: Whether the network escape hatch is enabled. If a network connection can’t be made at boot time, the escape hatch prompts the user to temporarily connect to a network in order to refresh the device policy.
How to set up Advanced Launcher (Multi-App) kiosk mode #
Visual and display configuration #
Customize the appearance of your devices by configuring wallpapers, adjusting icon size, organizing the apps layout, and creating folders. You can also manage display settings, such as keeping the screen always on, to ensure a consistent and personalized user experience across all managed devices.

Additionally, by clicking on a specific app, you can define it as a startup app. This means it will automatically launch the first time it is installed on the device. This feature is especially useful for applications that require an initial setup.
Access to Settings app #
Configure the view that opens when tapping on Settings, or restrict it from opening altogether.
You can also secure access to the Settings app with a password, ensuring that only users who know the password can use the in-device Settings app to perform actions.

Customize Header and Footer #
You can personalize the header and footer displayed on your devices. This includes customizing the text, adjusting its size, and adding dynamic variables such as the device display name, user email, and more.

We strongly recommend enabling the Network Escape Hatch configuration in all kiosk modes. If a network connection cannot be established during boot, the escape hatch will prompt the user to temporarily connect to a network to refresh the device policy. Once the policy is updated, the temporary network connection will be forgotten, and the device will continue booting normally. This feature prevents situations where the device is unable to connect to a network if no suitable network is available in the last policy, if the device boots into an app in lock task mode, or if the user is otherwise unable to access device settings.
Display Settings #
Additionally, you can configure the display settings of your device as follows:
- Screen Brightness: Adjusts the screen brightness mode.
- Screen Timeout: Determines whether the user can configure this setting.
- Maximum Time to Lock: Specifies the maximum duration of user activity before the device automatically locks.
- Stay On While Plugged In: Keeps the screen on while the device is plugged in.
